How Gantner Uses Exalate to Achieve a Frictionless Collaboration Process between Support and Dev Teams

Exalate case study Gantner

A network of interconnected companies and teams is for sure one of the outstanding things that the 21st century has brought along with itself. The more flexible the companies are when it comes to software integration, the faster and more smoothly they can grow. 

The Pioneer 

The Gantner Group is the pioneer and leading developer in contact solutions for fitness, attraction, corporate and education markets focusing on locker solutions, access control, and cashless payments.

With a variety of customers among which are swimming pools, fitness centers, museums, zoos, and theme parks around the world, Gantner’s hardware and software innovations have been transforming the way companies interact with their customers and employees for the past 35 years.

Gantner has a worldwide workforce of over 400 people with its headquarter located in Austria, and there are many Sales & Support offices around the world. Approximately 100 people of Gantner are active in software product development which is done in one of the subsidiaries located in Austria, Dubai, Belgium, Germany, or India.

Why Exalate? 

• A cross-company integration solution allowing both internal and
external collaboration
• Faster Sync of tickets (45x compared to other solutions)
• Higher incident Resolution Volume (500/week)
• Better Security with full control
• Extreme Flexibility thanks to its scripting functionality
• Feature set allowing the extension to integrating partners cross-
company

The Challenge of Modernization 

In early 2015, the new CTO Dimitri Degraeve, and the Program & Software Development Manager Christof Cuypers, joined Gantner BeNeLux-UK and immediately started to modernize the way Software Development was handled. A gradual transition from Waterfall development, over Scrum, to Scaled Scrum, was decided as the best way to carry out the plan. 

There were some issues to be taken into account beforehand:

  • There was a common mindset in the company believing in developing everything in-house as it was assumed to be cheaper and better. The use of the in-house ticketing system was an example. 
  • The customer service platform could improve to meet the customers’ needs and to enable smoother collaboration between the internal teams and the prospective external ones. 

Christof Cuypers proposed another approach, “I thought that we should focus on expertise and buy a third-party solution to take care of the rest”. So, they decided to replace the current ticketing system, used by Product Development, with something which was 10 times more efficient. And that’s how Jira Software came into the picture and was gradually rolled out. 

Although Product Development switched to Jira Software, the other departments, like the customer service center, were still using the old in-house ticketing system since at that time Jira Software was not the best option for their needs.  

It was then that they reached out to Exalate to ask for a small proof of concept to be presented to the board. The result was satisfactory and the in-house ticketing system was eventually replaced by Jira Service Management in 2019 to optimize the internal collaboration between the customer service and the development teams.

The transition of the existing in-house developed ticketing software to Jira Service Management was done in 2 larger phases and in close collaboration with Exalate

In the first phase, Gantner continued using the portal of the existing ticketing software, and all customer incidents were pushed to the Jira Service Management instance used for internal purposes at that time. In the second and final phase, the existing ticketing software was entirely replaced by Jira Service Management and all departments shifted to the Atlassian Jira platform.

Time to Take a Step Forward in Issue Syncing 

Back then, Gantner used an issue syncing add-on internally to sync data between different teams using Jira Software and Jira Service Management. The add-on was not able to support all their scenarios as it was too slow for so many tickets per day. 

“What made us think of a third-party solution back then was the fact that we have multiple products (around 50). And there is a separate Jira Software project defined for each of them. The add-on we used at the time was not able to manage so many projects. For instance, when a customer reported an issue, it was supposed to be duplicated in one of our development projects. The forwarding process of duplicating the ticket and creating it in one of the development Jira projects took approximately 45 seconds which was really slow”

Says Christof.

So when Gantner reached out to Exalate again to ask if they could help with their Jira Service Management implementation and configuration, they were introduced to their cross-company integration solution.

And that’s when they decided it was time to move forward with Exalate as a replacement for their current issue syncing solution as they had already experienced good support, expertise, and consultancy. 

Plus, as a growing company with an agile outlook, they believed it was time to take a step further and integrate with other companies to simplify collaboration.

Smoother and More Flexible with Exalate 

Since then, things have been running more smoothly for the team. 

“We can now handle around 500 customer incidents per week, thanks to Exalate, which is a very good result regarding the number of products we’re dealing with. It synchronizes 45x faster than our previous solution. Nowadays our Jira setup is also easier to manage since all the complexity related to the sync is done by Exalate’s powerful scripting capabilities and hence there’s no need for extra add-ons”

Time was actually one of the main factors why Gantner chose Exalate in the first place for both its internal and external collaborations. It has helped pace up the ticketing process. And ticketing now happens in the background and it takes less than a second for a ticket to be sent over to the relevant department/ team without any delays, which is 45 times quicker than the previous solution! 

When it comes to integration between teams and companies, security should be considered as one of the most important factors. So what security risks did you have to address when you decided to use Exalate? We asked Christof: 

“Next to the fact that we want to be in control of our Jira environment, which is hosted in one of our data centers, we also want to be in control of what data will be synced and exposed to our customers. As an ISO27001 certified company, Security is key in our organization and Exalate meets our expectations”

And what do you consider as Exalate’s best feature?

Stepping outside the Borders: Using Exalate to Achieve Cross-Company Integration  

Like many other growing companies, Gantner is stepping outside its borders and is integrating data with other companies. They have very recently started a pilot with one of their esteemed customers, a company that provides dynamic ICT services. 

The possibility of easy integration with other ticketing systems is listed as an added value of using Exalate. So Gantner is now using Exalate to integrate data between its own Jira ServiceDesk and Digipolis’s Zendesk. 

Gantner is quite happy with the result of implementing Exalate and is hopeful to create an Exalate network and to extend its connection to other customers who are willing to move on to a flexible fully- automated integration process. Plus, the pricing is just fair for an internal-external integration. 

Results Recap

  • Possibility of both internal and cross-company integration 
  • 45x faster ticketing 
  • 500 customer incidents handled per week
  • Outstanding flexibility and scripting 
  • High security and full control

Become an Exalate user and experience an optimized workflow and high productivity. It’s flexible enough for any sync use case. 

Book a demo now

How to Set up an Azure DevOps GitHub Integration: The Complete 2025 Guide

Azure DevOps GitHub integration

As software teams grow and diversify, it’s getting more common to have them manage their work on different platforms. These organizational systems are definitely a great help to your productivity.

However, achieving an Azure DevOps and GitHub integration to keep everything in sync isn’t always that straightforward. If you can solve the potential syncing issues, you can give your business a real boost.

Focusing on two particular platforms, we’ll look at how to set up an Azure DevOps to GitHub Integration in order to help your teams work in harmony.

We’ll discuss the potential problems when teams use different software and show how the right integration solution can address them. With these platforms integrated correctly, your teams can work in tandem to achieve your business goals faster.

Note: In this tutorial, we will be using a software integration tool called Exalate to set up the integration. You will learn more about this throughout this guide.

Why Integrate Azure DevOps and GitHub

Azure DevOps

Azure DevOps is a platform that has multiple features for development teams that require project management, version control, reporting, and requirements management.

Since it is a Microsoft product, you can use your Microsoft account to log in. Azure DevOps integrates well with several other tools but is particularly suitable for teams using Visual Studio or Eclipse. Its project management capabilities make it a compatible tool for agile and waterfall teams.

You can run it on your own server or use the cloud version, which is handy when it comes to scalability. It also has a range of extensions available on its marketplace.

GitHub

GitHub is a great way to keep code in one place. It handles versioning and source management, as well as issue tracking and project milestones. It is also among the best choices for distributed teams, who can use it to share code with team members anywhere in the world.

GitHub is one of the most popular coding tools around, especially with teams working on open-source projects. Although GitHub was originally an independent platform, Microsoft has acquired it.

Why Integrate Azure DevOps and GitHub

Azure DevOps and GitHub are both great tools, but when choosing a platform for your team to use, you’ll want to pick the right one for the job. Since they offer different things, teams within your organization may want to use one or the other. 

That means they can take advantage of their best features. But it can also mean that the teams might lose track of what the others are doing. This can lead to a silo effect, where they handle the same issues separately or don’t share information that can be useful for those outside their group.

GitHub enables you to make your code visible to everybody, which is especially good for open-source projects. Often though, there’ll be parts of your business that you want to keep private. You may want to limit what you share or filter the information people add to it. 

Azure DevOps, on the other hand, is great for handling backend code, or for working in the development environments it supports. 

So if you want to manage the relationship between these two platforms, you’ll need a tool that can handle them both and can sync data when needed.

Talk to Exalate experts

How to Choose the Right Solution for Setting up Your Azure DevOps GitHub Integration

When looking for the right solution for our integration, we need to make sure it fits our needs first. To help us do that, let’s look at the problems we’re aiming to solve. There are three particular features we should take into account:

1. Decentralized Integration

Helping our teams work together without introducing unnecessary constraints is one of the most important features to consider. Information exchange should let our teams work together in the comfort of their own environment, meaning that they shouldn’t become dependent on one another.

Both sides should be able to define what, when, and with whom they want to share the information. And they should also have the freedom to make changes without causing problems for others.

2. Reliability

The integration needs to exchange information without getting in our way. We don’t want to have to fix problems every time we transfer information. Our system should be able to cope with occasional issues, such as outages on either side. It should be robust enough to resume as normal when both sides come online again.

A reliable system should do what we need without distracting us from other tasks. We should be able to set it up and forget about it until we want to make changes.

3. Flexibility

As systems evolve and teams expand, changes become inevitable. So the more flexible an integration solution is, the better it can adapt itself to the changes and updates.

Decorative image

Moreover, teams might need to integrate data with other teams working on different platforms, so a solution that can support a variety of connections seems like the most convenient one in the long run.

We’ve used a tool called Exalate which was designed specifically to meet these requirements. It lets us connect our platforms while avoiding these pitfalls.

In terms of flexibility and scalability, Exalate provides an AI Assist feature, which admins can use to generate scripts for mapping in seconds or minutes.

Next, we’ll look at how to use it. We’ll see how to set it up on Azure DevOps, then on GitHub, and then see how we can configure what is shared and set the conditions for data exchange to take place.

How to Set up an Azure DevOps GitHub Integration (a Step-by-Step Process)

There are five steps to take to set up our integration. First, we’ll install Exalate on both platforms. Next, we’ll see how to connect the two. We’ll then configure the connection we’ve set up so that it does what we want. And finally, we’ll look at automated synchronization triggers to control when the information is exchanged. We also have a video tutorial, if you prefer.

Step 1: Install Exalate on Azure DevOps

First, we need to install Exalate on Azure DevOps. You can start by visiting the integrations page or installing it directly from the Azure DevOps marketplace.

Once done with the installation, you need to create a personal access token.

Open the settings menu at the top right of the screen and click “Profile”. Now look at the left-hand menu and click on “Personal Access Tokens” in the “Security” section. You can read this guide to understand this step in depth.

azure devops personal access token

Here you can see the tokens you already have and can edit or revoke them if needed. If you haven’t done this before, it will likely be empty. Start by clicking on “New Token”.

A form will appear where you enter details for your new token. You can give it a name and organization, as well as choose when it expires. A longer lifespan means you won’t have to extend it as soon, but a shorter expiry date can be a better choice for security reasons.

azure devops integration creating a new access token

You also need to choose what the token grants access to in the scopes section. You can provide access to everything by selecting full access, or you can pick and choose what you want.

For our installation, we need access to read, write, and manage work items. Select those, and then click “Create” to generate the token.

azure devops access token granted for an integration

A new window will appear containing your token, which is simply a string of text. Select this, making sure to get all of it, and copy it to a safe location. There’s an icon next to it that copies it straight to the clipboard which makes it easier. You only get one chance to do this, or else you’ll need to start over and create a new token.

Next, look in your email and find the response to your Exalate app node request. Follow the link that was sent to you and you’ll be taken to your new node.

Accept the license to continue.

Exalate for Azure DevOps

Now you can put your details in. Add your organization name and paste it into the personal access token you just generated. There’s also a space to enter your DevOps URL. If yours doesn’t work, try using dev.azure.com instead.

Once you’ve set those details up, you’ll need to log in. Again, this uses your personal access token. Enter it and click the “Login” button. After that, you’ll see the settings page. We’ll come back here after installing GitHub.

Step 2: Install Exalate on GitHub

Now that Exalate is ready on Azure DevOps, we’ll move over to GitHub. You can install Exalate on your GitHub instance by visiting its integrations page or via the GitHub marketplace.

Note: Exalate is also available for GitHub Enterprise. For installing Exalate on GitHub Enterprise Cloud, check this article.

When installing from the marketplace, click the green “Set up a plan” button first. Fortunately, Exalate for GitHub has a free trial, so you can try it out for free. Click the “Install it for free” box to take advantage of it.

install exalate on github for free

On the install screen, Exalate will allow you to select which repositories should be granted access to. You can pick all of them or a preferred selection. Exalate doesn’t need to access the code itself, as it just works with the metadata, the issues, and the pull requests.

Once you’re happy with your settings, click the “Install” button to continue. You’ll then head over to the official Exalate website to accept the user agreement.

Next, you can choose one of the two methods for accessing GitHub from Exalate. Giving it your username and password is the easiest, but that might be removed in the future. Creating an “OAuth token” is the other option. 

Once you’ve set up the access, you’ll need to request an evaluation license for GitHub. 

Note: If you don’t request an evaluation license, you won’t be able to synchronize issues later.

Step 3: Connect Azure DevOps and Github

After setting up Exalate on both platforms, we can now get to connect them. We need to initiate a connection on one platform, and then accept it on the other. We can generate the invitation from either side, but for this tutorial, we’ll go back to Azure DevOps and start there.

Go to the Azure DevOps node and log in with your access token. Once you’re in, check the menu on the left-hand side and click on “Connections”. On the connections screen, click the green “Initiate connection” button.

Initiate connection in Exalate

Next, enter the URL of your GitHub node. If you’re not sure what that is, access your GitHub account and look for the Exalate app in the marketplace. From there, click on “Configure access”. There’s a link next to “Looking for your Exalate Console URL” that will take you to a screen where you can enter your username and find your GitHub node.

Configuration modes in Exalate

Here, a verification takes place to see if Exalate exists on the GitHub instance. After a successful verification, the above screen prompts the user to select the configuration type. 

Exalate comes with 2 modes: the Basic Mode and the Script Mode. The Basic mode is suitable for use cases of basic complexity. The modification of the sync rules and other advanced configurations is not possible with this mode. It also comes with a Free Plan that allows up to 1,000 free syncs per month.

With the Script Mode, you can expect advanced configuration features for complex and unique business cases. With this mode, you can edit the sync rules and use “Groovy scripting” to pass almost any kind of information between the two instances. 

For now, we will have a look at the Basic Mode, and then we will learn about the Script Mode.

Continue with the Basic Mode

After clicking “Next” on the screen above, you will need to select the project on the Azure DevOps side. This can be done by selecting one from a drop-down list. 

initiate azure devops  GitHub integration

Hit “Next” after you select the project. 

Now you need to verify if you have admin access to the GitHub instance or not. Don’t worry if you don’t have access; click on “No, I don’t have admin access” and you will be asked to copy and paste an invitation code on the GitHub side. We will be covering this in the Script Mode part.

GitHub Azure DevOps sync admin access

For now, click on the “Yes, I have admin access” button, “Initiate” and verify the access. 

Upon successful verification, you will now be taken to the GitHub side for further steps.

accept azure devops github connection

Here, as done for Azure DevOps you need to select the repository for the Github side as well. 

Click “Confirm” and you will be asked to enter the issue key. This means a new work item will be created on the Azure DevOps side, where the details of the synced issue will appear. The same screen on the Azure DevOps side will prompt you to enter the work item number.

Either way, wait for some time for the synchronization to take place. 

Azure DevOps synced with GitHub

This is an easy way to sync issues or work items using the Basic Mode. You can even connect the issues for synchronizing or creating triggers (we will see them in a bit) or even “Bulk Exalate” issues to sync them all at once. 

Continue with the Script Mode

The steps for the Script Mode are slightly different. Once you choose the “Script” Mode, you click “Next”. 

initiate GitHub azure devops connection

You must now enter the name for the local instance (Azure DevOps) and the remote instance (Github). Give meaningful names so that you will remember what the connection is for. The system will generate a name by combining both the local instance short name and the remote instance short name. You can choose to keep it as it is or change it if you want. Enter a description to identify what the connection has been established for and click “Next”. 

initiate GitHub azure devops connection

Select the project just as you had for the Basic mode and click “Initiate”.

After a brief pause, our connection is created and an invitation code is generated. We need to copy that and paste it somewhere safe. We’ll use it to accept the connection on our GitHub node.

We’re done with Azure DevOps for the time being, so click the “Done” button and then we’ll head back to GitHub.

In our Exalate GitHub node, click on the “Connections” text. This time, we’ll click on the “Accept invitation” button.

exalate invitation code

There is a big text field that allows you to paste the invitation code. Paste and click “Next”. 

accept GitHub azure devops sync invitation

Select the repository now and click on “Confirm”. 

Azure DevOps GitHub connection

You have successfully set up a connection between GitHub and Azure DevOps. To configure the connection, you can either click the “Configure Sync” button or simply configure it by editing the connection later. 

We will see this configuration in the next 2 steps.

Step 4: Configure your Connection to Determine What Information Gets Shared

exalate connection list

Let’s make sure our connection shares what we want. In GitHub, click the “Edit Connection” icon next to your connection name.

Note: We are choosing to edit the connection for configuring it, but you can press the “Configure Sync” button shown in the step above as well. 

You’ll see a screen with 4 tabs: “Rules”, “Sync”, “Statistics,” and “Info”. We are interested in the “Rules” tab for this step.

Sync rules in GitHub

Here we can see a list of the synchronization rules. These show which fields on each platform are matched to those on the other.

For example, in the outgoing sync, we can see most fields are matched to identically named fields on the other platform. There are some fields like that on the incoming sync rules and a few that use more complex rules to get the correct data.

We can edit these rules to give us more control over the data exchange. We can remove any we don’t want to share, add the ones we do, and edit fields with different names to swap data if that’s what we want. Be careful here as any mistakes will cause an error, so be sure to test what you do and make sure it works as intended.

For more information, read our script helpers guide.

Connections in Script Mode Using AI Assist

The Script Mode allows you to generate and optimize scripts using the AI Assist feature — which appears as a tab under both the incoming and outgoing sync rules.

How does it work?

Enter your sync requirements into the chat box, and AI Assist will generate scripts based on your input, existing configurations, and Exalate’s scripting API.

It is also important to note that AI is not perfect. So, you need precise and detailed prompts to ensure the best results. 

Let’s say you want the name of the assignee of an AzureDevOps work item to appear in a GitHub issue as a comment; the prompt could look something like this: 

“I want the name of the assignee of an AzureDevOps work item to appear in a GitHub issue as a comment.”

Sync rules (AI Assist) in Exalate

After a moment, the script will be generated, with suggested changes highlighted in green and red. The green scripts are suggested additions, while the red scripts are suggested deletions. 

If the new snippet works for you, click on “Insert Changes”. Otherwise, you can discard the suggested code. If needed, you can refine your prompt and, once satisfied, publish the changes.

Step 5: Set up Automated Synchronization Triggers

Now, our platforms are exchanging the information we want, but we also need to choose when the information is shared and what will trigger the exchange.

exalate trigger for Github node

In your GitHub node, select “Triggers” from the left-hand menu. Then click the “Create Trigger” button.

Note: You can also create a trigger, by clicking on the “Triggers” tab in the edit connection section. 

Triggers in GitHub

On this screen, you can set trigger conditions using GitHub’s advanced search syntax. If you hover over the “i” next to “if”, there’s a link to help you with that. You can choose the connection your trigger applies to, and add a note to help you track what your triggers do. There’s also an “Active” switch to turn the trigger on and off. When you’re ready, click “Create”.

To read more about this and other advanced configurations, check this link.

Common Pitfalls to Keep in Mind when Completing the Azure DevOps GitHub Integration

To make sure our integration goes smoothly, we’ll look at some of the issues that can happen when setting it up. Keeping these potential problems in mind will help us avoid them and ensure we get the best out of our software integration.

Role Clarification

The right software integration can help our teams work together more effectively and prevent siloing. Beware of the opposite problem though. It’s a good point that the teams know about each other’s issues, but we don’t want them working on the same things.

When storing information in the same place, it’s important to keep track of who’s doing what, so teams don’t get distracted. Making sure everyone is fully aware of what they are responsible for is critical. As well as tracking who is assigned to each issue, it might be worth flagging which team is handling it, too.

Message Overload

We need to keep track of what our software is doing and most platforms help us with this by sending messages when anything of note happens. When platforms are integrated, the flow of information increases, and this can result in more messages. 

We don’t want this to become overwhelming. Getting too many notifications can decrease engagement and productivity. So, you may want to tune your notification settings to make sure you don’t see more than you want to when it comes to integrating platforms.

Architecture, Security, and Deployment for an Azure DevOps GitHub Integration

Now we’ll discuss Exalate technology in more detail. If you’re using it, you may be curious about its architecture and security features it has.

Architectural Autonomy

Here’s a diagram that shows Exalate’s architecture:

Exalate architecture

The blue end represents Azure DevOps and the red end represents GitHub. Exalate agents for each platform sit in between these two services and handle the exchange of information between them.

  • The letters A-F show how information flows between platforms. Both services use Exalate as an intermediary, which maintains the autonomy of each one.
  • The Exalate agents control the sending and matching of information from one platform to the other.
  • As well as Azure DevOps and GitHub, there are Exalate agents available for Jira Cloud, ServiceNow, Jira On-Premise, HP ALM/QC, and Zendesk. More services are coming soon, so check back later if the one you need isn’t ready yet. You can also request an integration here.

Security

Security is a key consideration when exchanging information between platforms. Exalate is designed with security in mind so you can trust it to synchronize information securely. 

It uses the secure HTTPs protocol for most data exchange and nodes use a reverse proxy for data termination. It also uses JWT to ensure data requests come from trusted sources.

Exalate protects your data by taking daily backups, which remain in storage for two days. It also conducts monthly penetration tests to help find and eliminate potential security issues.

To learn more about how Exalate keeps data safe, read this free Exalate Security and Architecture Whitepaper

Conclusion

If your teams are working on different platforms, then it’s important to make sure they stay connected. There are many ways to do that, but getting the right balance between automation and customization can give an edge to your team’s performance.

Azure DevOps and GitHub both cater to different kinds of teams. Sometimes you want them kept apart. But when you don’t, you need a way to bridge the gap. We’ve done that with Exalate.

We’ve gone from having two different platforms with information tracked separately to an integrated system where data flows between the two automatically. The left hand now knows what the right hand is doing.

Frequently Asked Questions

Why should I integrate Azure DevOps and Github? 

You can combine these powerful tools, Azure DevOps for its robust build, test, and deploy capabilities and GitHub for its feature-rich code hosting and version control abilities. Integrating these platforms can enable an automated end-to-end development process. You can also promote better code quality, facilitate cross-team collaboration, and simplify the management of work items and issues, delivering high-quality software faster. 

Can I connect GitHub Enterprise with Azure DevOps?

Yes, you can connect GitHub Enterprise and GitHub Cloud with Azure DevOps. You can create a standard GitHub Enterprise Server service connection to a GitHub repository. 

You can also integrate GitHub Enterprise with Azure DevOps to support advanced synchronization cases using third-party tools like Exalate

Does Azure DevOps have a Git repository?

Yes, Azure DevOps has a built-in Git repository, which allows users to store and manage their code base. Apart from the regular Git repository, Azure DevOps also gives your team access to Team Foundation Version Control (TFVC).

How does GitHub integrate with Azure DevOps? 

One way to connect GitHub and Azure DevOps is through GitHub Actions, which allows you to define custom workflows within your GitHub repository. 

Azure DevOps pipelines can fetch source code directly from GitHub repositories and execute build and release processes. 

Azure Boards, a project management tool in Azure DevOps, can integrate with GitHub issues. 

You can also use third-party tools like Exalate that support a variety of different synchronization use cases to integrate GitHub and Azure DevOps. 

How do I integrate Azure pipelines with GitHub?

With an Azure DevOps and GitHub account, you can integrate Azure pipelines with GitHub. Then, you can create a new service connection to authorize GitHub access to your Azure pipelines. 

How do I move code from GitHub to Azure DevOps?

Both Azure DevOps and GitHub have Git repositories that support version control. To move code between them, you need to clone the GitHub repository before adding the Azure DevOps repository as a remote. Then use Git commands in your terminal to push the code to the Azure DevOps repository.

Can I integrate Azure DevOps and GitHub for free? 

Yes, you can integrate some entities like Azure boards or pipelines for free between Azure DevOps and GitHub. There are also third-party plugins like Exalate that come with a Free plan to sync 1000 entities per month. The plan can be used for basic synchronization use cases. You also perform advanced integrations using simple code with Exalate. 

Should I use GitHub or Azure DevOps?

GitHub and Azure DevOps both offer features for software development and project collaboration. If you are more interested in version control, GitHub is the go-to platform for you. If you want a comprehensive software development platform, Azure DevOps is the perfect choice.

Recommended Reading:

Sustaining an Effective Collaboration in Time of Remote Work

collaboration in remote time

“These are the times that try (our) souls.”  When Thomas Paine penned that over 250 years ago, he knew little of the coronavirus. But as true as it was 250 years ago when war broke out, it is true for us today as we’re trying so hard to adapt ourselves to remote work and virtual collaboration.

The COVID-19 pandemic is a trying time for all of us. But these times have also shown how resilient and adaptable we are as a human race. We have witnessed the heroic actions of our front-line responders, as they risk their lives to battle this pandemic. We see the many volunteers who have stepped up to help their community and encourage their neighbor’s in these times of crisis. 

We’ve also seen how flexible and innovative companies have become in adapting to the need for their entire workforce to work remotely as entire cities have shut down.

For some companies, it’s a scramble as they try and figure out the best ways to implement a remote business model. For others that have been quietly performing remote work, it’s been a struggle as they quickly scale and adapt their business processes for 100% remote work.

 At the initial stages of this outbreak, many wondered if the Internet infrastructure was capable of scaling the massive demand required for remote work. There were some fears that the entire Internet would completely crash because it couldn’t handle the workload. Fortunately, about two months into the crisis, we’ve had our answer: our infrastructure has been able to handle the increased workload just fine.

Even before the pandemic struck, many corporations were well on their way to implementing some sort of remote work structure. The success of so many companies with a quick adaptation to remote work on such a large scale means that remote work will become the new normal for the foreseeable future.

The ABCs of Effective Remote Work 

While some companies have been early adopters of the remote workplace concept, for many managers and employees alike, setting up a productive remote workplace is a new and perhaps a daunting challenge. Telling people just to ‘go work at home until this blows over’ is a recipe for disaster. Setting up a remote workplace requires careful planning, collaboration, and accountability by everyone if the remote team is going to be successful.

Communication in such an environment is critical. No longer can co-workers just walk down the hall to the next cubicle to have walk-in chats or ask questions. Ad hoc meetings down the hall in the conference room aren’t possibly longer. Unless you have a continuous intercom type of solution and require people to be at their remote desks continuously, most of your communications will be asynchronous.  

Meetings will have to be scheduled ahead of time, so people can join the meeting from various time zones. To maximize time, meeting checklists should be sent out before meetings to optimize the items discussed. 

Team collaboration is an essential part of an effective remote work environment. Fortunately, there are many tools available to assist with team collaboration.

Facebook’s Workplace.com is but one of many good collaboration platforms that allow your teams to collaborate in a shared workspace. Additionally, other automated tools such as Zoom, Skype, WebEx, and Blue Jeans enable remote workers to share documents and collaborate in face-to-face meetings in real-time.

For as effective as some of these collaborative tools can be for remote workers, they are ill-equipped for the management of business process workflows in a remote environment. They don’t allow teams to focus on phases of a project, priority of tasks to complete, work that’s in progress, posting comments on specific tasks, or tracking the percent of completed tasks.  

What’s needed are applications and platforms that will allow your team to collaborate on specific tasks in a workflow, such as a Scrum or Kanban board. This is best done by a collaborative work management system.

Many companies may be familiar with collaborative tools that can enhance remote workflow capability.  However, for companies that are just beginning to embrace the reality of working remotely, there is considerable temptation to reach for a familiar office automation tool to help them – spreadsheets. While spreadsheets are great individual productivity tools, they break down in a collaborative environment. 

Let’s briefly look at some of the issues.

Why Spreadsheets are not Work Management Systems

spread sheets for work management

Whether you use Excel, Open Office, LibreOffice, Google Sheets, Numbers, or another spreadsheet application, they all fall short when it comes to enhancing the collaborative use of data.

While you can have spreadsheets perform many functions, their collaborative limitations include:

  • They’re not truly multi-user.  Although it is possible for multiple users to open applications like Excel if they are hosted on a collaborative platform like Microsoft’s SharePoint application, even the best spreadsheets on the market do not handle multi-user updates well.
  • They don’t support asynchronous dialogs. As spreadsheets were built primarily for single users, they do not have any collaborative support for asynchronous dialogues or discussions between users.
  • They don’t support notifications. If a co-worker wanted updates to a spreadsheet, they would have to either send the spreadsheet in an email for your update, or post the spreadsheet to a shared location, and send you a separate notification by email or messaging service that the spreadsheet was ready for an update.
  • They lack workflows.  While enterprise-level spreadsheet applications could be programmed for simple workflows using macros, even the best custom-built workflow macros are not capable of handling multi-user functionality.
  • Other issues include:

-Difficulty in creating task relationships.

-Trying to make attachments, while possible, is very awkward.

-Changes are difficult to track as spreadsheets do not have built-in logging capabilities.

-Time tracking is complex. It would require developing complex functions or macros.

Most organizations that are thrust into a remote work environment for the first time will find that for all the reasons listed above, spreadsheets are a poor choice for collaborative productivity.  

Examples of Work Management Systems for Remote Work

Fortunately, there are some great tools for boosting company productivity that was built with a remote collaborative environment in mind. 

These tools enhance business processes and workflows by allowing collaboration on a common task list – wherever they are working from. Properly structured, they can ensure the tasks that need the most attention are moved to the top of a task list. They actually ensure that your projects are on track. They also provide easy visualization of work in progress and allow optimization of the entire workplace.

Let’s take a quick look at some of the best work management systems that help you facilitate your workflow.

Jira

Jira is a collaborative software tool that advertises itself as the project management tool for agile teams. While there are certainly many other software tools available for agile project management, Jira has certainly become one of the more popular collaborative tools for engaging remote agile teams.

Jira has many built-in features that make it an ideal work management system for agile teams. Among its features is the ability to quickly build scrum or Kanban boards that allow teams to quickly develop the complete iterative planning cycles for software development.

kanban board for Jira

Jira Scrum and Kanban Boards, like the one shown above, are built with collaboration in mind. Team members can add tasks (or cards) to each phase of the Kanban board so that everyone on the team can have a complete picture of work in progress at any given time.  

Teams can also drill down into each task and add data to each task such as due-dates, percentage of task completion, description of the task, activities, issues, etc. Additionally, these cards make it easy to add attachments or links to each one of the cards, giving team members complete visibility on all tasks and subtasks related to the development process.

Scrum board for Jira

The Jira platform can also include a collaborative service desk application for use by a remote customer service team. This application can be accessed from anywhere in the world for technicians with the appropriate permissions. Service tickets can be tracked, assigned, monitored, and resolved by remote service desk personnel from anywhere in the world. 

Trello

Trello is another popular collaboration tool that allows remote workers to collaborate on several projects by using a Kanban-style card system. Originally developed as a free application, its ability to quickly and intuitively develop project boards is one of Tello’s main strengths. 

These project boards can be set up as list categories and task cards placed under each category.  Like Jira, the cards are feature-rich and can be used to track activities, due dates, and comments for each task. Additionally, whenever a task is modified, automatic notifications are sent to anyone who is invited to the board or task, as appropriate.

Another handy feature of Trello is the ability to quickly move cards between categories in a collaborative environment.  When any user moves these tasks from one category to the next, everyone who is logged into the board can instantly see the changes.

Trello board and remote work

After a brief kick-off meeting and a discussion of the major tasks of this project, the project manager was able to quickly move all the tasks to the proper project phase, as shown below.  From this point forward, the team members responsible for each task will be able to drill down into the tasks and provide any updates as necessary, as shown below.

Trello board

The free version of Trello provides all this functionality, but the standard and premium versions provide even more functionality for teams, like advanced project reports and ‘power-ups’ that provide the ability to integrate other applications into Trello for advanced remote capability, including integration with popular collaborative apps like Slack, Google Drive, and Google hangouts. Trello is a well thought out collaborative tool that allows small teams to collaborate well, and scales well to larger companies, as well.

ServiceNow

ServiceNow

ServiceNow is another collaboration platform. The strength of this platform is that it “enables the digital workflows” for the individual worker and the entire organization itself. ServiceNow is a collaborative platform that is widely used across many different economic sectors; Government, HealthCare, Human Resources, and Managed Service.

 Providers are but a few of the sectors that use ServiceNow to enable their remote workforce. Not only does it allow for collaboration on standard or customized business workflows, but the richness of this platform allows companies to rapidly build portals to collaborate in real-time with their external customers, as shown in the example above.

ServiceNow platform for workflow and service management

The ServiceNow Platform marries up workflow management with service management across a wide array of corporate sectors. It allows the company to use workflow templates ‘out of the box,’ or a company can choose to build their own workflow applications through an end-user interface that doesn’t require complex software coding.

servicenow portal

This combination of real-time portals, custom workflows, and remote collaboration has made ServiceNow a crucial player in helping mitigate the COVID-19 pandemic. In March 2020, Los Angeles used the ServiceNow platform to conduct COVID-19 testing around the city. The customer-facing ServiceNow portal was used to provide the 16 million citizens of Los Angeles with the ability to confirm their symptoms and make appointments at any one of the city’s remote drive-through testing locations to test for the virus. 

This collaborative application has been crucial in Los Angeles’ ‘test, trace, and isolate’ program, which has proven effective in halting the spread of this pandemic. All of this was done by rapidly implementing the end-to-end ServiceNow workflows for testing employees and citizens alike.

Azure DevOps

Another useful platform for the remote workplace is Microsoft’s Azure DevOps application.  Formally known as Microsoft Team Foundations Server, this enterprise application allows any remote team of software developers to collaborate in real-time on all the stages of software development.

Azure DevOps platform

As its Team Foundation’s predecessor, Azure DevOps allows remote teams of software developers to remotely check-in and check-out software files into a shared repository, which Azure DevOps calls ‘Repos.’  Azure DevOps can be used to collaboratively control builds, releases, and deployments.  

The Steps of Deploying a System in Remote Work

Jira, Trello, ServiceNow, and Azure DevOps are just some of the collaborative platforms and applications that your work teams can use for work management systems that go beyond simple visual and presentation applications. 

From simpler applications such as Trello to the complexity of ServiceNow, they all allow you to optimize your teams’ productivity. Whether its collaborative development of project plans, Scrum, or Kanban boards that give teams visibility of work in progress or well-designed customer-facing portals that allow customer interface, these platforms help overcome the challenges of a remote work environment.

These applications can be easily set up and implemented. While some of these platforms may require administrative training to get the full advantage of their features, others can be set up immediately with little or no training. 

As an example, the board interface of Trello is so intuitive that project plans and agile iterations can be developed within minutes of first using the application. 

These tools are great enablers of a very productive remote workforce. However, the tools are only one of the enablers; the discipline of the remote workforce is just as important as the best collaborative tool. Once workflows and business processes have been implemented, teams must have the internal discipline to follow agreed-upon business practices.  

This means that the workforce is properly trained on the processes, and a system of accountability is put in place to ensure everyone is equally productive. This requires some careful management planning and a phased rollout approach to ensure that everything is running accordingly.

Working with Multiple Companies 

These platforms and applications are great tools for allowing companies to quickly transition to a remote work environment. They provide companies with a way to remotely collaborate in real-time on tasks requiring specific data and information exchanges that aren’t possible with video conferencing tools. They are one of the key facilitators to optimizing your remote workforce in these times of forced lockdowns and orders to stay and work from home.

While they are great tools to optimize your internal processes, their efficiencies usually stop at the borders of the company. They’re generally lost the moment that the company needs to integrate their data and information exchanges with one or more external partners. In many cases, the move to a remote workforce only serves to amplify these data integration problems.   

The daunting challenge is to integrate these systems remotely without interrupting the internal workflows. The process of integrating the external data and information exchanges without affecting internal company business processes was previously discussed in the Journey of Software Integration blog post. 

When it comes to the right remote cross-company integration solution, autonomy is key. You need to have complete control over what, when, and with whom you share specific data. It’s also crucial to be able to work in your own familiar environment especially when your network of connections gets wider and multiple companies with different work management systems get involved. 

Moreover, configurations evolve. How do you deal with the situation where a workflow changes on one end? How do you accommodate this in the configuration of the solution, and at what stage is such change introduced? It should be possible to change the configuration from both ends without affecting the sync with your partner(s).

What’s more, it is a question of the solution’s flexibility. Is the scripting intuitive enough to allow you to configure a variety of use cases? The solution should be flexible in a way that either end can easily change their sync requirements to adapt them to their workflow and collaborations. 

With cross-company integrations, you never know what future requirements you will encounter. For instance, if you have an incident-to-issue mapping where you have 150 projects on the Jira end (this is an actual case), and new projects are added on the fly on the Jira side.  How do you implement an efficient dispatching capability that is easy to maintain?

And the right solution should for sure be reliable. Systems go down – that’s a fact. You can imagine that your partner is upgrading their Jira. How do you ensure that all the changes are synced in the same order as they happened? So let’s list reliability as one of the key factors to take into consideration when buying a third-party cross-company integration solution.

Exalate as a cross-company integration solution was built to meet these criteria and to solve the thorniest integration issues. It allows you to focus on optimizing processes within your company while seamlessly integrating with your external partners exactly where and when you need to integrate, even in a remote environment.

It gives your company the flexibility, reliability, and autonomy you need to successfully execute cross-company integrations anywhere in the world while guaranteeing your security. Check out Exalate security and architecture whitepaper

By solving these issues, Exalate lets you focus on your number one priority; running your business. 

Recommended Reading:

Build vs. Buy: The Pitfalls of Building your in-house Software Integration Solution

software integration: build or buy?

In the global knowledge economy, companies need to be agile enough to stay competitive. To achieve this agility, corporations are constantly trying to improve their business workflows for their products and services. This has given rise to work management systems that depend heavily on integrating data and information within the company to optimize these internal processes.

Increasingly, today’s corporations also live in an interconnected world. From large corporations to small and medium enterprises, companies have a need to exchange data with one another at many stages of their workflows.

Companies have made great strides in improving integration processes between their own teams. However, that integration stops at company borders because they often use different work management systems. 

Even those firms that use the same systems But it’s this data in these different systems that must be integrated if companies are to reduce the friction of exchanging information and improve efficiencies.

So the dilemma remains. How do companies integrate data between themselves in the most efficient means possible? In an earlier article The Journey of Software Integration, after briefly looking at manual and shared information transfers, we concluded that to optimize work management systems without sacrificing the internal processes of companies, automated integration was the only viable answer.

build or buy?

But what’s the best method of cross-company integration? Should companies build their own integration, or look to buy a ‘best of breed’ software package? In this article, we are going to expand on the advantages and disadvantages of each approach by examining the phases of an integration project.

Phases of the Integration Project

The Environment

Integrations are quite complex. Not only are there initial technical challenges to overcome, but there are many other factors to take into account. Companies come to the table with totally different organizational structures, people with different skill sets and agendas, different processes, and even different work management systems.  These factors all add to the complexity of the integration process.

We’re going to focus on one portion of the process, examining whether to develop a custom integration application in-house using existing company resources or to purchase one of the commercially available software applications that provide this service. 

To read more about the entire integration process, check out The Journey of Software Integration

The Initial Set-Up

Before a company can accurately assess the advantages or disadvantages of a make or buy decision, they must clearly spell out the requirements for data integration. This includes:

– Determining the communication path between the two environments: What deployment model will the companies use? What are the specific authentication, authorization, identification, information, data, and network security issues to be used during the integration?

– Determining a common data model: This means the companies must ensure that the data exchanges are properly mapped and any needed data transformations between systems occur properly. 

This set is vital for any successful data integration project and becomes especially critical in a cross-company integration scenario. A three-space text field will not map to a two-digit text field no matter how many attempts are made to force the issue. While this may sound trivial, there have been specific instances where technicians have spent days troubleshooting such a ‘trivial’ issue. 

– Identifying any redundancies: This includes identifying failure paths and proper notification protocols to take place in case of probable failure. It’s also important to take into account unforeseen delays and data synchronization between companies and systems. Plus, there needs to be a formal rollback system in place in case of unexpected system crashes.

– Accounting for data tracking: To ensure our data integration is valid and complete, any cross-company integration application needs a tracking system to log all data transfers.  This is vital to conduct audits of data transfers to ensure the reliability of the system.

– Developing application functionality: Assuming that all of the requirements have been accurately gathered, the developers can start to code in the required functionality.  While seemingly straightforward, in reality, it can be an arduous task. Programming the functionality might often seem straightforward enough, but the real work always comes in determining how to handle errors and exceptions. 

More sophisticated applications are developed to capture and deal with all data errors and exceptions without causing the application to terminate. It’s important that the fitting functionality of the application not only includes proper execution of code but also alerts the identified integration issues back to the appropriate technical personnel.

– Validating the solution: Once the application has been developed, one of the most challenging aspects will be the validation of the integration functionality. To ensure the proper functioning of the integration application, it needs to be ‘wrung out’ by being subjected to tests for functionality and performance. 

These tests must also validate the stability and availability of the integration to ensure that duplication or other unintentional errors in the integration process don’t cause the system to crash. 

Additionally, tests must also be developed to discover unexpected errors that lead to system crashes, causing unintentional loss of data. For instance, trying to put a three-letter country code into a two-letter text field – KOR (for Korea) will not cross into a KR text field, no matter how much we wish it would.

– Managing the production release: Now that the application has been developed and properly validated, it needs to be released to the production systems for the various companies involved in the cross-company integration process

It also needs to be rolled out into two different systems at the same time. Implementation into the systems of all companies involved must be completely transparent to the end-users. Because any unplanned disruptions to production work management systems can cost the companies involved thousands (if not millions) of dollars in lost revenue. 

data integration initial costs chart

Any rollout of an application for production must also include rollback plans in case of unintended failures or consequences caused by the application. 

– Planning ongoing monitoring: Monitoring must be put in place to ensure the application is continuously monitored for accuracy and reliability. Trained personnel can spot and report unexpected data anomalies and service interruptions.

Customization

Once an integration solution is rolled out, additional customization requests will inevitably come up. Business processes tend to be fairly dynamic. This Is when reality kicks in. There will almost always be constant requests to make changes to the initial integrations, to make things “just a little better.”

Unless the in-house development team takes into account functionality for allowing end-users to make changes to workflows, customizations will have to be made by the development team. As most companies are very particular about their sensitive internal data, any customization for the in-house developed applications will have to be coordinated between the DevOps teams of both companies. This can be a long-drawn-out process.

data integration customization costs

Additionally, most development teams are engaged in several in-house projects at the same time, and customization of the data integration might be just one of them. So, these in-house customization requests often have to compete with other projects. As a result, they’ll often languish unnecessarily for months unless they’re properly prioritized.

Maintenance

In software engineering and development circles, it’s pretty common knowledge that maintenance accounts for most of the costs associated with software projects. It’s safe to say these costs are even higher for cross-company integrations.

The costs involved are significant. But they only reflect the difficulties in maintaining the custom in-house applications. When the underlying systems are upgraded or completely replaced, applications developed for the original systems will need to be modified, or in some cases completely rewritten. 

Moreover, the documentation on the original application will have to be maintained and updated whenever changes are implemented. And whenever the original developers or the system maintenance personnel leave, knowledge transfer to new IT personnel becomes a sort of problem itself.

This often creates ‘the perfect storm’ of issues that dramatically drive up costs and make customization difficult to maintain. 

A recent case study of a large corporation that maintains in-house custom integration software revealed the depths of these problems. It runs into maintenance difficulties every year with one of its major partners. Their partner relies on short-term contractors to maintain their workflow systems. 

It becomes very obvious that there is no turnover between contractors from year to year. Every time this corporation tries to customize or upgrade the integrations, it has to re-educate the new contract development team about the specific features of the integration. 

On one occasion, it was even required to deploy its own development team to the partner’s site to assist them with the upgrades needed on their systems to continue the functionality of the system. While the integration is essential for maintaining the client’s mission, these difficulties with cross-company integration have caused costs to skyrocket.

the costs of integration maintenance

These costs can be significantly reduced by using the right commercial integration software. These products all come with support agreements that allow the companies to integrate their data and information to leverage the significant expertise of the developers and engineers within the integration software firm. 

These experts also have teams responsible for maintaining the software documentation and providing needed training. They even work with their clients on troubleshooting specific issues and provide the required support along the way. 

Changes

Business environments are dynamic and change quickly. Companies must fluidly accommodate changes in order to stay competitive. For integration applications developed in-house, this adds an extra layer of complexity to the customization issues. 

These constant changes have a pretty dramatic effect on any cross-company integration. It’s normal to expect configuration changes on either side of the integration. These can include new workflows, permissions, data fields, and new insights from using the existing workflows. 

“You know, if we took our existing process and added these two new data points, we could eliminate the need to perform this additional check” is but one example.

Unfortunately, custom integrations are not set up to handle changes so dynamically.  Unless a solid change management process has been finely tuned, changes between both end both business and technical coordination. 

comparing in-house and third party integration solutions costs

The use of commercial integration software can significantly reduce difficulties and delays caused by system and process changes. Most of these companies work with their clients to develop seamless processes for handling change requests. 

seamless software integration

This integration software allows the process owners to define what information gets sent out externally and how incoming messages are processed internally. Changes in the internal company processes will not have an effect on cross-company integration.

This autonomy is an important feature in any such integration setting, and currently, Exalate is the only commercial integration software providing this functionality. Instead of pinpointing specific processes, Exalate allows more flexibility in the integration of systems and allows the systems to be loosely coupled and independent of each other. 

Conclusion

When cross-company integration becomes an essential part of optimizing workflows and work management systems, companies are faced with a decision to develop the integration applications in-house or purchase commercial integration software. It’s a classical make-or-buy scenario.

Confronted with the up-front costs of enterprise integration software, many corporations are tempted to develop a solution through the use of their own internal development staff. The initial costs seem cheaper, and the development staff is already on board. It’s just another simple development project for them to tackle. Right?

Not so fast. Building your own solution is a huge undertaking, not to be underestimated. While initial costs to start an in-house integration project may seem the cheaper option, many difficulties arise during customization and maintenance that will exponentially raise costs. 

Customizations must be done on both ends of the system. And how will this work across development teams on both sides? When one or more of the underlying systems are upgraded, how will the application be retrofitted (if it can be done at all)? Who will be responsible for system documentation and change management? How do you transfer knowledge when one or more of the key developers move on to another company? The solutions to all of these issues dramatically drive up costs and reduce efficiencies.

Most of these difficulties can be averted by incorporating the right commercial integration software into your project. While the initial upfront acquisition costs are higher, they drop off dramatically in the customization and maintenance phases of the integration.  

cross company software integration solution

Commercial integration firms have pricing plans that offer support at all phases of the integration project. They provide documentation support and can provide the best practices for customization.

Additionally, commercial integration software is built with changes to underlying systems in mind and is built to operate independently of changes to these underlying systems 

One of the most critical advantages of acquiring commercial integration software, however, is the advantage of integration transparency. Your focus is on optimizing your business, not getting distracted by potentially messy in-house integration projects.  Acquiring one of the best-in-breed integration software packages allows you to do just that.

When it comes to the right cross-company integration solution, the following features become the most prominent ones to take into consideration when buying a solution:

  • Autonomy
    Configurations evolve. How to deal with the situation that a workflow changes on one end.  How do you accommodate this in the configuration of the solution and at what stage is such change introduced?
  • Flexibility
    With cross-company integrations, you never know what future requirements you will encounter.

    For instance, if you have an incident-to-issue mapping where you have 150 projects on the Jira end (this is an actual case), and new projects are added on the fly on the Jira side.  How do you implement an efficient dispatching capability that is easy to maintain (without coding)
  • Reliability
    Systems go down – that’s a fact. You can imagine that your partner is upgrading their Jira.  How do you ensure that all the changes are synced in the same order as they happened?

Exalate was built to meet these criteria and to solve the thorniest cross-company integration issues. It allows you to focus on optimizing processes within your company while seamlessly integrating with your external partners exactly where and when you need to integrate.

It gives your company the flexibility, reliability, and autonomy you need to successfully execute cross-company integrations. By solving these cross-company integration issues, it lets you focus on your number one priority; running your business. 

Recommended Reading:


Shaping the Future of Integration: Transitioning from Copying Data to Cross-Company Integration

Software integration journey

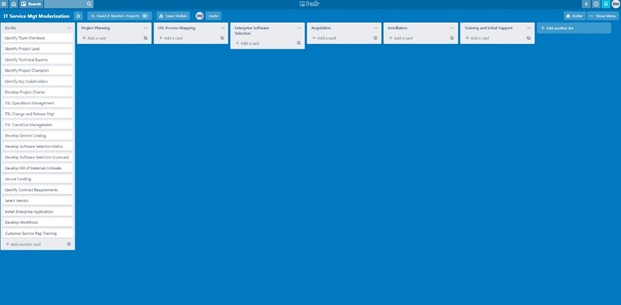
We often use various applications, like CRMs, ERPs, etc. to share common projects, statuses, or workloads with other teams, not often physically co-located. You might already be familiar with Jira, Salesforce, ServiceNow, Zendesk, and the like. These applications are useful for time tracking, handling workflows, managing project statuses, etc. 

However, teams often face challenges while dealing with these multiple applications. Handling data communication between these applications using diverse technologies is one such challenge.

Integration plays a major role in enabling communication across applications leading towards a holistic digital transformation of your company. You can now connect with your partners, suppliers, or vendors, possibly using a completely different application. We like to call this “cross-company integration”. An eventual outcome of this cross-company integration is a globally connected network of companies striving towards common business goals. 

But when it comes to multiple companies and collaborations amongst them, you need to tread carefully. In this article, we present our vision of a “Global network of connected companies” while discussing all that there’s to know about cross-company integrations. 

So Where Did It All Start? 

Before the commercialization of the Internet, companies were oblivious to integration and never felt the need for it. 

Then the Internet boomed, and suddenly, everyone wanted to digitize their daily work. The means to achieve this digitalization using software applications, those that helped automate business processes, structure information moving through a company, enhance decision-making capacities, and optimize results, was felt more than ever. 

Task management systems like project management tools, issue trackers, and enterprise-wide applications were founded to fulfill this desire. They helped streamline collaboration within teams, manage workflows, optimize cycle times, and allow for timely escalations. The result was increased productivity and efficiency.

And Task Management Systems Multiplied… 

Then, as a natural progression, there were way too many such applications. Teams rapidly adopted them due to their exponential growth. People happily managed their day-to-day work, set deadlines, and met them smoothly. Because, essentially, that’s what was meant to achieve in the first place. 

There came a time when people realized that they were working fine within a single team. However, when it came to collaborating with another team using a different application from theirs, they faced issues. 

How do they communicate with a system that has completely different technologies, APIs, deployment models, data mappings, and workflows? 

They needed automatic, accurate, real-time information exchange. 

The result of this need was integration. However, it is an uphill task. 

Integration between teams involves aligning processes and mapping data between diverse systems while keeping the internal workflows intact. It must also be easy to maintain, scale, and secure. 

This is a huge undertaking, even with teams located within a single organization belonging to different departments. What about teams you want to integrate with who are outside the company? All of the things we talked about just multiplied in complexity. And what about security? That’s exponentially more complicated with a cross-company integration. 

And this is precisely the reason why we want to share this journey with you. To make it smoother and better.

The Cross-Company Integration Journey 

Companies benefit by connecting and collaborating with each other. Consider a supply chain organization where a retailer generally depends on other product suppliers, who in turn, may be dependent on different independent suppliers. 

For all of these companies to seamlessly work together and move products and services between each other, integration is needed. You can track delivery issues with a lot less friction by integrating the quality management system with the task-tracking systems of the suppliers: a classic example of cross-company integration. 

So, let’s discuss how this cross-company journey started evolving by understanding the ways in which companies try to connect with other companies in the first place. 

Manual Copy-pasting of Information

The first resort is to manually exchange information via phone calls, emails, copy-pasting, messenger apps, and countless meetings. But all this results in inaccurate, misplaced, or altered information. Statuses remain unclear, service levels are missed, and even wrong escalations happen at times. 

The manual method has some disadvantages but is still adopted for a variety of reasons 

  • reluctance to invest in integration strategies, 
  • data security concerns, 
  • not enough understanding of data needs,
  • governance issues, or 
  • it seems to be the most viable option.

However, every step of this process is prone to manual errors and can ultimately defeat the purpose of integration. 

Sharing the Environment

Another common approach companies follow is to share their environments with one another, like adding new users to their systems or allowing access to their instances. This may seem logical at the beginning, but it is not always convenient. Imagine having to log into an unfamiliar environment every time you need a piece of information. 

There is also a high risk of exposing sensitive information to unauthorized users. Proprietary data is prone to risk, not to mention GDPR requirements.  

Native Integrations Between Apps

Software vendors have since long recognized the need for allowing native integration between popular applications. You can easily set up a Jira Zendesk integration natively, for instance. 

You can use such native integrations that are built for common scenarios with predefined templates if your use case is simple and straightforward. They are also easier and quicker to set up. For instance, you can automate a unidirectional flow between Jira and Zendesk, such that when a high-priority ticket arrives in Zendesk, it automatically triggers a dev issue in Jira.   

However, over time, it does not allow for customization and lacks the flexibility an integration demands. 

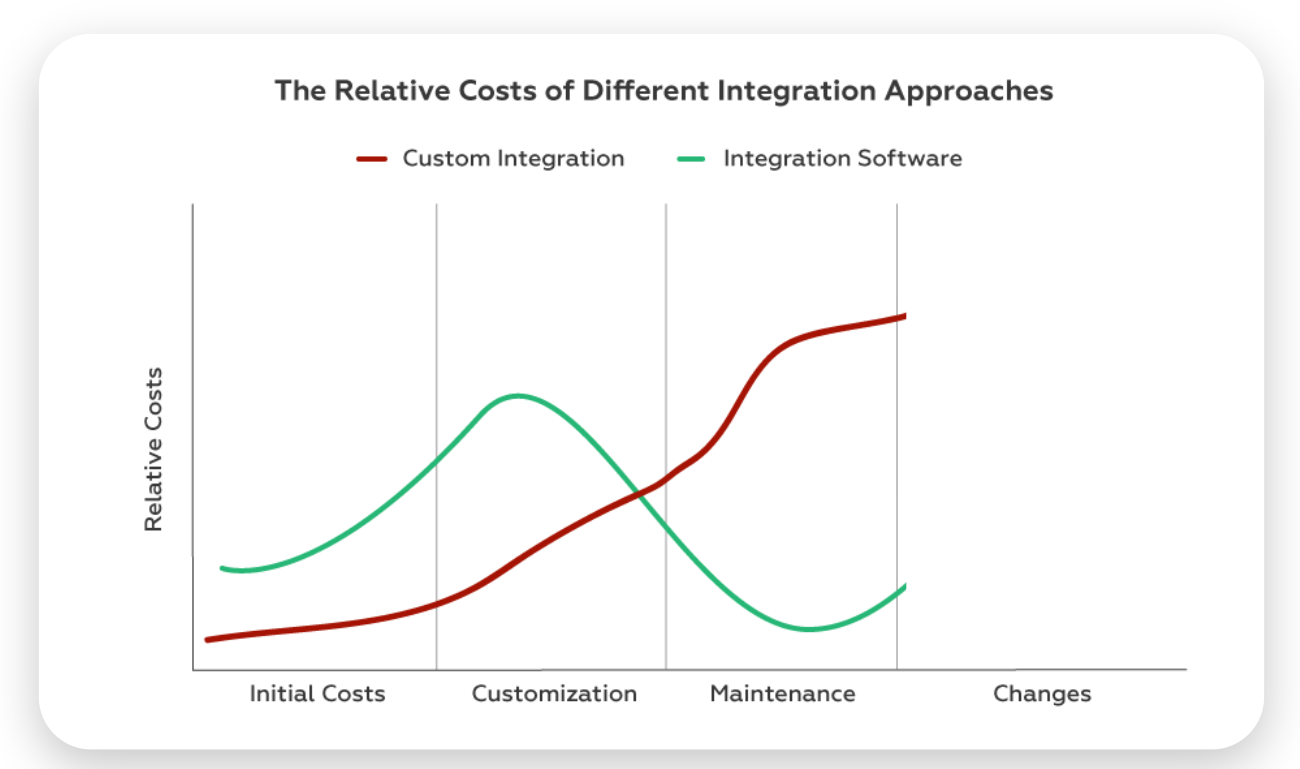
Build Your Own Integration 

The next obvious step that companies take is to contemplate the build-vs-buy decision.

With multiple companies involved in the integration process, many choose to build the integration in-house due to ample availability of technical expertise and resources, covered expenditure, fulfilled data security requirements, and a custom-tailored integration. 

Another reason why companies also choose to build in-house is the lack of knowledge of integration solutions that offer the flexibility and automation they desire. 

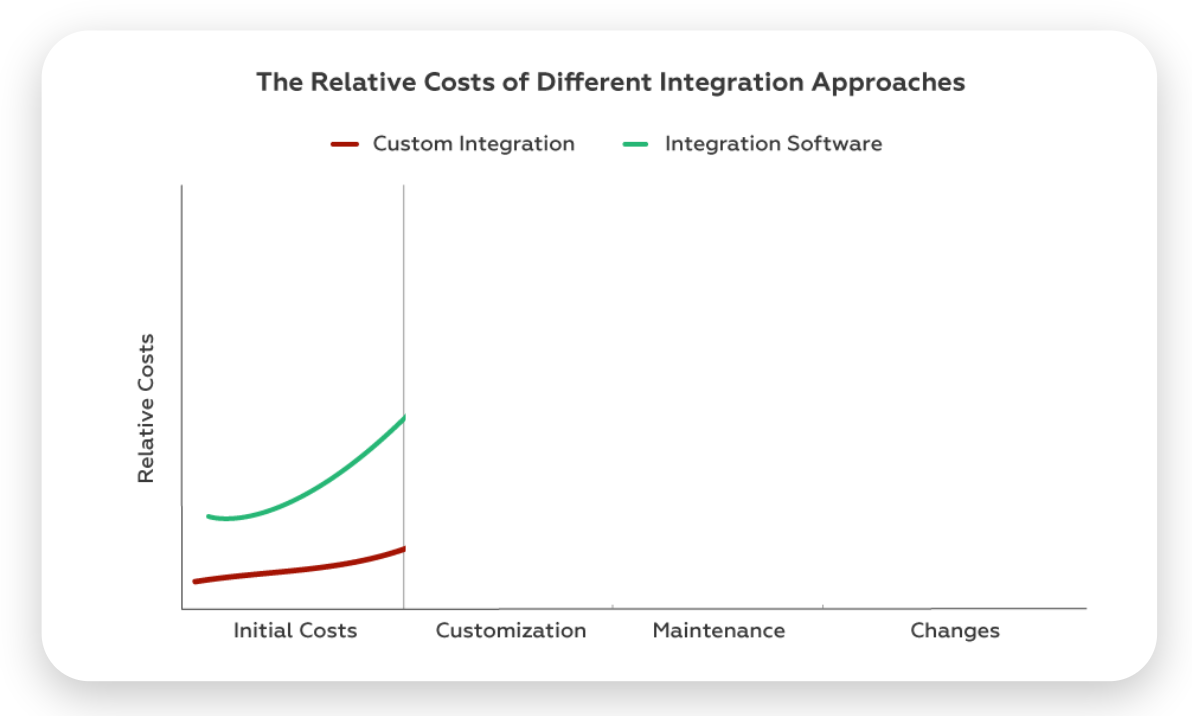
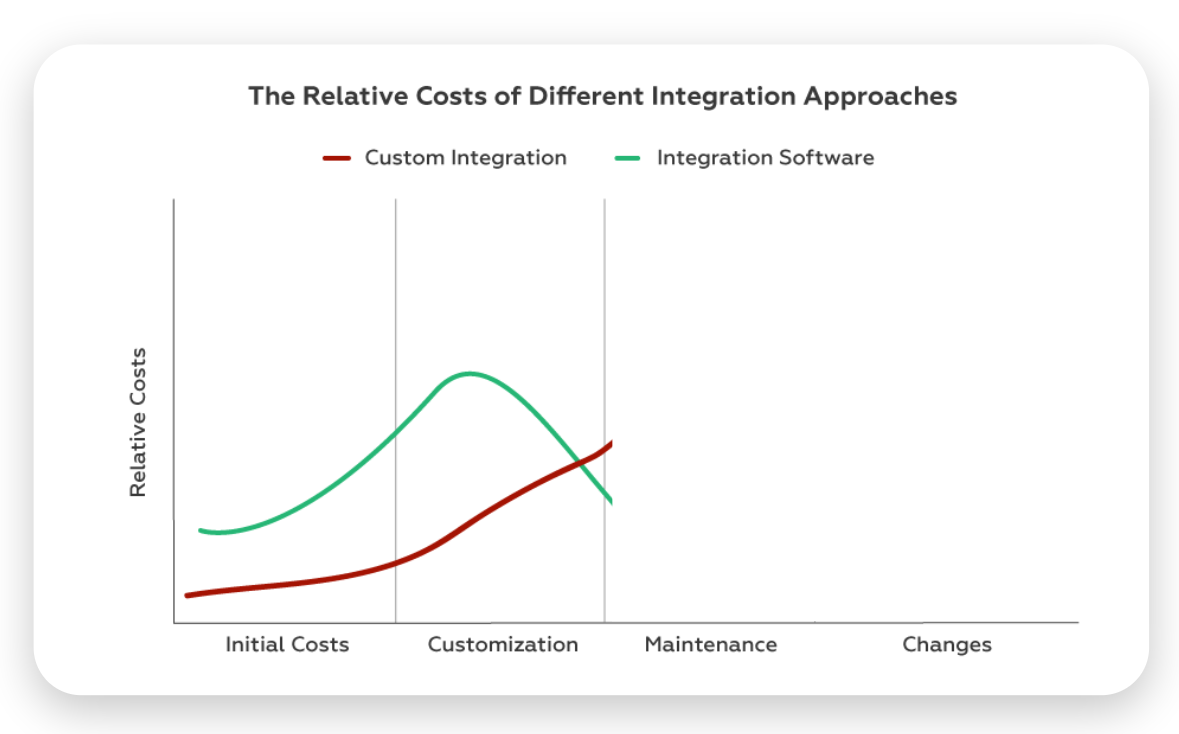
At first glance, this seems to be a better proposition, and that might be true, but only initially. The upfront costs of building an integration might be relatively low, but with time, maintenance costs go off the roof. 

Also, since integrations mature with time and so do their requirements, fulfilling them with built-in integrations can be time-consuming and costly, putting additional stress on critical technical resources. 

Moreover, internal teams need to be more diligent in maintaining documentation. So when the key talent leaves, the system becomes unwieldy to continue. 

3rd-party Integration Solution Providers

Perhaps the most logical outcome of all our discussion here is using third-party integration solutions. 

Firstly, they are experts in what they do, so getting an integration up and running is faster. 

Secondly, they provide the architecture necessary for getting the information flowing between the organizations and alleviate the issues of having to do that on your own. They also provide connections between hybrid cloud environments like connecting a cloud instance with an on-premise one. 

Thirdly, they have elaborate training, support, and documentation handy to answer any or all of your integration questions. 

Fourthly, since integrations are their bread and butter, newer, custom-made, and complex (or advanced) integration requirements can be implemented without any additional hassle. They support diverse integration methods like webhooks, APIs, middleware, etc. 

The initial cost of using third-party integration tools might seem higher, but with time the maintenance and customization costs are drastically reduced. 

iPaas is a type of third-party integration solution provider that is gaining a lot of traction. 

iPaaS (Integration Platform as a Service) Solution

iPaaS (Integration platform as a service) offers cloud-based platforms and services specifically designed to integrate various third-party applications and systems. 

These platforms help connect different software applications, services, and data sources, allowing organizations to automate workflows, share data, and improve overall business processes. 

iPaaS providers typically offer a range of features and tools, such as pre-built connectors, low-code/ no-code development environments, centralized management dashboards, monitoring capabilities, and security controls. iPaaS vendors are a subset of third-party integration solution providers, focussing specifically on cloud-based integration platforms and services. 

We can envision a lot of possibilities with the right third-party integration solution. One such possibility is to develop your integration network with your partners. 

For that to happen, let’s discuss the types of networks that exist. 

Types of Cross-Company Networks

Companies establish different types of connections between the applications they use. It can be a direct connection between systems or can be via a standard, central UI. 

Peer-to-Peer Integration

The first step companies usually adopt is to create a one-on-one integration connection between themselves and their integration partners. It essentially means you have a point-to-point connection with a single other company. This option is cost-effective and simple to implement. 

However, the simplicity of a peer-to-peer connection is also a disadvantage. It is difficult to scale this integration network.
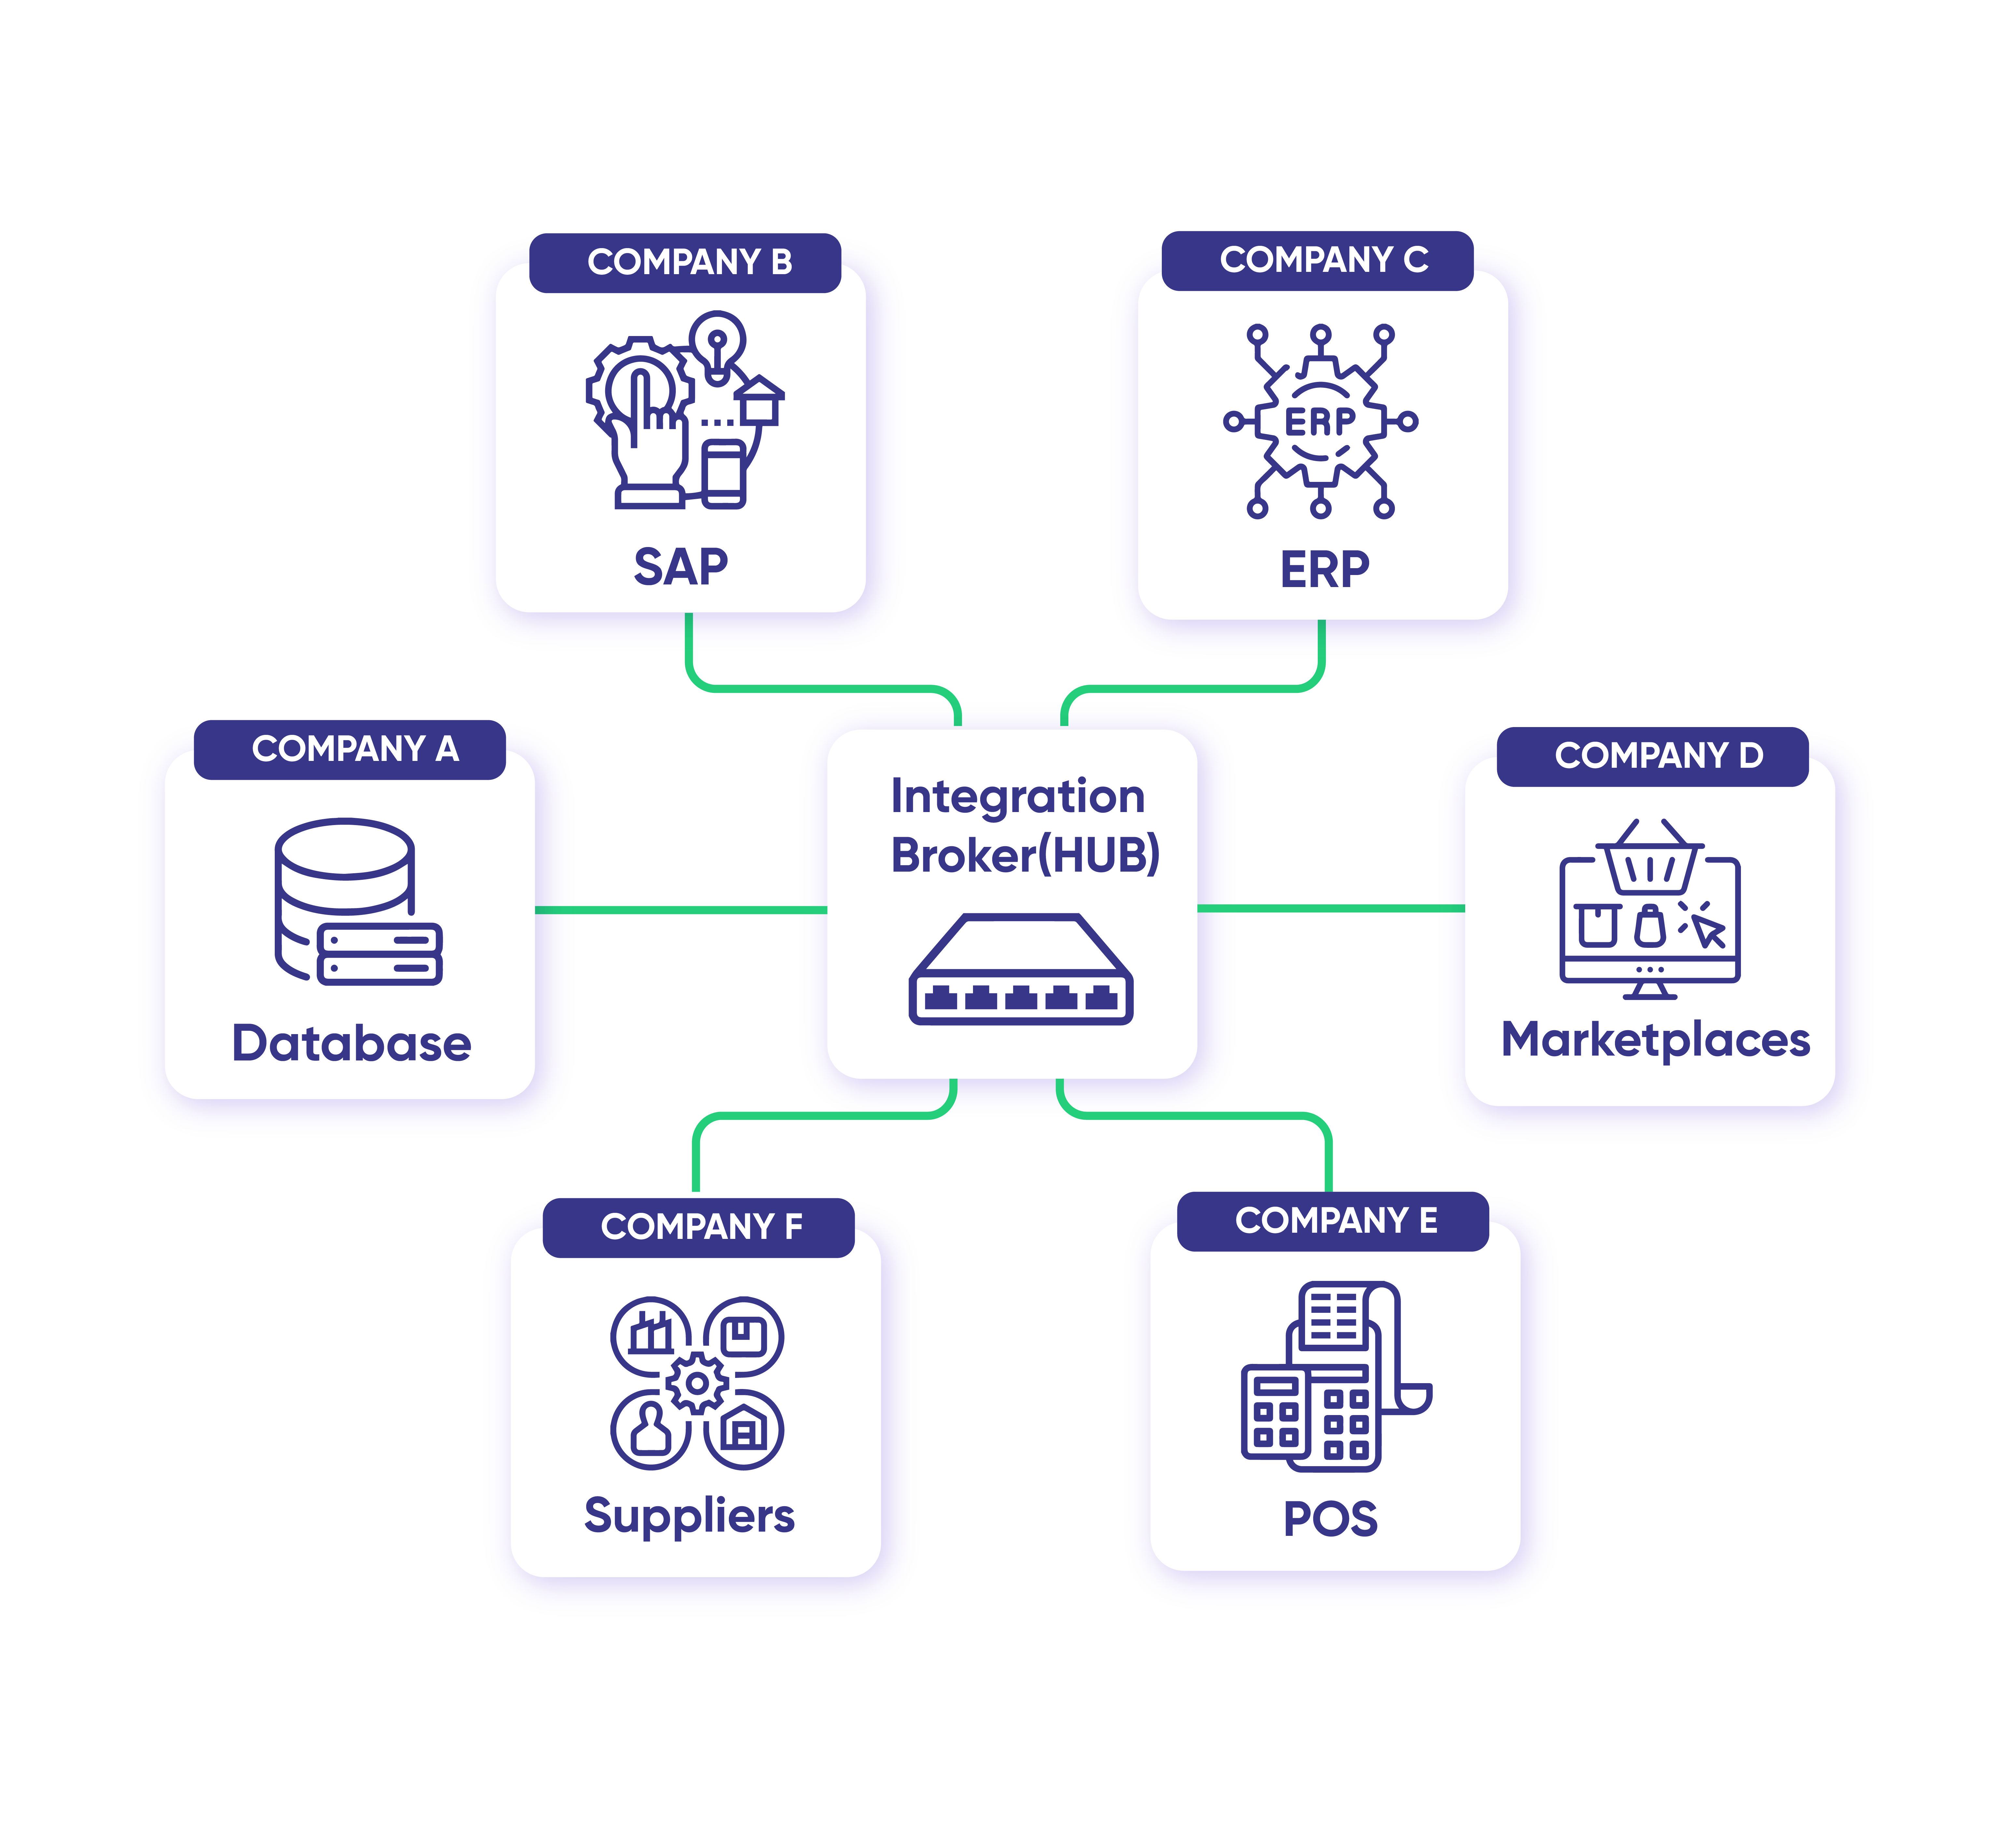
peer-to-peer integration

Star Networks

Star connections are also called a hub and spoke model, a popular approach that many companies adopt. 

Star network

The hub works as a central entity. Other entities connect to the hub as spokes. So, every single company has a direct connection to the hub. Note that connections between the spokes are possible, but then the star network becomes a meshed network.

ESB (Enterprise Service Bus)

Message broker (BUS)

Sometimes entities can also be connected in a serial or a train-like fashion. Its simplicity makes it easy to adopt, but this type of arrangement can create inefficiencies in the workflow and can be difficult to manage. 

Meshed Network

A sophisticated version of a peer-to-peer connection is creating a mesh network. In this type, every company can have multiple connections, all of them connected in a mesh pattern.

Meshed network

So you no longer have the limitation to connect to a single other company. This kind of network definitely holds the promise of optimal workflows across all of the integrations. 

To implement these various network models and connections, we saw why using an integration solution is the best option. 

However, it’s also important to understand how these solutions have evolved over the years and how modern enterprises can leverage them for cross-company integrations. 

Evolution of Integration Technologies

The evolution and rise of modern integration solutions can be traced back to the increasing complexity of IT systems, the growth of digital technologies, and the need for organizations to streamline their operations, improve efficiency, and deliver better customer experiences. 

Early System Integration

Before the widespread use of the Internet and digital technologies, organizations primarily relied on point-to-point integration solutions to connect different software and hardware systems. This was implemented using EDI (Electronic Data Interchange). 

These integrations were often custom-built and costly to maintain. They lacked scalability and flexibility.

The Rise of Internet and Web Services

The advent of the Internet and the development of web service standards like SOAP and REST revolutionized integration. Web services allowed applications to communicate over the internet using standardized protocols, making it easier to connect systems across different platforms and locations. This led to the emergence of SOA (Service-Oriented Architecture).

Enterprise Service Bus (ESB) and Middleware

ESBs and middleware platforms became popular as they provided a centralized hub for integrating various applications and services. ESBs allowed for message routing, transformation, and mediation, making integrations more manageable. However, ESBs were often seen as complex and costly.

Cloud Computing

The rise of cloud computing introduced new integration challenges. Organizations needed to integrate cloud-based applications residing on private clouds, public clouds, or hybrid clouds. Cloud-based Integration Platform as a Service (iPaaS) solutions emerged to address this need, offering scalable, cloud-native integration capabilities. 

The proliferation of APIs (Application Programming Interfaces) at this time fueled the API economy, making it easier for organizations to expose their services and data to external partners and developers. API management platforms and API gateways became critical components of modern integration solutions.

Microservices and Containers

The adoption of microservices architecture and containerization technologies like Docker and Kubernetes led to a shift in integration patterns. Integrations became more fine-grained, with each microservice responsible for its own data and interactions. Tools like service meshes and container orchestration platforms added a new layer of complexity but also enhanced flexibility.

The evolution and the future of modern integration solutions have been driven by the changing technology landscape, the need for greater agility and scalability, and the growing importance of data and real-time interactions. 

The Future of Integration 

Let’s peer into the crystal ball and glimpse what the future holds for integration. 

Low-Code and No-Code Integration

To democratize integration and reduce the reliance on highly specialized developers, low-code and no-code integration platforms have gained popularity. These platforms allow business users to create integrations with minimal coding, accelerating digital transformation efforts. 

Hybrid and Multi-Cloud Integration

As organizations increasingly adopt multi-cloud and hybrid cloud strategies, the need for seamless integration between on-premises and cloud-based systems continues to grow. Modern integration solutions provide the flexibility to connect disparate environments, giving rise to HIPs.

HIP (Hybrid Integration Platform) 

HIP (Hybrid Integration Platform) enables organizations to seamlessly integrate cloud-based applications (public/ private) and on-premise ones and makes them work as a single unit. 

Hybrid Integration Platform

It works on two basic principles:

  1. Provide a way to handle the different protocols every application has. For instance, HTTP, TCP, etc. 
  2. Convert data into a common format that is understandable and makes sense to the integrating systems. For instance, JSON, XML, etc. 

AI and Machine Learning Integration 

The integration of AI and machine learning capabilities into business processes is becoming more common. Modern integration solutions often include AI-driven features for data transformation, prediction, and automation.

Next-generation middleware, based on AI capabilities will ensure accurate mapping, transformation, and business process automation between systems. 

However, you need to be mindful of the adverse effects of this AI boom. For instance, it’s important to avoid AI hallucinations, resulting in incorrect or unacceptable assumptions or answers to integration problems. To work on the complexities of integrations, use AI to actively research and come up with the best approach. 

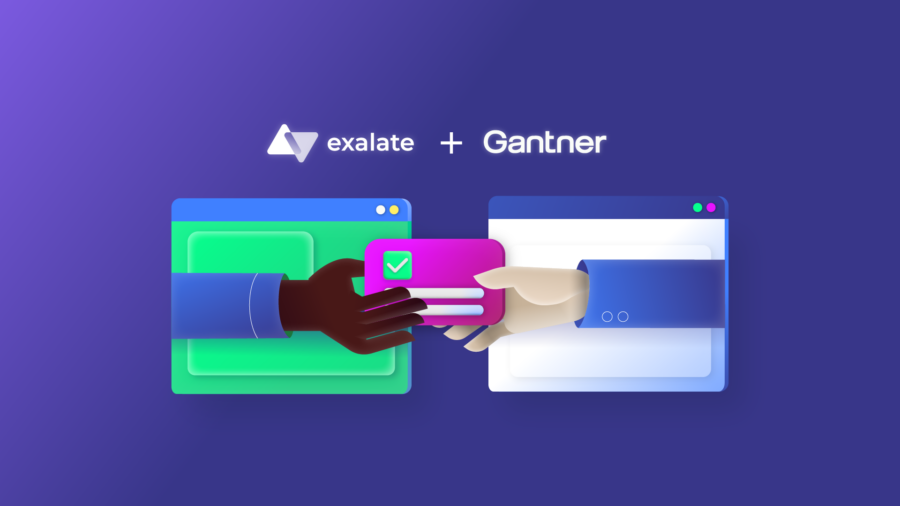
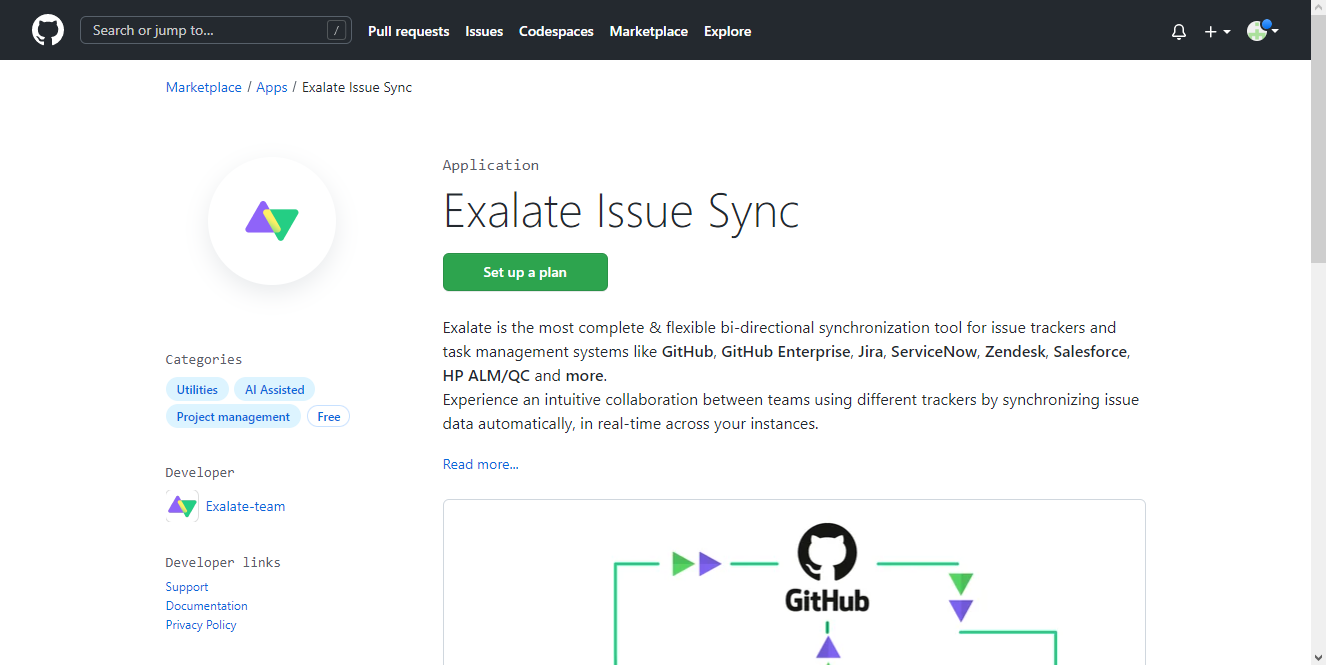
Exalate: A Cross-company Integration Solution

Today’s integration solutions need to be more agile, distributed, scalable, and user-friendly than ever before, enabling organizations to connect to external partners and applications without any hassle. The solution they need must also rapidly adapt to changing business requirements and handle the ever-evolving data volume.  

In this world of rising integration solutions, the answer to all of the requirements above is Exalate. 

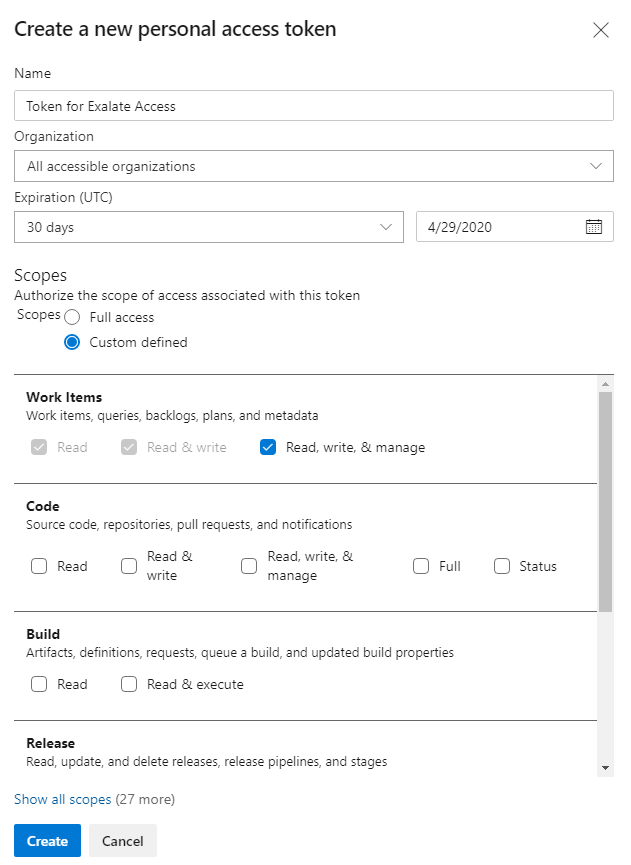
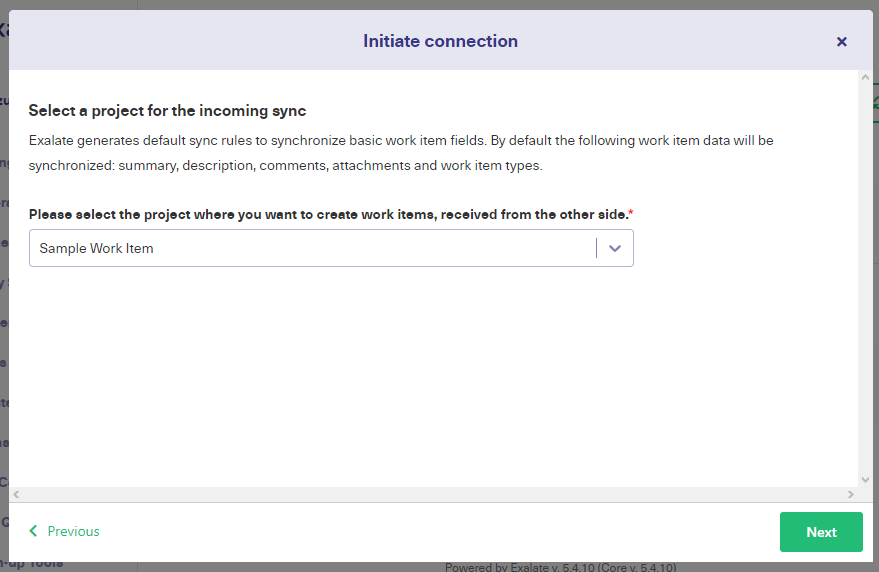
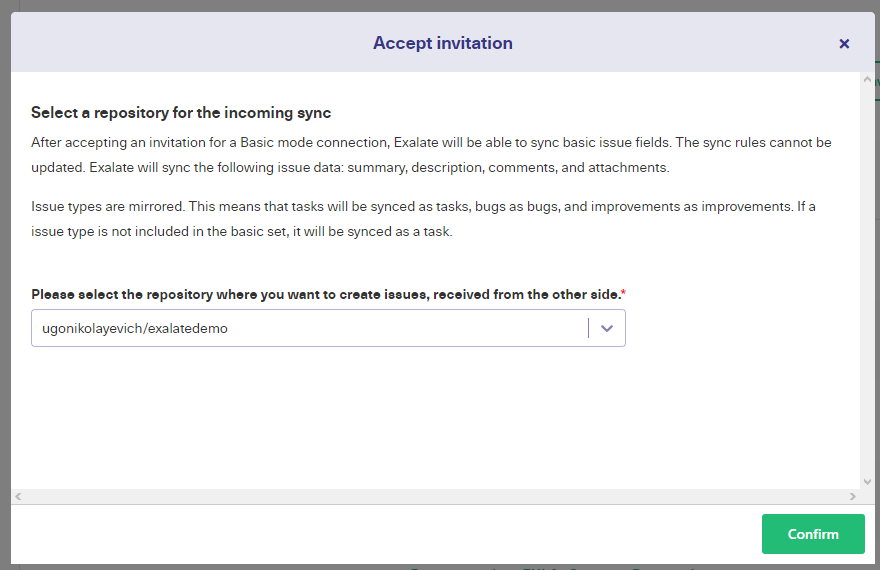
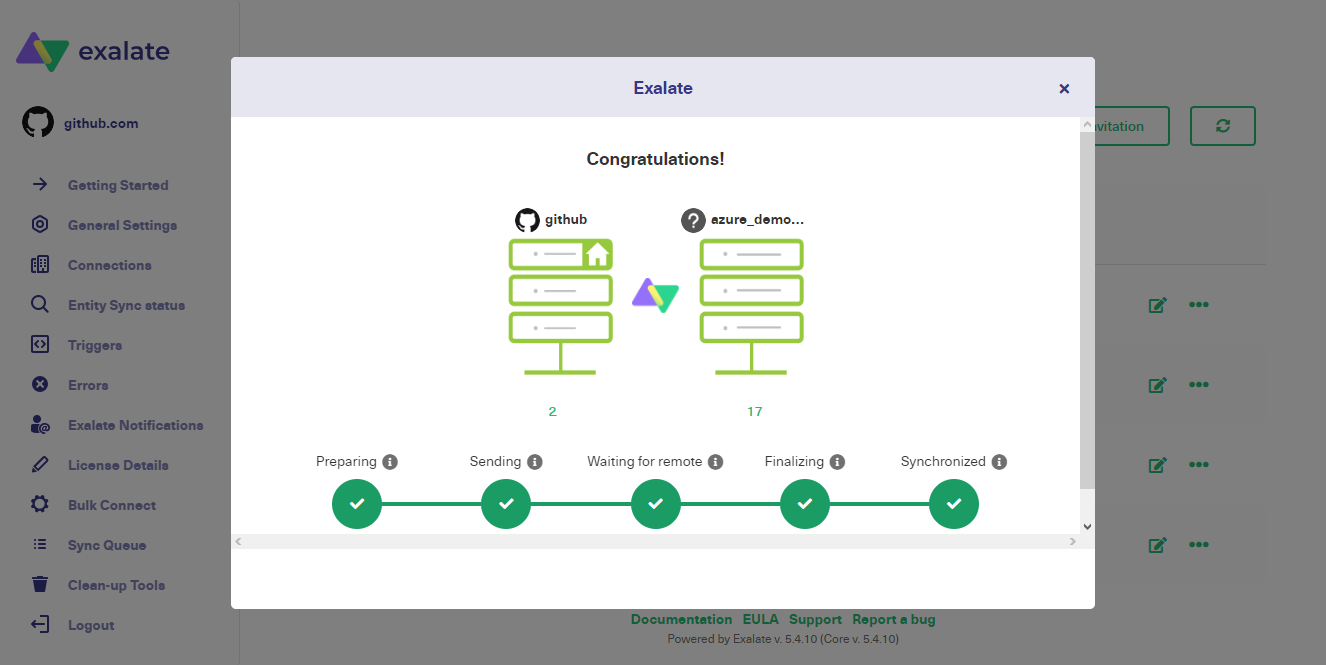
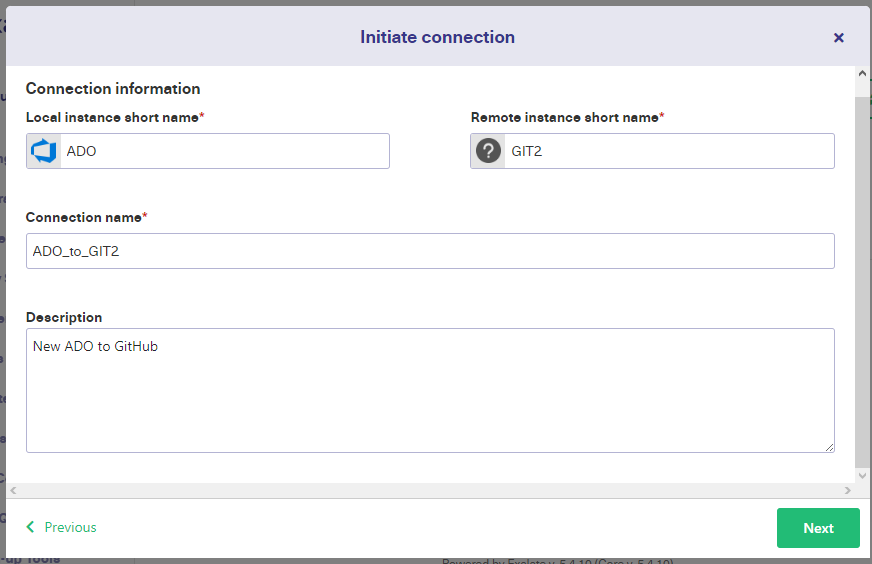
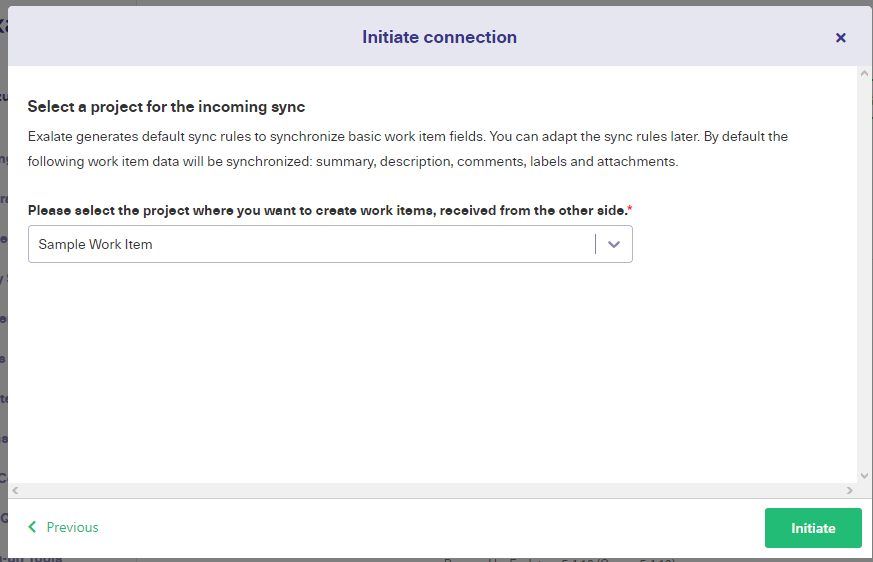
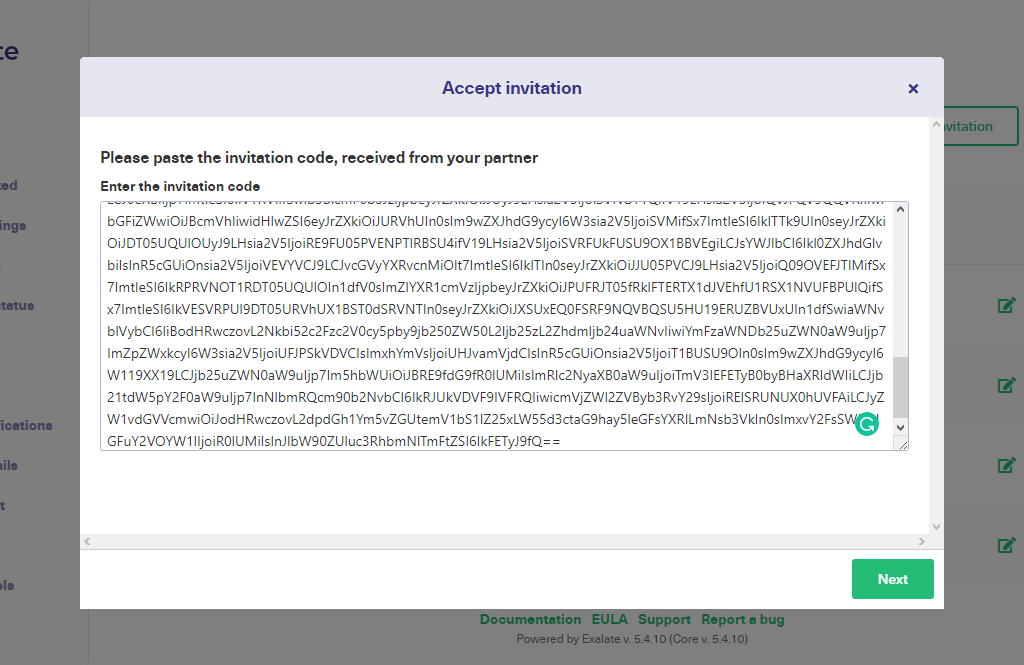
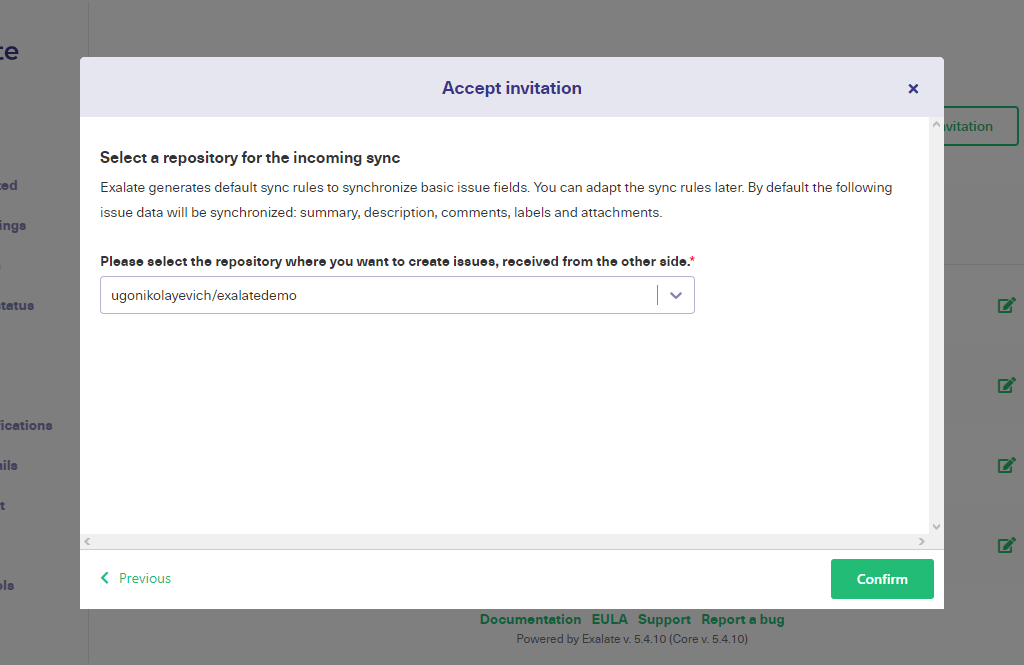
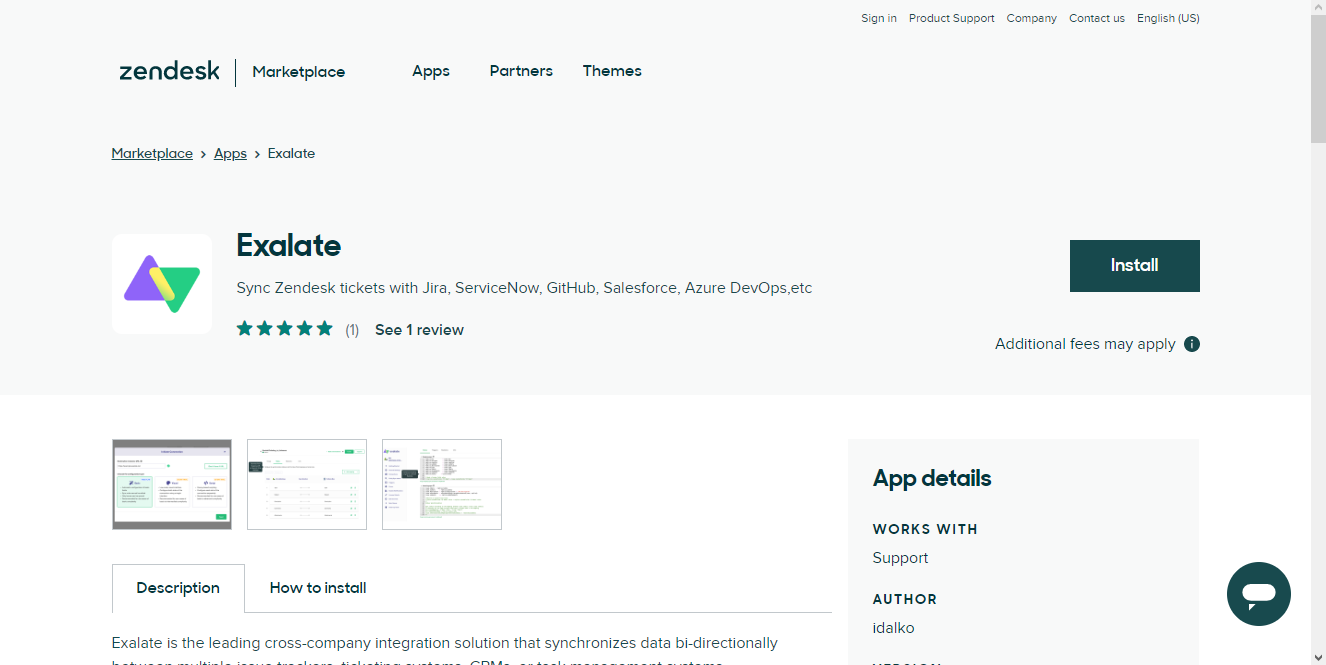
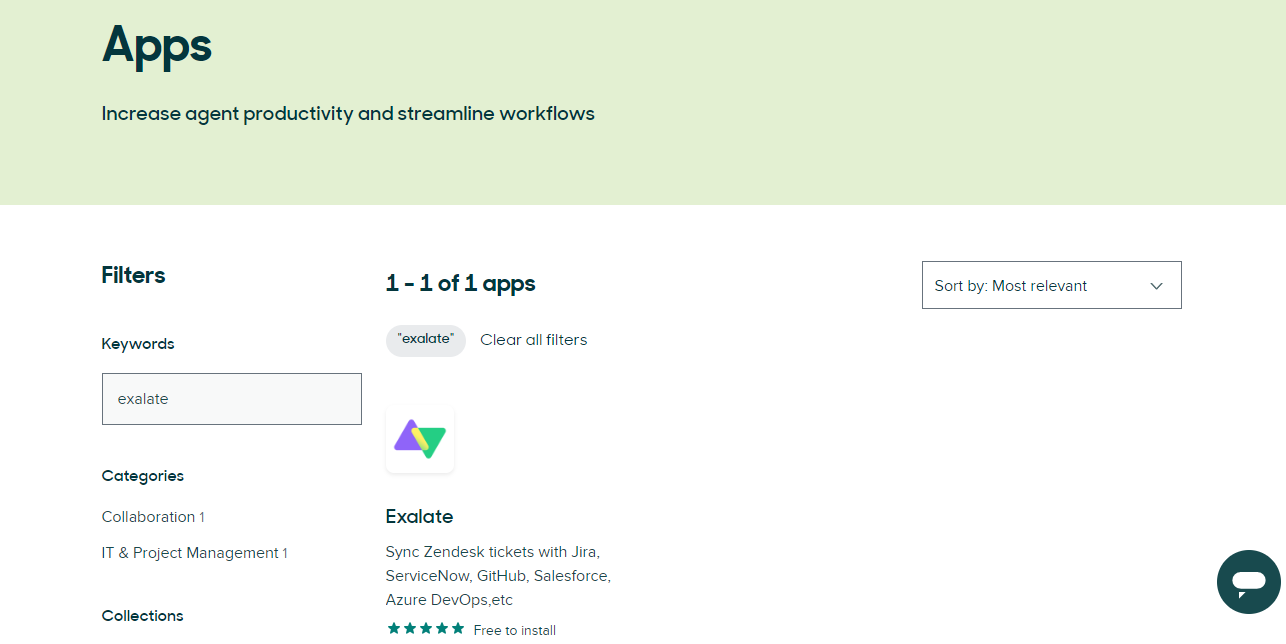
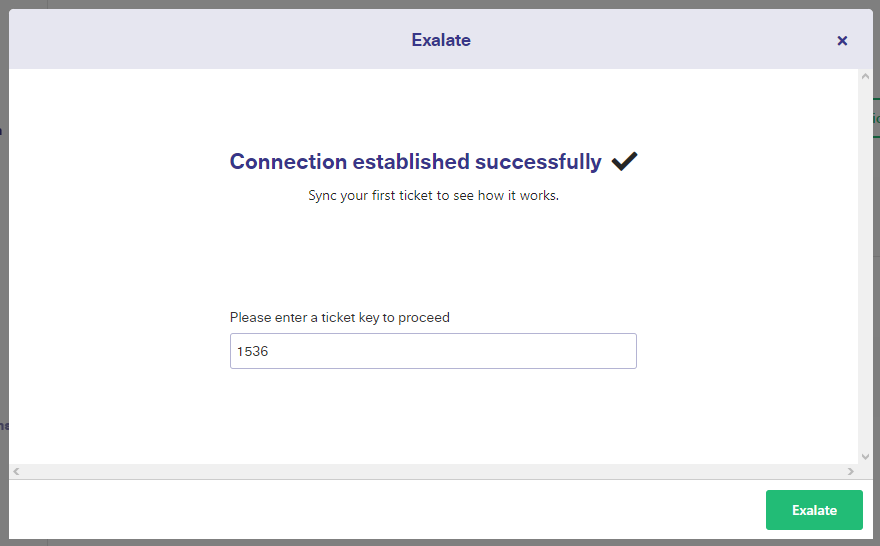
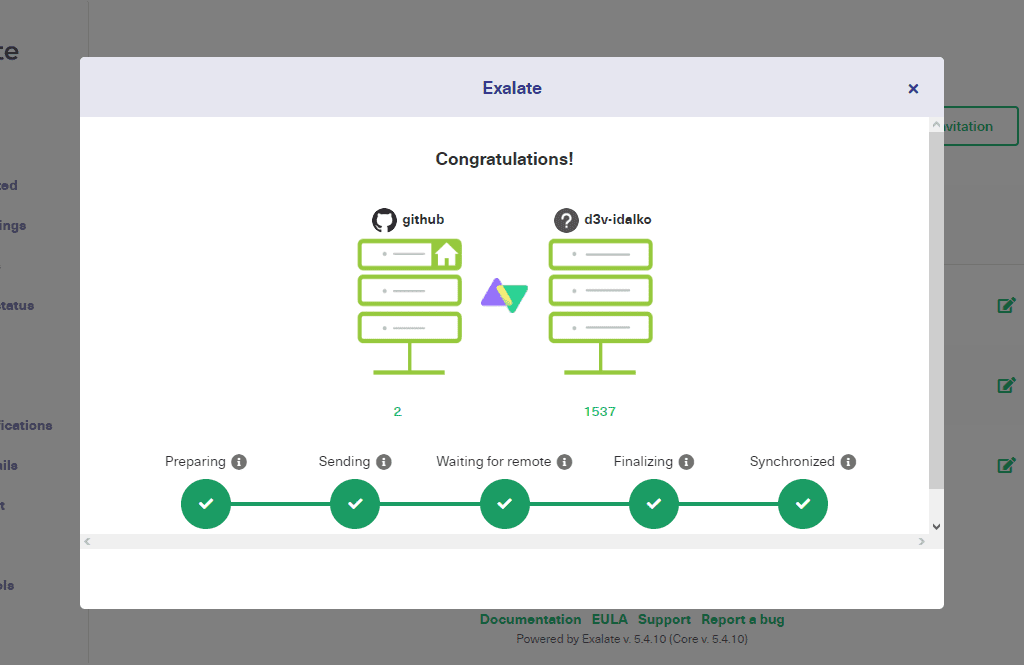
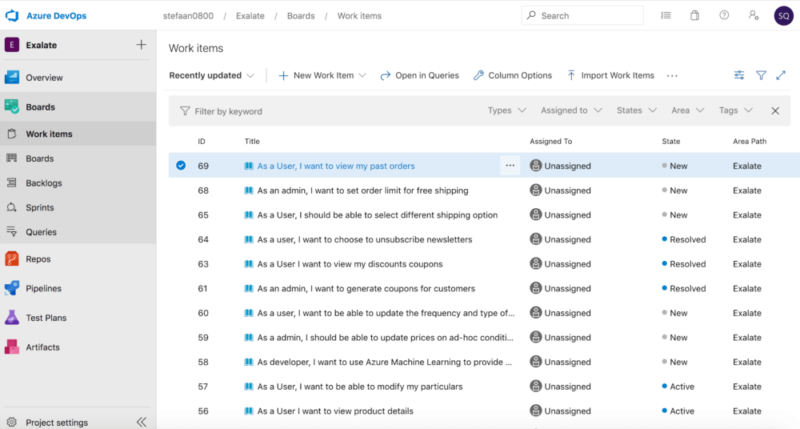
Exalate is a modern integration solution that has some unique features and is a perfect fit for a cross-company (or intra-company) integration scenario. It provides uni or bi-directional synchronization in real time between different applications like Jira, ServiceNow, GitHub, Azure DevOps, Zendesk, Salesforce, etc. 

Some key Exalate features are: 

  • It can be deployed on the cloud as well as on your on-premise applications, paving the way for hybrid integrations. 
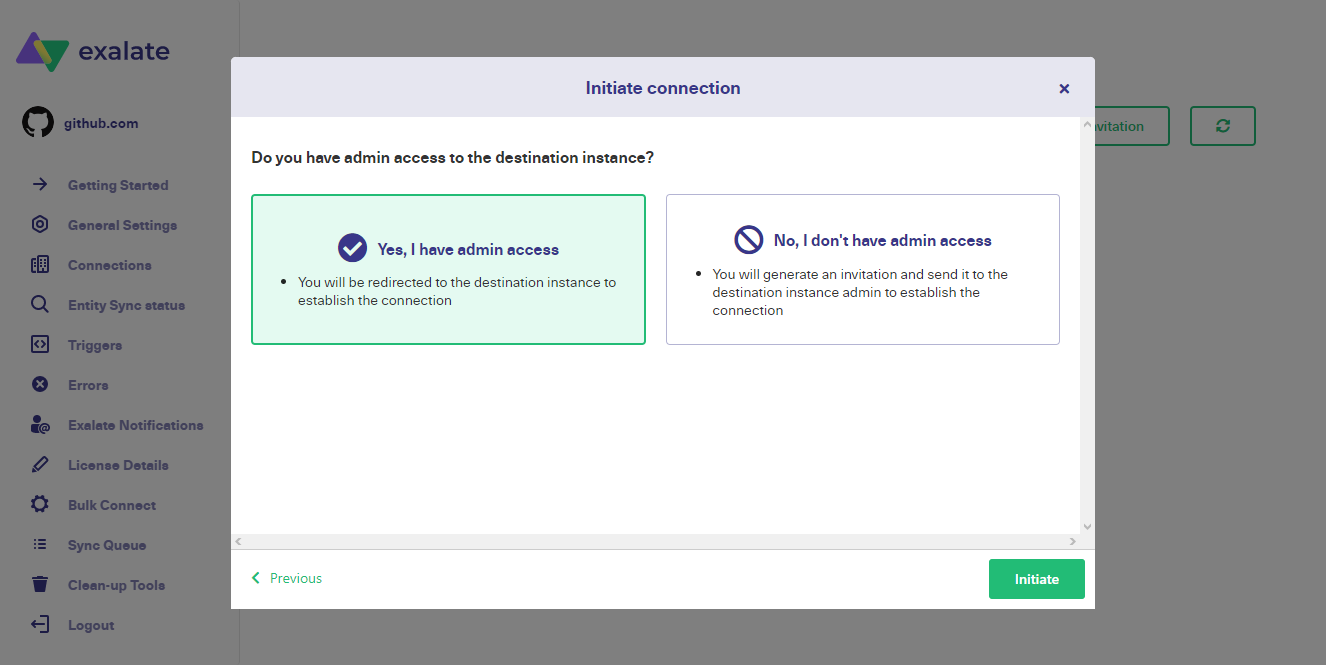
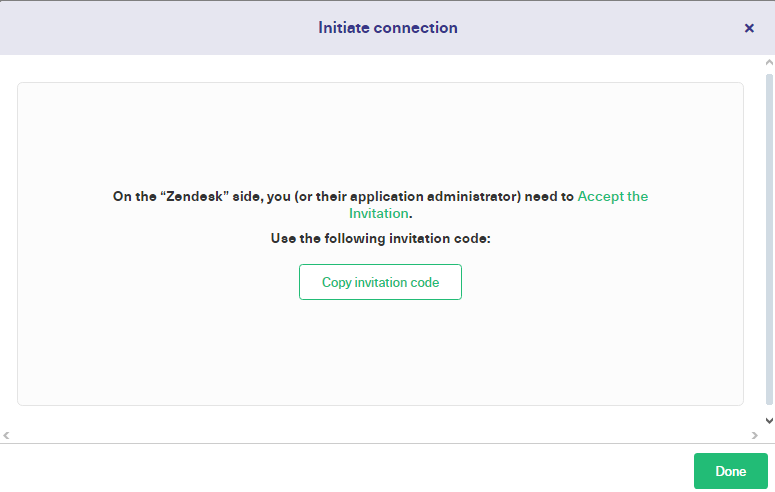
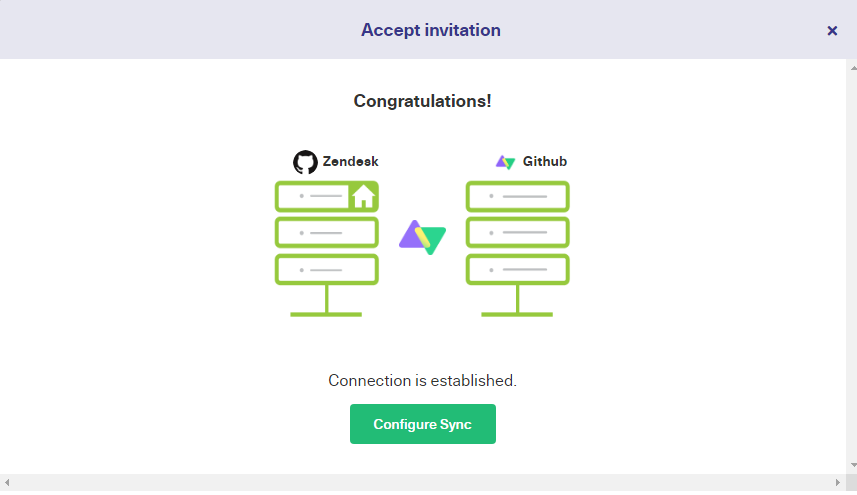
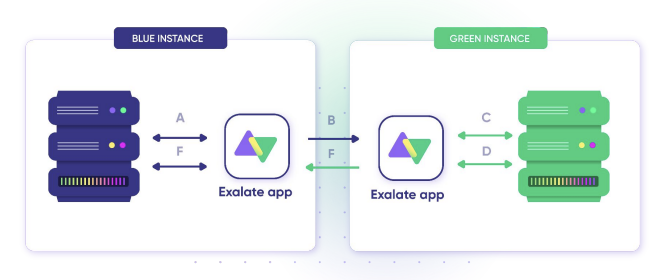
  • It is the only solution that supports decentralized integration. 

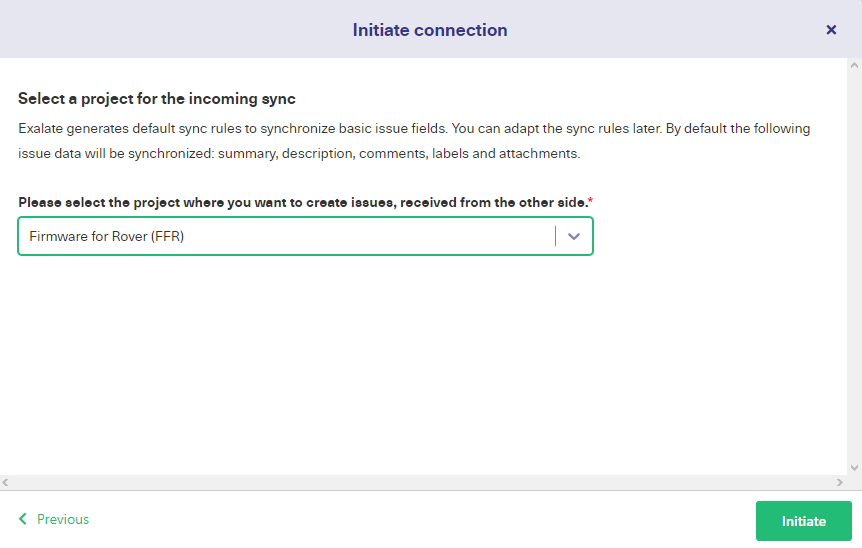
Decentralized integration allows you to independently control the information you share and receive. This is contradictory to the usual centralized integration architecture that forces you to control integration settings through an uncommon, often unfamiliar UI. It’s also necessary to maintain any integration changes in the common interface (UI). 

With decentralized integration, you can decide what to send and receive without keeping the destination admin in the loop. Well, involve them the first time you set up the integration, but after that, you have complete control over your incoming and outgoing information.
In a cross-company scenario, this can be a huge differentiating factor. For instance, workflows are hugely specific within a single company, and it becomes difficult to orchestrate them with another company with a different workflow. Neither of them wants to modify their workflows or build a new one while still wanting to get the information they need within their application. With a decentralized integration solution, each company initially contributes toward setting the expectations of the workflow. And once that is done, each side can independently make decisions without worrying about how it affects the destination. 

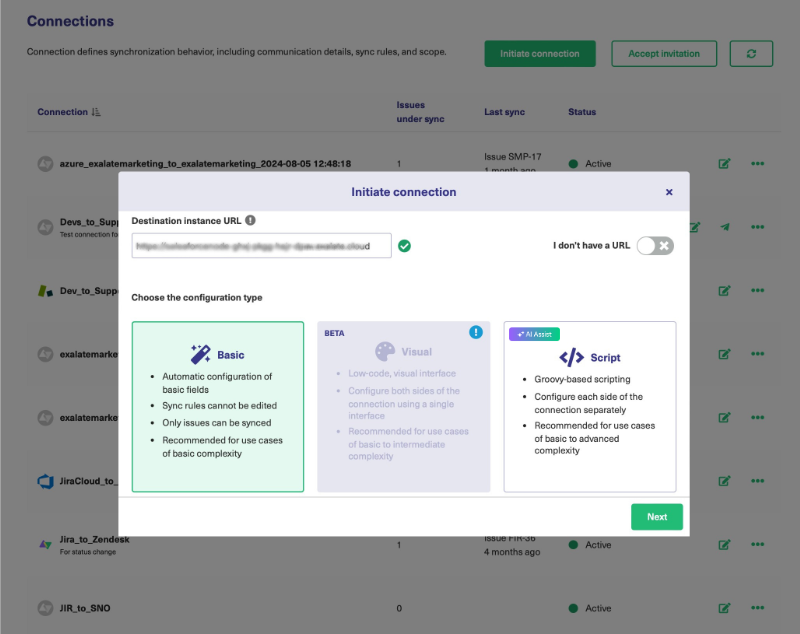
  • It has a distributed architecture that ensures the integrating systems are loosely coupled and that the admins will not mess up each other’s sync. This increases the scalability and maintainability of your integration. For this reason, Exalate needs to be installed on both sides of the integration.
  • It offers a no-code/ low-code integration approach. 

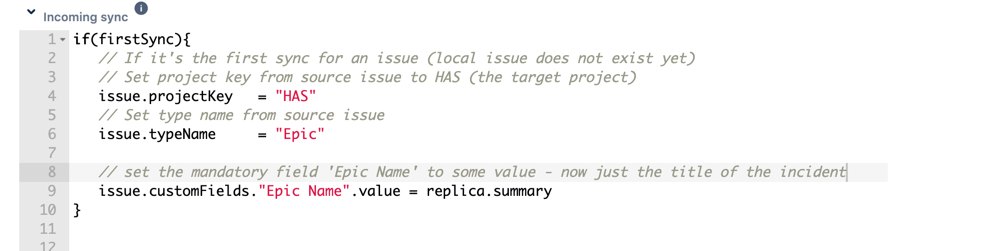
The low-code approach uses an intuitive Groovy-based scripting engine that comes with sync processors to control incoming and outgoing information independently on both sides. These processors can map, transform, filter, and sync any information, the way you want. This scripting capability allows Exalate to accommodate even the most complex integrations. 

  • It has a reliable transactional sync queue that allows it to resume synchronization from the point of interruption in case of downtimes or system failures.  

How Exalate Envisions Growth Towards A Worldwide Network?

At Exalate, we acknowledge that integrations are complex, and so we make them simple for our customers. 

Exalate for a P2P (Peer-to-Peer) Connection

If you are an organization that wants to connect to a single other department, team, or company you can establish, what we like to call, a P2P connection. 

For instance, your dev team works in Jira and your customer support team relies on Zendesk. With the help of an Exalate P2P connection, you can connect your dev and support teams, so they always remain on the same page. If you choose to automate your dev workflow or streamline the customer support process, all of your needs will be handled. The no-code and low-code modes in Exalate allow you to implement basic to advanced integration scenarios. 

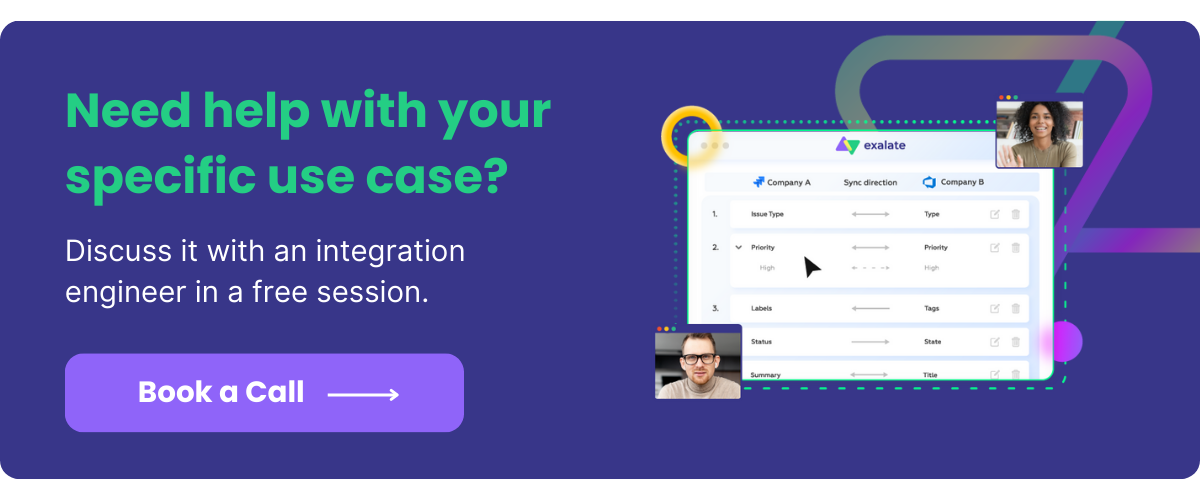
Book a demo with an integration engineer to see this in action. 

Exalate for MSPs

If you’re an MSP or MSSP, we know you struggle with disconnected customer environments, waste time and effort in manual data exchange, have security concerns, and want to maintain a balance between growth and service quality as you scale. 

The Exalate for MSPs is an A-Z service that handles tickets, issues, incidents, or tasks integration across your teams and organizations. With this program, you can expect enhanced service management, efficient incident management, enabled cross-company project management, and much more. 

We implement end-to-end integration with your partners or customers, offer dedicated support and maintenance, tailor-make your connections for legacy systems, and ensure top-notch security and stability. 

Discuss your integration use case with us and find out how Exalate can help you grow faster and at scale.

What after this? Do we stop? Or do we dream bigger? 

Can your cross-company integration effort as an MSP lead to a global network of connected companies? 

A network where all the companies have streamlined communication between each other and information exchange takes place at the flip of a switch. 

A Global Network of Connected Companies

At Exalate, we envision a global network of connected companies. 

Imagine an MSP operates its own integrated network which involves a range of applications catering to specific business functions. The network can be any of the ones we discussed, like peer-to-peer, hub and spoke, etc.  

Such an MSP wishes to integrate with another independent (or outsourced) entity either one of its customers, partners, vendors, or suppliers. Each of these external parties operates its own integrated network with a different technology stack. 

There is a need to connect these fragmented networks that are fully distributed with no central operational control. Each system in the network is motivated to ensure there is end-to-end connectivity of every part of the network. 

Such a connected network of companies ensures integration is an intrinsic business strategy rather than an afterthought. It blurs organizational boundaries and not only integrates information but also people, ideas, and processes. 

The journey toward creating this global network of connected companies is a path paved with innovation, collaboration, and adaptability. Exalate will ensure you reach the end of this journey and continue to thrive in an interconnected world. 

What Lies Ahead? 

At our core, integration is part of our DNA, and with great enthusiasm, we venture into the dynamic realm of ChatGPT. We grasp the significance of staying at the forefront of innovation and are currently delving into the possibilities AI technology offers to enhance Exalate’s capabilities and reach a wider audience. Our unwavering commitment lies in executing these advancements effectively, precisely, and with utmost security in mind.

Exalate AI Services

We are embarking on three primary AI-driven initiatives:

1. Exalate for ChatGPT: We’re infusing AI into our support portal to elevate the efficiency and performance of our support services and operational processes.

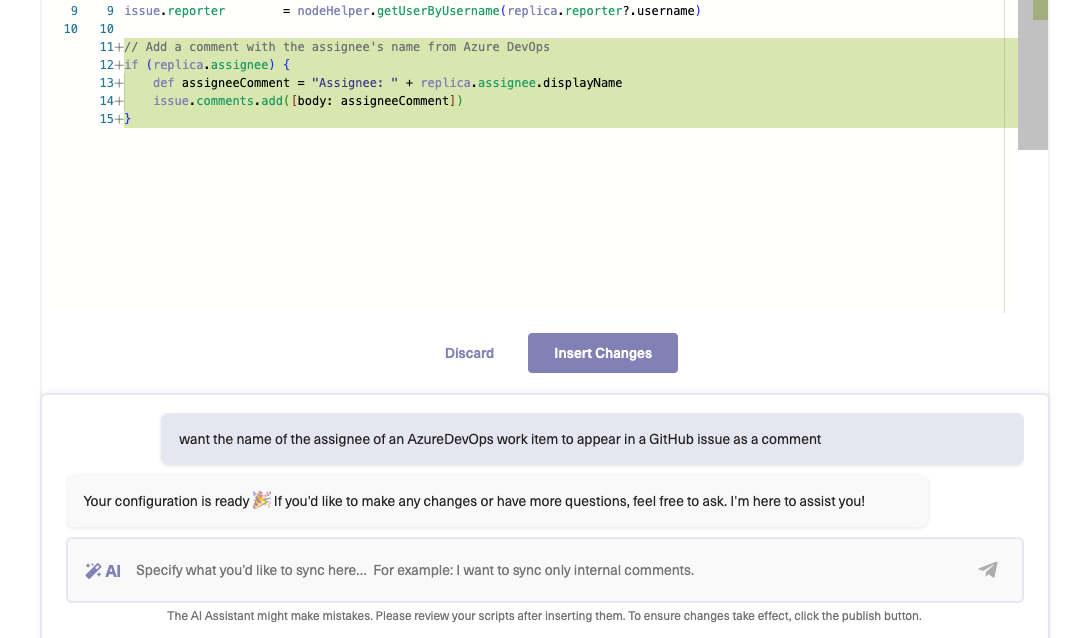
2. Assisted Integration: Within Exalate Script Mode, we’re creating a feature that operates as a collaborative co-pilot for Github, simplifying integration tasks.

3. Auto-generated Integration: We’re charting a course to introduce a feature that enables you to present your use case and initiate integration with a single click, while AI takes care of the rest. This promises to streamline the integration creation and maintenance process.

Conclusion

Integration (intra or cross-company) is a humongous task in itself. The complexities and requirements of such an integration are more stringent and advanced in a cross-company setup. Security needs grow manifold and they need to be handled by some advanced features. 

We saw how decentralized integration with advanced integration capabilities can help alleviate these security concerns and yet provide autonomy in handling your data the way you want. 

Exalate is one such integration solution that has been around for a while and is an expert in decentralized integration. It is also flexible enough to handle the deepest integration requirements via its scripting engine. And more than that, it helps you put integration at the forefront of all your business needs. 

And at the end of it all, it stands by its vision of creating a global network of connected companies. 

Recommended Reading:

How to Set up a Zendesk GitHub Integration: The Complete 2025 Guide

Zendesk GitHub Integration

Tracking and storing information plays an important part in the course of a business’ performance. It is crucial to ensure that your data is accessible, consistent, and useful. It’s especially challenging for teams with unique or variable needs. And the right software integration solution, such as a Zendesk GitHub integration, can assist teams in having their needs met.

In this guide, we’ll discuss the need to set up a Zendesk GitHub integration and how to share information between these two platforms. We’ll also show you how to manage data and allow teams to use it according to their needs and roles.

Note: In this tutorial, we will be using a software integration tool called Exalate to set up the integration. You will learn more about this throughout this guide.

Why Set Up a Zendesk GitHub Integration

Zendesk is one of the major players in customer service, with its software used by over 100,000 customers around the world. Its typical users are service desk teams in mid to large-sized companies.

These teams may also have other teams using different software, and the right integration solution is what can help them work together easily and in harmony.

Some of Zendesk’s high-profile clients include big hitters like Airbnb, Squarespace, and Vimeo. Take a look at the Zendesk blog to learn more about the range of businesses that use it.

GitHub is an online source management and versioning platform that allows teams to share code easily. It is developer-focused and allows team managers to track all the changes made by team members, and make sure everyone’s changes work with everyone else’s. 

It also allows issue reporting, letting you keep track of what needs to be done. Issues have a lot in common with Zendesk’s tickets and the information they store will often overlap.

Why Integrate Zendesk and GitHub

Now, if you have different teams working on different platforms, they will need a convenient way to exchange data between themselves.

For example, your customer service team might enter tickets into Zendesk, and your engineers might be copying this data over to issues on GitHub. This takes time and if done manually, can be prone to error. 

If you can automate the process, then things will happen more smoothly. You will also save money, as nobody is needed to perform the task of transferring information from one place to another.

Note: Learn how DPG Media had to assign a full-time task of copying data to one of their employees in Zendesk. And how they used synchronization to completely eliminate this task.

As well as the tickets themselves, related information can also be shared. If both teams have access to all relevant information, they will be better equipped to do their jobs, saving you quite some time.

Teams get the benefit of using a tool they are already familiar with if they can update the same issues on their own platforms. They stay focused on their area of expertise and are also provided with smooth, up-to-date communication with other departments. 

Doing this automatically means you don’t have to worry about the status of the issue, or that you are missing key pieces of information when you see what is available in either system.

How to Choose the Right Technology for Setting up Your Zendesk GitHub Integration

There are a few things to take into consideration when selecting a suitable integration solution:

1. Reliability

The integration is supposed to save you work and make sure all your teams are working with consistent data. If it doesn’t work well, that means additional headaches. You want a system that keeps integration running even when, for some reason, one side is not available.

2. Flexibility

As well as synchronizing two systems, we want the flexibility to recognize the different roles those systems play and to filter the data they store accordingly. Mapping attributes is just the first part. Tuning the data to the needs of different teams is a key part of using it effectively.

Plus, you’ll want the tool to be flexible enough to change with you as your workflows and systems change. For example, you want the tool to support more integrations than just GitHub and Zendesk. Then you can use the tool to set up a similar synchronization with other parties or when your partner switches their tool.

3. Decentralized Integration

The system should be robust enough to handle changes to either tracker. The trackers are able to exchange data and should be able to cope if this data is differently structured or contains additional information on either side.

In short, either side needs to be able to exchange data however they want to, independently from the other side.

For this guide, we’ll set up the integration using Exalate. Precisely because Exalate was built to fulfill the above requirements. 

Next, we get to the good part: setting up Exalate with Zendesk and GitHub to enable a bidirectional integration. 

How to Set up a Zendesk GitHub Integration (A Step-by-Step Process)

It’s now time to connect Zendesk and GitHub and set up a two-way sync between the two platforms.

Note: If you prefer video tutorials, you can watch this quick demo.

Step 1: Install Exalate on Zendesk

To install Exalate on your Zendesk instance visit its integrations page.

Note: You can also get the app on the Zendesk marketplace.

exalate for linking zendesk github

There are a couple of things to do before installing.

First, you need to create a proxy user and access token so that exalate can communicate with Zendesk. The proxy user is a regular Zendesk user, so create a new user or use an existing one.

Then, to generate an access token, log in to Zendesk with your proxy user. Navigate to the API page in the Channels section of the left-hand menu.

Click on the grayed-out switch to enable Token Access (unless it is already enabled).

Then click on the plus button to create a new token.

Copy the long text string somewhere. Click save, so that your changes are kept.

zendesk api token

Next, find the Exalate app in the marketplace and install it.

You’ll see an installation screen where you can enter your proxy account email address, along with the token string you just generated.

Now an Exalate icon should appear in the left menu bar. Click on that icon.

exalate for zendesk github integration

Now you are in the Exalate UI. Accept the EULA. Then you should navigate to the licensing page. And request the Free 30-day Trial.

exalate eula for zendesk

Enter your email address and then check your inbox for the key. Click the green ‘license key’ button and enter the key to activate your trial.

To learn more about the installation process, have a look at this Exalate documentation page.

Step 2: Install Exalate on GitHub

As you did for Zendesk, start installing Exalate for GitHub from the integrations page.

The reason why you should install Exalate on both Zendesk and GitHub is to keep the autonomy and control for both sides.

You can also log in to your GitHub account and click on the marketplace.

From there, enter Exalate into the search box, or click here. As with Zendesk, Exalate has a free trial.

Click on the green “Set up a plan” box, then the “Install it for free box” to get started.

Note: Exalate is also available for GitHub Enterprise. For installing Exalate on GitHub Enterprise Cloud, check this article.

exalate for github issue sync

After you confirm your installation, you’ll need to grant Exalate permission to access your GitHub account. By default, it has access to all your repositories, but you can limit access to specific ones if you prefer. In either case, Exalate only needs access to metadata, issues, and pull requests, not the code itself.

exalate github sync installation permission

Next, you’re directed to Exalate’s own site, where you need to accept the user agreement to continue.

After that, you need to select how Exalate will access your GitHub account. You can use your username and password, or create an OAuth token.

The username/password method will likely be phased out at some point, so be aware that you might have to change it later if you pick that option.

After this, you’ll need to request an evaluation license for GitHub, in a similar way you’ve done for Zendesk.

Note: If you do not request an evaluation license, you will not be able to synchronize issues later.

Step 3: Connect Zendesk and GitHub

Now that you’ve installed Exalate on both sides, it’s time to set up a connection between GitHub and Zendesk. Let’s take a look at how to do this.

We want tickets on one platform to show up on the other, and we want to create some rules to decide which ones are shared.

After setting up GitHub in the Exalate app, you should be redirected to a welcome screen.

Click on the “Connections” tab on the left-hand menu. From there, click on “Initiate connection”.

Configuration modes in Exalate

Next, you’ll need to enter the details of your other connection. In this case, that will be your Zendesk account URL.

As seen in the screen above, you will be prompted to select one out of the two configuration modes. The Basic mode allows you to sync tickets or issues according to default mapping rules which cannot be changed. The Script mode on the other hand allows you to change sync rules and experiment with advanced features. You can also use AI in the Script mode. We will cover that in the next section.

We will have a look at both these modes separately as they involve different ways of setting up connections.

Continue with the Basic Mode

Once you click on “Basic” and then “Next”, you will be asked to select a repository from a drop-down list. 

initiate zendesk GitHub connection

Select the correct one, and hit “Next”. 

You are then required to confirm whether you have admin access to the destination instance, in our case, the Zendesk instance. Click “Yes, I have admin access” if you have the required access. If you click on “No, I don’t have admin access”, you will be required to copy and paste an invitation code manually on the Zendesk side. 

For now, we click Yes and then “Initiate”.

After verifying the admin access, you will be taken to the Zendesk side. Since Zendesk is a ticketing tool, we do not have to select any repository as we did on the GitHub side. 

The connection here is successfully established, and you will be required to enter the ticket key directly. This ticket key will denote the ticket number you want to synchronize with the GitHub side. 

Enter the required key number and click “Exalate”.

successful Zendesk GitHub Integration

Wait for a while to get the ticket synchronized…. 

And after some time, Viola! You already have your ticket synchronized successfully. 

successful GitHub zendesk sync

You can sync tickets or issues as shown above or you can create automatic triggers for syncing them, you can even sync your tickets/ issues in bulk.

Continue with the AI-assisted Script Mode

Give your new connection a name and an optional description. A meaningful name and detailed description will make these easier to work with later, especially if you set up several connections.

The local instance’s short name denotes GitHub since you are initiating the connection there, and the remote instance will be Zendesk. 

After entering the details, click “Next”. The next screen will prompt you to “Select Repository” from a drop-down list. Select the appropriate one and click “Initiate”

An invitation code will be generated now. Copy the invitation code somewhere. We’re done with GitHub for now, but if you look at the connections area, you can see our newly established connection listed there as “Pending”. It will become “Active” only when verification is completed on the Zendesk side.

Exalate invitation

Now go back to Zendesk and take a look in the Zendesk app tab. You can also go to Zendesk if you click “Go to remote” on the screen above. Click to accept the EULA license if you haven’t already. You should see a screen such as this: 

accepting github zendesk sync invitation

Click on the light gray “Accept invitation” button and paste the code you just generated into the text area. Click “Next”.

Zendesk Github connection successful

After this step, your connection between Zendesk and Github is successfully established. You can straightaway click on the “Configure Sync” button, or you can configure the connection by editing it later on. Both approaches will take you to similar screens.  For now, we click the button.

To edit the connection later on, you can click the edit connection icon next to the name of the connection listed in the “Connections” tab on the Exalate console. 

Step 4: Configure your Connection to Determine What Information Gets Shared

Now you’ll see a list of the automatically generated rules. You don’t need to change these yet, but if you want to configure things more precisely, you can do so.

Sync rules in GitHub

Take a look at this guide to learn more about sync rules and how to work with them using script helpers.

If you’re happy with the rules and don’t want to change anything at this point, click on the “Publish” button to set up the connection.

Use AI to Generate Sync Rules

Exalate’s Script mode now features AI Assist, which appears as a chat window in both your incoming and outgoing sync rules tabs. Simply type in your sync requirements, and AI Assist will generate the scripts for you.

The scripts are crafted based on your input, existing configurations, and Exalate’s scripting API.

Keep in mind that AI Assist—like any AI—can occasionally make errors. So, the more precise and detailed your prompts are, the better the results will be.

Here’s an example of how it works:

Let’s say you want to map and sync statuses between Zendesk and GitHub. You could enter something like this into the AI chat:

For incoming sync (GitHub): “Create a status mapping that sets GitHub’s open status to Zendesk’s open status and done to done in the GitHub incoming configuration.”

AI assist in Exalate

After a moment, the script will be generated.

Red script rules indicate lines that will be removed from the current scripts, while green ones show new lines to be added. You can either accept or reject these changes. If needed, refine your prompt. Once you’re satisfied, publish the updates.

Step 5: Set up Automated Synchronization Triggers

In the Zendesk Exalate app, click on “Triggers”, and then on the green “Create Trigger” button.

Note:  Triggers can also be created while configuring the connection for the first time after you click the “Configure Sync” button.

Zendesk Github triggers

Here you can specify rules to decide when synchronization should happen automatically. We’re going to share all open tickets by typing “status: open” in the box.

We also choose the connection to share with from the dropdown, selecting what we created earlier

If needed, we can leave notes here, too.

After creating the trigger, click where it says status to ensure the mark is green. Tickets added to Zendesk should now be sent to GitHub.

Note: When your tools are exchanging information, you may get lots of extra notification messages, so if you get too many, have a look at the settings and turn some of them off.

With our platforms connected together, information is shared consistently, but teams can still tune it to their needs.

Our new software makes our business more efficient and lets us focus on getting things done, without getting bogged down by communication issues.

Architecture, Security, and Deployment for a Zendesk GitHub Integration

Alright, let’s now discuss Exalate technology in more detail. If you’re using it, you may be curious about its architecture and security features it has.

Architectural Autonomy

This diagram shows Exalate’s architecture:

Exalate node architecture

The blue end represents Zendesk and the red end represents GitHub. Exalate agents for each platform sit in between these two services and handle the exchange of information between them.

  • The letters A-F show how information flows between platforms. Both services use Exalate as an intermediary, which maintains the autonomy of each one.
  • The Exalate agents control what gets sent and how information is matched from one platform to the other.
  • As well as Zendesk and GitHub, there are Exalate agents available for Jira Cloud, Jira on-premise, ServiceNow, HP ALM/QC, and Azure DevOps. More services will be added soon, so check back later if the one you need isn’t ready yet. You can also request an integration.

Security

Security is definitely a key consideration when exchanging information between platforms. Exalate is designed with security in mind so you can trust it to synchronize information securely.

It uses the secure HTTPS protocol for most data exchange and nodes use a reverse proxy for data termination. It also uses JWT to ensure data requests come from trusted sources.

Exalate protects your data by taking daily backups, which are retained for two days. It also conducts monthly penetration tests to help find and eliminate potential security issues.

To learn more about how Exalate keeps data safe, read this free Exalate Security and Architecture Whitepaper

This image shows the relationship between Exalate and the services it supports.

Conclusion

There are many software platforms around today that help you organize projects and make planning much easier. Linking them all together can be a chore, so automating the process of synchronization can help you improve productivity.

Moving information around isn’t enough. You also need to filter it, which means you need a system that can be tuned according to your needs.

A compatible system needs to combine reliability, flexibility, and autonomy. To achieve this, it needs to give teams a choice over what data is shared, as well as letting them work without having to worry about changes to the software other teams are using. It also needs to work consistently without the need to be micromanaged.

That’s it for now. In this guide, we’ve set up the integration using Exalate. And we’ve described the step-by-step process on how to complete this integration to bridge the gap between systems, different teams, and companies. 

Frequently Asked Questions

Does Zendesk integrate with GitHub?

Zendesk can integrate with GitHub even though both platforms serve dissimilar functions. The secret to this integration is that both platforms use APIs, webhooks, flows, and actions to interact with internal systems, making it possible to access payloads.

How do I link GitHub to Zendesk?

It is possible to link GitHub with Zendesk by connecting both systems with GitHub Apps or OAuth Apps. You can also use Exalate and other third-party tools to link your GitHub repository with your Zendesk workspace.

Do I need to code to integrate GitHub and Zendesk?

Depending on the tool, you might not need to code in order to integrate GitHub and Zendesk. You can pick a plug-and-play integration tool with pre-built connectors. Or you can opt for code-based integration solutions such as Exalate for connecting GitHub with Zendesk.

What data can be synced between GitHub and Zendesk?

Exalate allows you to sync milestones, IDs, descriptions, task priority, comments, and attachments between GitHub and Zendesk. It is also possible to sync linked pull requests, users, and other custom fields.

Are there free GitHub Apps for Zendesk integration?

Yes, there are free GitHub Apps for Zendesk integration on the marketplace. Exalate is the only standout solution that allows you to sync a limited number of Zendesk tickets with your GitHub issue.

Recommended Reading:

How to Sync Time-related Information between ServiceNow and Jira

time-related info between Jira and ServiceNow

This question has been raised on ServiceNow community

This page details the answer to this question.

1. Question

We have the following workflow:

  • An incident is raised on ServiceNow.
  • This incident escalates towards Jira where an Epic is created.
  • The Epic is broken down into stories. Every story has a time estimate and the actual time spent information.

The question is:

Is it possible to synchronize this time-related information back to the incident, so that we can keep track of the budget consumed by the development activities?

2. Answer

2.1. Overview

This use case is an advanced synchronization case and needs quite some explanation. The overall flow is as follows:

  • The incident is escalated to Jira using an Exalate Trigger.
  • The Exalate on Jira creates an epic.
  • This epic is broken down into stories.
  • Whenever a story is created and/ or modified, sync is triggered on the parent epic.
  • During the sync from the Epic to the incident, the time tracking-related information is tallied and included in the message to the incident.
  • This information is included in custom fields on the incident.

2.2. The details

2.2.1. The incident is escalated to Jira

In Exalate for ServiceNow, you can define a trigger – which will regularly check (every 20 secs) if an incident should be synchronized.

In this case, an additional state has been added, such that the user has an easy way to send over the incident.

The incident gets wrapped into a message, and the message is sent over to Jira.

2.2.2. The Exalate on Jira creates an epic

The Exalate for Jira Server receives the message, finds out if this is the first time this incident is being synced, and processes the following code:

Exalate Jira sync rules

This will

  • Create the epic.
  • fill in the epic name custom field (which happens to be mandatory for Epics).
  • Create a synchronization relationship between the incident and the epic.

A link is also added to the incident.

ServiceNow incident sync

2.2.3. This epic is broken down into stories

This is something that the development team does and results in a detailed ‘mini-project-plan’.

Sync time info between Jira and ServiceNow

2.2.4. Whenever a story is created and/ or modified, sync is triggered on the parent epic

Using a ‘script listener’, update events on stories which are escalated into the sync of the epic.

Sync epics

2.2.5. During the sync from the Epic to the incident, the time tracking related information is tallied and included in the message to the incident

Whenever an epic is synced, all the relevant information is collected from the underlying stories (and optionally subtasks), using the following code

  • Line 18 is calling an externalized script which contains the logic to tally all relevant information.
  • Line 19 – Line 21 include this information into the message sent to Exalate for ServiceNow.

2.2.6. This information is included in custom fields on the incident

The code to update the ServiceNow incident is:

Sync time related info

The prettyPrint method is a custom method (included in the script) which transforms the duration into a pretty print format (expressing time in days/hours/minutes).

2.3. Getting access

The whole configuration is available and can be requested through our support channel.

Recommended Reading:

Cross-Company Integration Made Simple: 6 Proven Steps to a Bulletproof Integration Using ITIL Best Practices

Cross-Company Integration Made Simple

Companies use work management systems or issue tracking systems to increase the efficiency of their operations. But these efficiencies often stop at the borders of the company. When companies need to integrate data from outside their borders, often through collaboration with other firms, the lack of data integration introduces high friction in day-to-day operations. 

This can be resolved through a mindful process of cross-company software integration. This kind of integration should allow data to be shared between two different platforms without putting each side’s autonomy or security at risk. So, each side should be able to decide what information and when to share with the other side(s). 

As you know, successful cross-company integration requires some careful thinking. You need to have your goals in mind when you start this process. Additionally, identifying your key stakeholders and your team, along with your requirements and specifications are good first steps, since these requirements and specifications will drive your technology choices. After that, you should take steps to implement and evaluate your plan to ensure you meet your stated goals. These steps mirror those needed to complete any type of project.

You can complete the cross-company integration by following these 6 steps. Let’s take a look at them: 

Step 1 – Defining your ‘Why’

The very first question to ask ourselves is why we need a cross-company integration in the first place. So before constructing a solid cross-company integration plan, it’s best to fully understand both the business and strategic objectives for the specific data integration. We don’t want to be lost halfway through the process, right? 

You’d better ask yourself what you are trying to achieve through this integration first. Are you trying to:

  • Reduce workflow times?
  • Increase the visibility of critical data at important points?
  • Increase the accuracy and visibility of financial data?
  • Increase the visibility of critical incident data?
  • Reduce logistics delivery times? 

Whatever your goals or objectives, identifying them should come before moving further into the integration process.

Along with identifying your business and strategic data integration goals, you might want to look at how you’re going to measure success. It’s a very good idea to identify and agree upon the key performance indicators (KPIs) you will use to guide you in evaluating the overall effort. Properly formulated, the right KPIs will not only measure success but help improve your integration efforts over time.

Two other complementary issues are essential in the overall strategic planning process. There are always risks and trust issues to consider, whenever two companies integrate data between systems. What are these risks? If you’re making critical decisions based on this data, you really need to have confidence in the reliability and accuracy of the integrated data. 

Similarly, you first have to decide on the amount and type of data you can externally expose. All the companies involved in this integration process must have a clear understanding of the acceptable uses of the data that’s shared between them and what’s expressly prohibited.

Note: You can also refer to this B2B integration guide to get more insights about how multiple companies can benefit from an integration.

Step 2 – Identifying Stakeholders and your Project Team 

Many integration projects fail because there wasn’t enough time and effort spent in identifying key stakeholders and ensuring that the right people were on the project team at the beginning of the project. It’s essential to identify your key stakeholders and get a clear understanding of their expectations for the Cross Company Integration. To complete this step, you need to:

Identify Subject Matter Experts (SMEs) with Needed Skills

Your team members play a crucial role in this. They should have the right skills for the completion of your cross-company integration project. This includes:

  • Business Sponsor. Clearly identified business sponsors can serve as your cross-company integration project champions. Sponsors should be available on both sides of the integration, so everyone can be on the same page regarding the overall goals. These sponsors should be knowledgeable about the project’s strategic goals and have enough leverage with the companies involved to help overcome any project obstacles. The importance of having champions with enough leverage can’t be overstated since many integration projects fail due to disinterested stakeholders.
  • Understanding of Business Processes on Both Sides of the Integration: The knowledge of where data needs to be synchronized and integrated starts with a complete understanding of the business processes on both sides of the integration equation. It requires some type of process mapping. This process mapping will help you define where you need to integrate your data. It is also useful in helping you identify any improvements required in your data integration effort.
  • Application Knowledge: Your team should include application SMEs who can identify the values and types of data expected by each application, how the application will use the data, and what the expected outputs are. This knowledge is an asset to a successful cross-company integration.
  • Impact on Infrastructure: With the development of robust hi-speed networks, this is an often-overlooked part of the planning process. However, it’s essential to look at the volume of data and the types of systems being used to make sure any potential infrastructure bottlenecks have been identified and dealt with.
  • Security: Whenever you allow external parties to access your systems,  you create a security risk. You have to weigh operational considerations against these external security risks, and ensure to take steps to minimize these exposures.
  • Governance: Governance and compliance issues are yet another thing to take into consideration, especially when it comes to financial data integration. Data integrity is crucial; there must be a governance framework in place to ensure that the data in the cross-company integration is both consistent and trustworthy. Additionally, good governance ensures your plan addresses legal and regulatory issues.

Availability

Do you need your data to be synchronized in real-time, or do your business processes only require periodic updates? Let’s not assume that the data will be available 24/7, so make sure your implementation plans spell out the availability requirements.

Roles and Responsibilities

This is a crucial planning step in any organization but is of vital importance when it comes to a cross-company integration project. Projects often stall or completely fail because individual roles and responsibilities are not clearly defined. 

roles responsibilities cross company integration

You can quickly end the confusion over roles and responsibilities by using a RACI chart. RACI charts are an ITIL best practice for Service Strategy, Transition, and Operations, where individuals and departments are assigned roles and responsibilities to specific tasks. Specific tasks are listed down the right side of the chart, and team members and departments are identified by one of their roles; responsible, accountable, consulting or informed (RACI). Multiple members can be responsible, consulted on, or informed on specific tasks. However, only one individual or department can be accountable for a task.

RACI chart cross company integration

A practical of a RACI Chart

Step 3 – Defining Requirements, Specifications, and Technical aspects.

Once you’ve identified your goals and objectives, your key stakeholders, and put your team in place, you’re ready to start digging into the details of your cross-company integration. The most important attribute for performing this step is your attention to detail and specifics.

This is where good requirements analysts are worth their weight in gold. The more detailed the data synchronization requirements and specifications are nailed down at the beginning of your effort, the better your chances of success. These include:

  • Information Exchange: It’s essential to know exactly what information needs to be exchanged. Moreover, the specific purposes for information must be validated. Are you looking to fully integrate and synchronize workflows between the companies, or do you need to integrate only at specific points in the process? 
  • Use cases: Identifying how specific users interact with a system under a collection of possible scenarios is the hallmark of a use case. How specific individuals use your systems for different purposes will help facilitate your cross-company integration effort by allowing you to see how data moves through workflows and work management systems.
  • Data values: Have you identified all the possible and valid data values that your systems will pass to each other? For example, many specific systems will balk at negative costs for their data exchanges. The data format is an important consideration. A three-digit value won’t integrate into a system that only permits two digits for the same data value.
  • Workflow orchestration: Let’s look at how your cross-company integration is orchestrated into all workflows. The ideal orchestration will ensure that changes in internal workflows do not affect cross-company integration. 
  • Side-effects: It’s always essential to plan on alternatives to address any unintended side-effects of the integration project. This includes minimizing these side effects through a phased rollout of the integration; first though small pilots, then planning any system-wide roll out during times of least impact. A key consideration during this planning is developing and testing reasonable roll-back plans.
  • Training requirements: Training requirements exist for both the business process levels – the end-user of your systems and those who maintain the systems. Your integration plan must focus on training end-users on the changes made to existing business processes. Additionally, your training efforts must satisfy the more extensive technical training requirements of your implementation engineers. They are responsible for operating and maintaining the integration technology that is needed to properly manage, support, and upgrade the cross-company integration as improvements are constantly made to the process. 

Step 4 – Choosing the right technology. 

Now that you’ve planned your integration project, selected your team, identified stakeholders, and thoroughly looked at all your requirements, specifications, and other technical considerations, you’re all ready to transition your plan into an error-free production environment. 

But wait! You still have some final technical decisions to consider. 

The first step in deciding what technology to implement is a MoSCoW analysis. This method, first extensively used with the Dynamic Systems Develop Method (DSDM), is a good prioritization technique used to reach a common understanding of the importance that all stakeholders place on the delivery of each cross-company integration requirement. 

MoSCoW analysis

MoSCoW is an acronym that comes from the first letter of the prioritization categories -Must have, Should have, Could have, Won’t have (the Os were placed there just to make the acronym more pronounceable). Using a MoSCoW approach, defining what requirements and specifications are most important, will help optimize benefits as early as possible in your integration project.

Next, you need to decide if you are going to use internal resources to build or develop an application for your cross-company integration project considering all of your possible resources. If resources could be better used elsewhere and there is a suitable external vendor with a reliable integration product at a reasonable price point, then you’d better consider buying an integration product instead.

Note: There are a variety of integration solutions available on the market to choose from if you’re thinking about buying an integration tool. Users who look for a flexible external integration product, find Exalate one of the most practical solutions. It provides complete autonomy for both sides, so they can control what information is shared and in what way. It also enables them to integrate data while working in the comfort of their own environment without worrying about security issues. You can read more about Exalate’s security here.

Whether you choose to complete your cross-company integration project internally or pursue an external vendor, your final step in implementing the technology is to test and validate your choice. This requires a solid test plan where all the possible use case outcomes are tested and successfully validated.

Finally, let’s consider the two final steps before flipping the switch, and then we’re good to go!  

It’s essential to make sure that your users (both internal and external) responsible for making the final integration successful, receive training on how the cross-company integration affects any work processes. Plus, you need to ensure you’ve thoroughly documented your entire cross-company integration effort. It provides a full understanding of all affected workflows and becomes a cornerstone for all future improvement efforts. 

Step 5 – Operation 

OK, it’s time! Once all technology considerations have been accounted for, and you have successfully validated your cross-company integration effort through the use of the appropriate testing and pilot programs, you’re ready to begin operations. 

This is where the Key Performance Indicators you identified in step one becomes important. The more time you take to make sure you have chosen the appropriate KPIs, the better you will be able to measure actual indicators and match them against the control indicators. This will not only help you measure success but help you identify opportunities for improvement.

Step 6 – Celebrate Your Success.  

Congratulations! You’ve successfully taken all the required steps to build a bulletproof cross-company integration. You worked hard to plan, transition, and execute your cross-company integration. You selected the right KPIs, and all measurements indicate you have reached your goals. 

Your cross-company integration has helped reduce inventory, reduce costs, reduced incident response time, allowed your DevOps teams to become more productive, and has increased your overall ROI. 

You all deserve to take a little time to celebrate your success. Take your team for a latte at your favorite café or go all out and enjoy a night on the town. You’ve earned it!

Recommended Reading:


Note: If you’re an IT professional and are looking for the ultimate guide to successful cross-company integration, then this is your one-stop handbook, employing ITIL 4 and SIAM (Service Integration and Management) best practices.

Announcing the Azure DevOps Integration for Exalate

Azure DevOps Integration for Exalate

When using Exalate, your teams already expect to have an easy experience collaborating across different trackers. They no longer have to use email or call just to get a status update. They no longer have to work in another system they are not familiar with. You can set up a synchronization and things will just “work”.

You can already use Exalate for popular trackers like Jira, ServiceNow, Zendesk, Github and more. And, today we’re announcing a new integration: Azure DevOps!

What is Azure DevOps?

azure devops

Azure DevOps is an agile planning and tracking tool that provides developer services to support teams to plan work, collaborate on code development, and build and deploy applications. You can track the features you’re developing, code defects, and bugs using work items. Work items are defined in an area in Azure DevOps, called Boards, and they are similar to Jira Issues. Boards provide the possibility to plan, track, and discuss work across your teams.

The Azure DevOps-Exalate Integration

If you’re already using both platforms and are looking for a way to build a bi-directional data transfer between the two, you’ll find this new Exalate integration very useful.

Exalate enables you to synchronize your Azure DevOps work items with Jira Issues. The integration makes it all easier for both sides to track issues/ work items, and collaborate with each other while they are working in their own environment. So, an issue created in Jira can easily be assigned to somebody in Azure DevOps as a work item, and Azure DevOps users will try to close it on their own platform. It is also true for the other side, Jira users track and resolve work items that are imported into Jira as issues. 

The users on both sides might also need to share an attachment with their teammates or the other end. And they’d prefer not to use work channels or email. In this case, they can just have this attachment synchronized in their work item/ issue. So they will not even have to leave their environment. With Exalate, they’ll have the flexibility to decide when, where, and with whom they want to share that particular piece of information. 

Use Case For the Azure DevOps-Exalate Plugin

Let me walk you through a possible use case of the Exalate integration for Azure DevOps. Imagine you have a development team working on an Azure DevOps project, while another Support team is communicating in a Jira Service Desk environment. Exalate allows the client to create an issue in Jira, and then a support engineer can synchronize it with the development team. 

On one end, you have the customer service desk receiving tickets. And on the other end, you’re receiving work items from Azure DevOps tools. Traditionally, customer service agents would receive a ticket and email the information to your developer team. From there, the dev team would need to manually create an issue in Azure DevOps, adding this to their backlog.

However, the developers are too busy to put in data manually. So, you can set up a connection with Exalate within your environment, add the necessary triggers, and they will automatically detect new work items coming in from your customer service desk (as issues). From this point on, you no longer need to manually put the work items into your dev team’s Azure DevOps project.

As a result, once the dev team updates a bit of information on their Azure DevOps instance, this information will be synchronized with the other side. The synchronization is automatic and two-way. This means your customer service desk will automatically be aware of any updates on the related issue, and that streamlines communication with the customers.

Wrapping it Up

If you already feel like you’re drowning in Azure DevOps work items, then Azure DevOps-Exalate integration will work like a charm for you.

This solution will help you simplify your customer service pipeline with:

  • Automatic, two-way synchronization
  • Customizable triggers
  • Multiple platform support (Jira, GitHub, HP QC/ALM, and more very soon)
  • Heroic support from our team

The Project Management Blueprint for Agile Collaboration Between Teams

The Project Management Blueprint for Agile Collaboration

Project management skills in the evolving software development space have an increasingly demanding role. Project managers need to manage their everyday responsibilities as well as achieve the following;

  • Supporting a rapid pace of project and product
    delivery
  • Gaining an all-encompassing view of the project
    progress
  • Keeping the focus on value while maintaining
    (or increasing) speed of product delivery
  • Managing stakeholder expectations

These may not be new challenges to many Project Managers. But, many are seeking to implement smarter ways of working in order to maintain productivity, collaboration, speed, and quality.

Establishing better processes in development projects allows Project Managers to focus on the things that matter: customers and their expectations.

Project Managers are aware that competition is tough, and failure to keep the customer as the focus may lead to losing them altogether.

This whitepaper aims to guide Project Managers through their current challenges and outline realistic approaches to overcoming them. It will offer a set of steps to take, to adopt agile project management methodologies.

Who is this white paper for?

1. Multiple teams working together from multiple locations …

Whilst the concept of more agile collaboration could be applied to a multitude of disciplines and project management scenarios, the key focus for this paper is on the need for agile working across multiple software development teams.

This is relevant to project managers who are responsible for the coordination of multitudinous and complex factors in the delivery of product development.

These project managers are responsible for coordinating teams of people from both within and outside the organization.

They are working together towards common objectives but often without one unified approach.

2. Teams using disconnected technology …

Another common issue for project managers to address is the supporting technology.

In some cases, there may be project management tools and applications in place to support and assist teams in collaborating and communicating.

But there is often a lack of consistency. And each team finds themselves using whichever tools they see best fits their own requirements.

In some instances where subcontractors or small teams are part of the project, there may be a complete lack of supporting technology altogether.

3. Project manager with an ever-growing team …

Project Managers in software development often find themselves looking to grow and expand their teams to include other internal teams, external teams and sub-contractors in order to meet the demands of a growing business.

4. Teams using a mix of approaches to managing workloads

In bringing teams together to work on the same project, Project Managers are likely to be faced with a combination of approaches and processes already in place.

One team may be comfortable using the waterfall model to base their workload on. While another team may still be relying on spreadsheets and written task lists.

The Challenges of Working in a multi-team environment working from different locations

This often complex scenario which software development project managers find themselves, produces a host of challenges that need to be addressed;

1. Volume of information

Managing multiple teams, team members, tasks, deadlines, and statuses leads to an overwhelming amount of data to coordinate into a logical and simple plan.

In projects with no collaboration and unified approach, this can lead to huge risks and delays, in delivering product releases on time and on budget. Especially when the project is being worked on by multiple teams.

2. Inflexibility

The software development world is competitive and fast-paced.

Successful organizations rely on their project teams to deliver regular product releases that respond to changing feature prioritization and insight from the dynamic software market.

Internal and external influences can affect the scope of projects enormously.

Many development teams find themselves not agile enough to adapt quickly and effectively.

3. Coordination of disparate teams

Managing the individuals within one team is a challenge in itself.

Add to this multiple teams in multiple locations and the challenge becomes overwhelming.

When aiming to deliver successful projects involving a number of internal and external teams, project managers need to consider individual ways of working, differing quality standards, internal conflict, and cultural and time differences.

4. Ineffective communication

When multiple teams and individuals are working towards one single outcome, good communication is essential.

And project managers can’t rely on ad hoc emails and phone calls to keep their teams on track.

It is the role of the project manager to break down communication barriers and encourage collaboration over working in silo, all the while avoiding confusion.

This can be a tricky balance to achieve.

5. Managing risk

Risk is an inevitable part of any software development project.

Even more so when multiple teams are involved.

Project managers need to be aware of potential risks, manage appropriately, communicate the risk outwardly, and mitigate where possible.

6. Maintaining speed of delivery

Software organizations rely on their speed of product delivery in order to survive.

But when each software project encompasses a multitude of moving parts this can be a big challenge.

Project Managers need to ensure there is a strategy in place for maintaining speed and quality (with limited risk) when dealing with patches, updates, and changing prioritizations.

The Approach

With the potential pitfalls of disjointed project management in software development displayed clearly, it makes sense that project managers are seeking smarter ways to

  • coordinate their teams for better
    collaboration,
  • deliver faster product development with
    minimized risk,
  • increase flexibility to respond to change.

This is where agile project management comes into play.

The agile methodology is a broad term used to describe various methods to support an iterative and incremental approach to effective software development.

The goal of the agile methodology is fast, regular, and high-quality software development facilitated through planning, tracking, analyzing, and above all, communication. 

This approach to software development is a well-known concept that has been in practice for decades.

One of the most common approaches adopted to support this movement is the Scrum agile development methodology. First proposed as a development framework in the 1980’s, Scrum is now used widely in organizations all over the world to improve business (not just development) processes.

Essentially agile development, in the context of software, centers on iterative and incremental development of software products.

There are many methodologies based on the agile concept and Scrum is one that is widely adopted by software teams worldwide.

The Scrum-based methodology focuses on breaking down large projects into allocated tasks and regular sprints (or reviews).

This allows a development team to track progress and add, remove or change elements along the way.

It acknowledges the importance of customer feedback, the need to be flexible, and the need for effective team collaboration.

The importance of scale

What often leads Project Managers to consider ways of improving their processes is the need to scale.

Growing teams lead to new group dynamics and the need to adapt their way of working accordingly.

In this common scenario, it is the role of the project manager to maintain visibility at all times and communicate the goals and objectives clearly.

This is not easy with multiple disparate teams to consider.

For development teams to be effective it is important that they understand how their contribution to the project affects the overall outcome and meets the objectives for the organization as a whole.

Product Architecture

The capability to scale depends on the concise breakdown of a product into components and subsystems or features.

This demarcation allows to distribute the responsibility of the product amongst the different teams.

For instance, a product, such as a mobile app, can be broken down into components such as the front end, back end, database reporting function, and design.

The Project Manager can gain visibility over these components and their development status, and manage deadlines and priorities more effectively.

System Integration Team

When the product is broken down into components where multiple people (teams) contribute to them, you need to be able to assemble them back together.

The system integration team is responsible for assembling the delivered components into one product.

Successful product development and release relies upon a multi-skilled team to validate every element and orchestrate every release.

Their responsibility includes taking care of the infrastructure for reviewing and testing integrations. And carrying out continuous improvement checks.

One of their main activities is to establish test cases and define release-specific test plans.

Definition of Done

Most project managers will be familiar with the term ‘Definition of Done’.

They will also agree that it is important for all team members to understand what the criteria is against which a product is reviewed for release.

Each story or feature in a sprint has its own level of acceptance criteria, and each sprint has multiple stories.

It is therefore important that the project manager provides a way for the team members working on different components, to access a unified set of acceptance criteria for the entire project.

This is essential for a release to go ahead.

The Scrum agile approach supports this unified thinking brilliantly, with its focus on collaboration and incremental progress.

Regular Scrum meetings provide the perfect opportunity to check in on progress against criteria. Enabling the product owner to make a decision about what goes into a release and what ist pushed to the backlog.

The Scrum approach also enables the Project Manager to maintain a level of fluidity to the Definition of Done. Because the open communication channel means that as teams get more familiar with working collaboratively and pick up pace, the Definition of Done can adapt accordingly.

Promotion Levels / Product readiness

With any software product release, it is important that an informed decision can be made if the build can be published.

Promotion levels allow to associate a quality level to a particular build and reflects the type and amount of tests that have been carried out (successfully).

For instance a:

  • bronze promotion level
    indicates that all unit and component tests succeeded.
  • Performance
    tests will be carried out to achieve a silver
    level,
  • while a gold level requires that the
    documentation matches the provided functionalities.

There will be scenarios where a gold release is imperative. And other occasions when a patch needs to get to market and a bronze build is sufficient.

These promotion levels are key. But decisions cannot be made without full visibility over what the acceptance criteria are. And what needs to be done in order to achieve them.

Supporting adaptiveness and acknowledging the importance of the customer

It is important to stress the point of how an agile framework aligns with the need for adaptable and responsive product development.

An incremental development framework supports short releases through regular sprints and scrum reviews. Giving the development team the chance to review progress and rearrange priorities if necessary.

In addition, essential customer feedback can be reviewed as part of this progress and potentially integrated into a release immediately.

This focus on the customer is an essential consideration for Project Managers.

Achieving agile collaboration

Once a decision has been made to implement an agile approach for the collaboration of multiple teams, what steps can you take to get started?

1.     Gain support before you start

The first step to implementing agile collaboration in software development is to ensure that there is internal support from relevant parties.

It is very challenging to implement a new framework within an existing organization. And Project Managers establishing collaboration through cross-functional and dispersed teams can often meet resistance. Resistance to change and cultural barriers.

Implementing a Scrum approach is asking the teams to change their focus and take control of their workload in a way which they may not be familiar with.

Support from key stakeholders within the organization displays confidence and assurance. Which can help overcome some of this resistance to change.

2. Establish clear goals

As a Project Manager you may be convinced that an agile collaboration approach is the way forward for your software development teams.

Take the opportunity to think about how Scrum will initially affect the teams and their productivity.

Then establish what you are trying to achieve through the implementation.

List out the goals and objectives for implementing a Scrum and agile approach. And it will be easier to break these down into actionable tasks and responsibilities.

It will also give you a good idea of whether you have all of the right people you need in the teams in order to achieve these goals.

3. Predict challenges and plan how to overcome them

Once you have established your goals and objectives, it is a good time to step back and think about what challenges may arise pre, during and post implementation of this new collaborative approach.

These may be linked to organizational culture, new starters or leavers, or technology problems.

Whatever they are, the more aware you are, the more chance you have to successfully plan ahead to overcome them.

4. Decide on roles

You have clear goals laid out and have predicted the issues you may come across as part of the process.

Now you need to decide how the Scrum roles will be allocated across the members of the teams who will make up the development project team.

This can be a complex task.

While the majority will assume the role of team member, you need to make sure there are clear Product Owners working on the development.

And you will have to decide whether you, as Project Manager, will take on the role of Scrum Master. Or whether this will be someone else that you work in unison with.

Often the role of the Scrum Master changes for each sprint.

Another important consideration is the size and scale of a project. As many large projects require a Project Management Officer (PMO) to manage multiple Project Managers.

Additionally, for collaboration across multiple teams you need to decide whether there is a requirement for nominating Scrum coordinators to take part in the ‘Scrum of Scrums’.

When scaling up means that Scrum teams are getting too big, teams can nominate one person to deliver their input and feedback to other representatives in a smaller group.

5. Be transparent at all times

Once you have decided on the Scrum approach and are busy defining goals and allocating responsibilities, remember that it’s important to keep your plans (short and long-term) transparent.

Not every product release can include each item from every wishlist. So Project Managers need to be realistic.

Short-term plans will likely be more detailed and outline plans in granular detail.

Long  term plans often don’t have this luxury.

Make these plans available to development teams. And be prepared to answer questions and concerns. And respond to input from the teams you are coordinating.

6. Assess product backlog and establish sprint plan

When you’re establishing a Scrum approach across multiple teams you need to create one master product backlog for each team to extract their own backlog from.

The Product Owner should assume responsibility for managing and maintaining this backlog.

The project manager must oversee that this backlog is groomed regularly and thoroughly. This is to ensure that there are no requests sitting in silo.

Similarly, you must establish one clear plan which all parties adhere to. Clearly laying out the sprint plan, schedule for sprint retrospectives and testing.

Make sure none of the teams you are coordinating are rolling out their own diluted version of this. Success in Scrum depends on a single strategy for product delivery and transparency is crucial. The agile framework is built on unified thinking, transparent collaboration and constant communication. It requires discipline.

7. The technology enablers

What applications and platforms are your multiple teams currently using to track their workload and deadlines?

You may find that there are a mix of products and methods being used currently. But there is a need here for consistency.

Think about the technology you need to put in place to track progress and status of product and subsystem delivery.

If you already have something in place, is this easily rolled out to include disparate teams?

It may be that you need to implement a synchronization tool (like this one) to make sure everyone’s workflows are aligned.

Another important technology consideration for multiple teams is communication platforms.

To succeed in agile working it is essential to move away from email and instant messaging conversations to a mechanism that enables you to view how the teams are collaborating and audit progress.

Note: Issue trackers are perfect for this. However, if you’re working with multiple systems, you will need a synchronization tool like Exalate. It’ll help you keep all information up-to-date and in sync while the teams keep on working in their own environment.

8. Offer training and support

An essential part of the collaboration process between multiple teams is offering ongoing support and enablement.

Make sure your teams understand what vehicles are available for them to access relevant information or ask questions.

9. Check back and make changes

Like any effective project management process, ensure that you inspect your agile collaboration processes regularly. And adapt as necessary.

If something isn’t working, don’t hesitate to change it. As long as any changes are communicated clearly and concisely to those who are affected.

Need for change can be a good indicator that progress is being made.

Suggest process inspections once per sprint.

Summary

The agile methodology was established to help businesses accommodate the changing needs in software development.

By introducing a unified set of processes and a focus on communication and collaboration, Project Managers are able to get better visibility of all aspects of the development project. And make adjustments to keep on improving.

This fluid approach allows better responses to market and customer influences. And it reduces time and resource being wasted on unnecessary project components and tasks.

Implementing an agile framework is not a simple task.

For Project Managers it requires much thought, preparation, and support in order to be done effectively.

There also needs to be a consistent focus on improved communication and collaborative working. But the benefits for better software development and fine-grained control are without question. 

Recommended Reading: