Tracking and storing information play an important part in the course of a business’ performance. It is crucial to ensure that your data is accessible, consistent, and useful. It’s especially challenging for teams with unique or variable needs. And the right software integration solution, such as a Zendesk GitHub integration, can assist teams in having their needs met.
In this guide, we’ll discuss the need to set up a Zendesk GitHub integration and how to share information between these two platforms. We’ll also show you how to manage data and allow teams to use it according to their needs and roles.
Note: In this tutorial, we will be using a software integration tool called Exalate to set up the integration. You will learn more about this throughout this guide.
Why Set Up a Zendesk GitHub Integration
Zendesk is one of the major players in customer service, with its software used by over 100,000 customers around the world. Its typical users are service desk teams in mid to large-sized companies.
These teams may also have other teams using different software, and the right integration solution is what can help them work together easily and in harmony.
Some of Zendesk’s high-profile clients include big hitters like Airbnb, Squarespace, and Vimeo. Take a look at the Zendesk blog to learn more about the range of businesses that use it.
GitHub is an online source management and versioning platform that allows teams to share code easily. It is developer-focused and allows team managers to track all the changes made by team members, and make sure everyone’s changes work with everyone else’s.
It also allows issue reporting, letting you keep track of what needs to be done. Issues have a lot in common with Zendesk’s tickets, and the information they store will often overlap.
Why Integrate Zendesk and GitHub
Now, if you have different teams working on different platforms, they will need a convenient way to exchange data between themselves.
For example, your customer service team might enter tickets into Zendesk, and your engineers might be copying this data over to issues on GitHub. This takes time and, if done manually, can be prone to error.
If you can automate the process, then things will happen more smoothly. You will also save money, as nobody is needed to perform the task of transferring information from one place to another.
Note: Learn how DPG Media had to assign a full-time task of copying data to one of their employees in Zendesk. And how they used synchronization to completely eliminate this task.
As well as the tickets themselves, related information can also be shared. If both teams have access to all relevant information, they will be better equipped to do their jobs, saving you quite some time.
Teams get the benefit of using a tool they are already familiar with if they can update the same issues on their own platforms. They stay focused on their area of expertise and are also provided with smooth, up-to-date communication with other departments.
Doing this automatically means you don’t have to worry about the status of the issue, or that you are missing key pieces of information when you see what is available in either system.
How to Choose the Right Technology for Setting up Your Zendesk GitHub Integration
There are a few things to take into consideration when selecting a suitable integration solution:
1. Reliability
The integration is supposed to save you work and make sure all your teams are working with consistent data. If it doesn’t work well, that means additional headaches. You want a system that keeps integration running even when, for some reason, one side is not available.
2. Flexibility
As well as synchronizing two systems, we want the flexibility to recognize the different roles those systems play and to filter the data they store accordingly. Mapping attributes is just the first part. Tuning the data to the needs of different teams is a key part of using it effectively.
Plus, you’ll want the tool to be flexible enough to change with you as your workflows and systems change. For example, you want the tool to support more integrations than just GitHub and Zendesk. Then you can use the tool to set up a similar synchronization with other parties or when your partner switches their tool.
3. Decentralized Integration
The system should be robust enough to handle changes to either tracker. The trackers are able to exchange data and should be able to cope if this data is differently structured or contains additional information on either side.
In short, either side needs to be able to exchange data however they want to, independently from the other side.
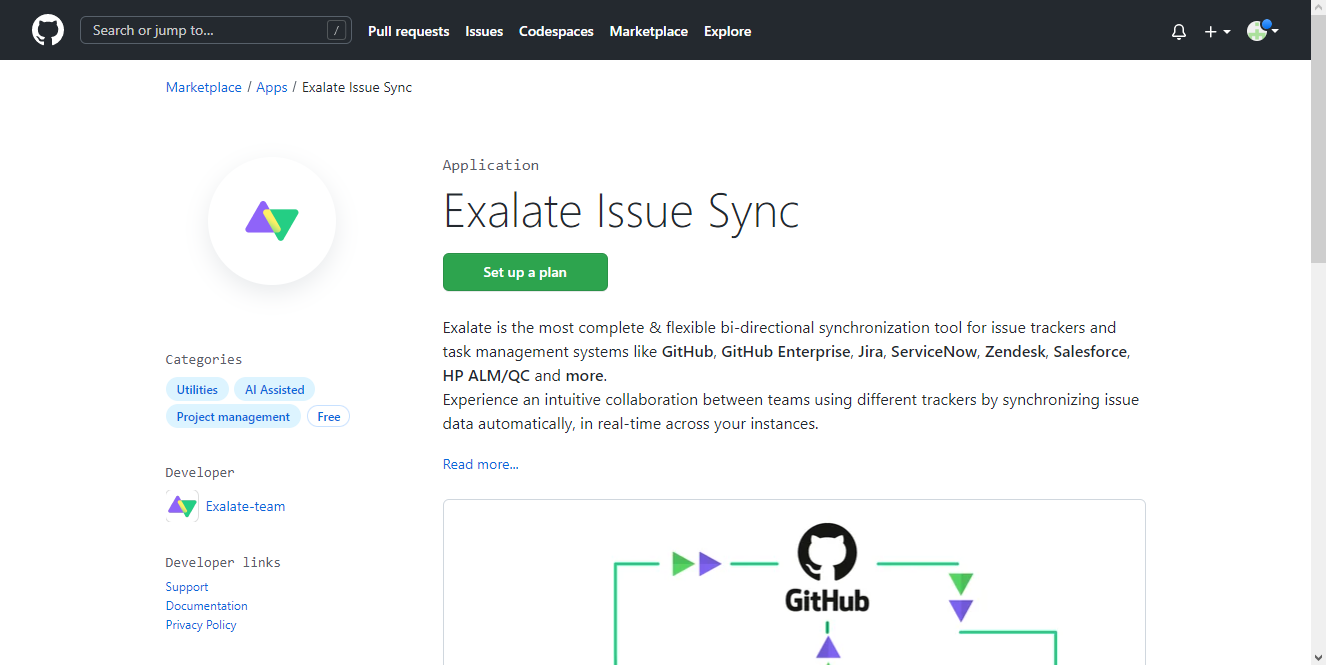
For this guide, we’ll set up the integration using Exalate. Precisely because Exalate was built to fulfill the above requirements.
Next, we get to the good part: setting up Exalate with Zendesk and GitHub to enable a bidirectional integration.
How to Set up a Zendesk GitHub Integration (A Step-by-Step Process)
It’s now time to connect Zendesk and GitHub and set up a two-way sync between the two platforms.
Note: If you prefer video tutorials, you can watch this quick demo.
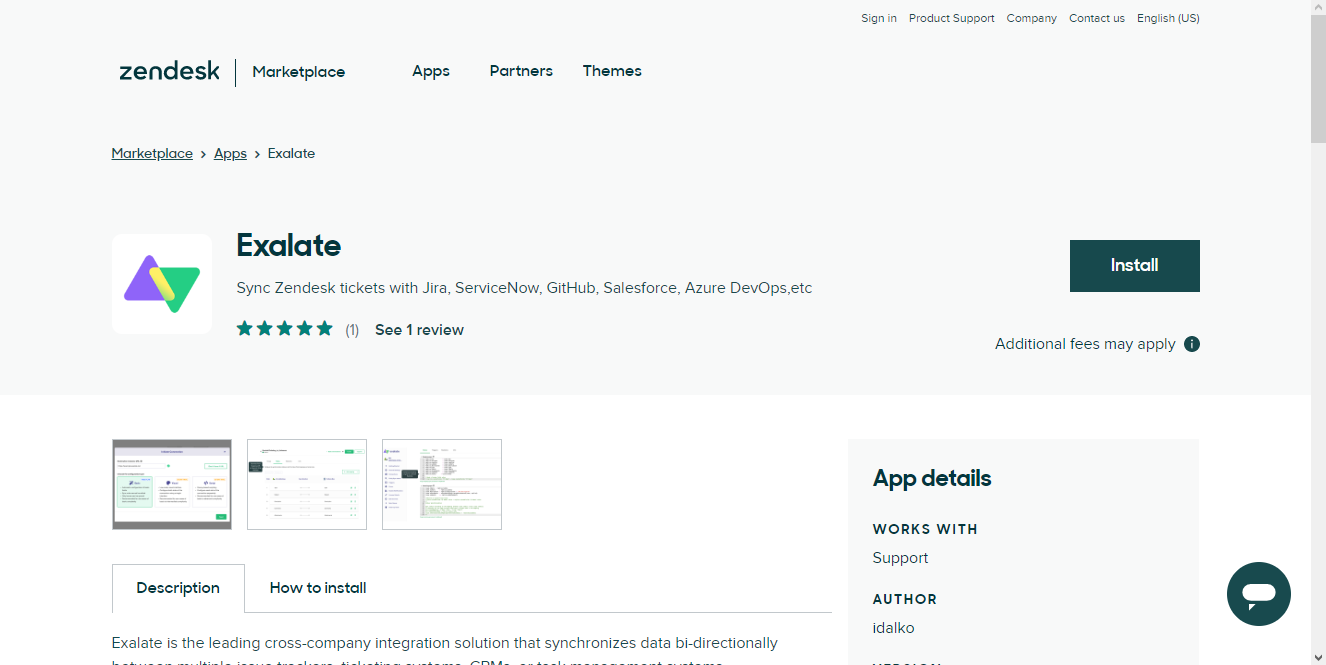
Step 1: Install Exalate on Zendesk
To install Exalate on your Zendesk instance, visit its integrations page.
Note: You can also get the app on the Zendesk marketplace.
There are a couple of things to do before installing.
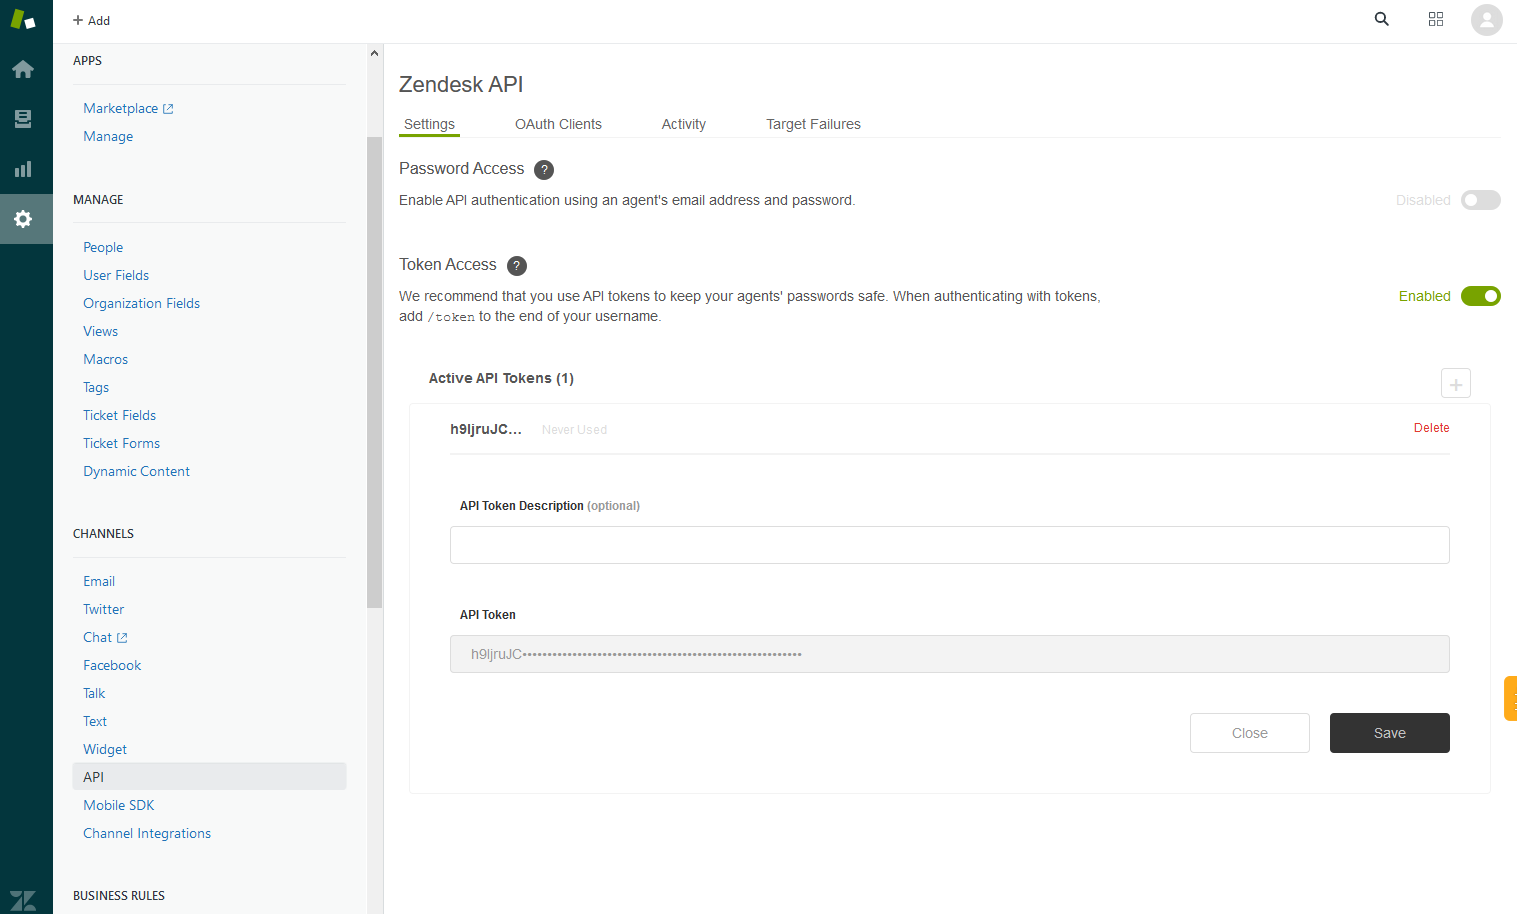
First, you need to create a proxy user and access token so that exalate can communicate with Zendesk. The proxy user is a regular Zendesk user, so create a new user or use an existing one.
Then, to generate an access token, log in to Zendesk with your proxy user. Navigate to the API page in the Channels section of the left-hand menu.
Click on the grayed-out switch to enable Token Access (unless it is already enabled).
Then click on the plus button to create a new token.
Copy the long text string somewhere. Click save, so that your changes are kept.
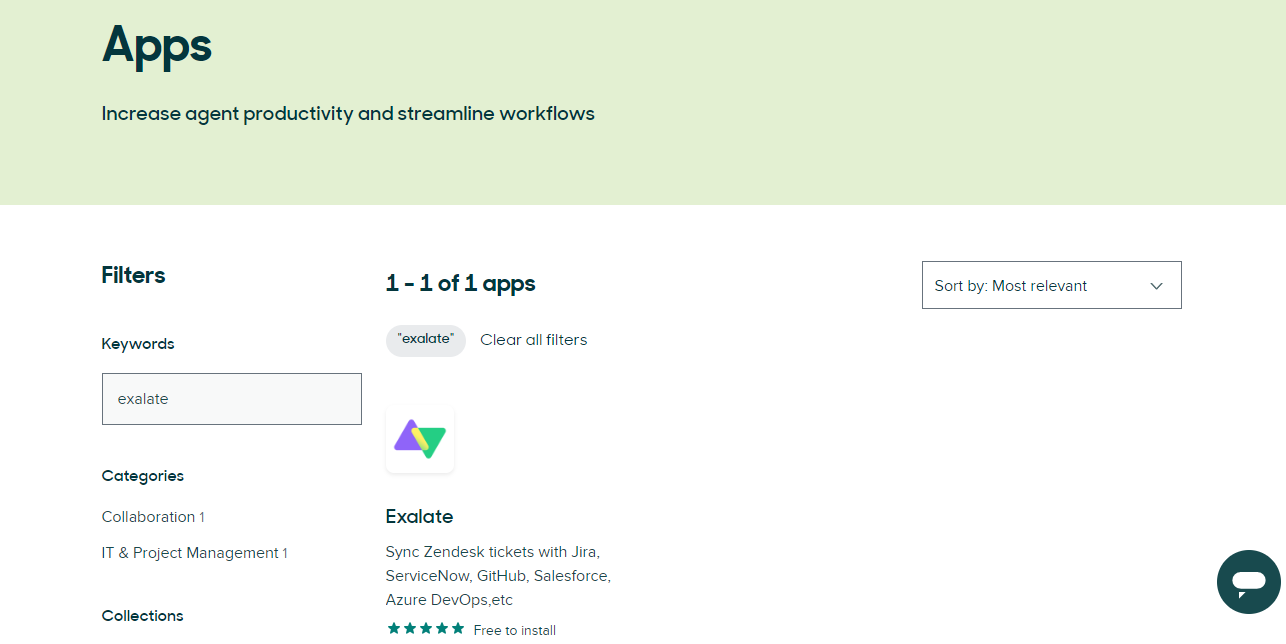
Next, find the Exalate app in the marketplace and install it.
You’ll see an installation screen where you can enter your proxy account email address, along with the token string you just generated.
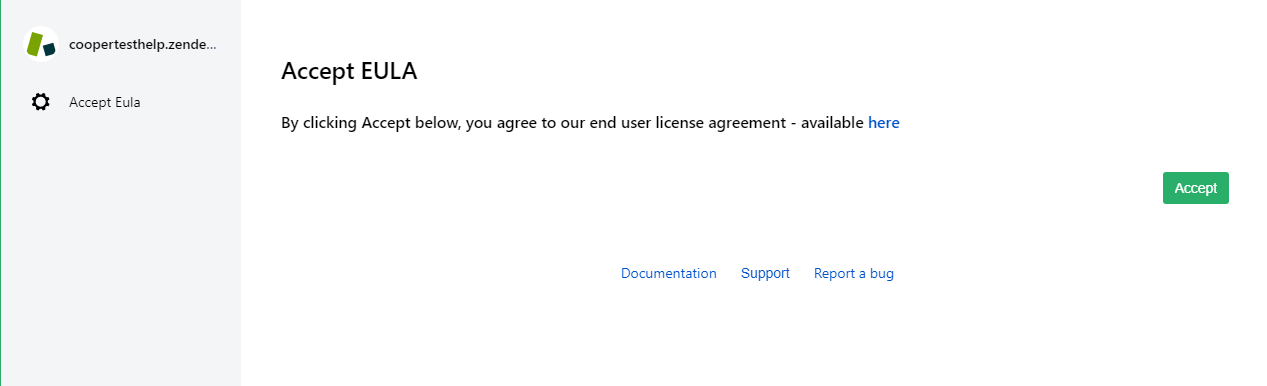
Now, an Exalate icon should appear in the left menu bar. Click on that icon.
Now you are in the Exalate UI. Accept the EULA. Then you should navigate to the licensing page. And request the Free 30-day Trial.
Enter your email address and then check your inbox for the key. Click the green ‘license key’ button and enter the key to activate your trial.
To learn more about the installation process, have a look at this Exalate documentation page.
Step 2: Install Exalate on GitHub
As you did for Zendesk, start installing Exalate for GitHub from the integrations page.
The reason why you should install Exalate on both Zendesk and GitHub is to keep autonomy and control for both sides.
You can also log in to your GitHub account and click on the marketplace.
From there, enter Exalate into the search box, or click here. As with Zendesk, Exalate has a free trial.
Click on the green “Set up a plan” box, then the “Install it for free” box to get started.
Note: Exalate is also available for GitHub Enterprise. For installing Exalate on GitHub Enterprise Cloud, check this article.
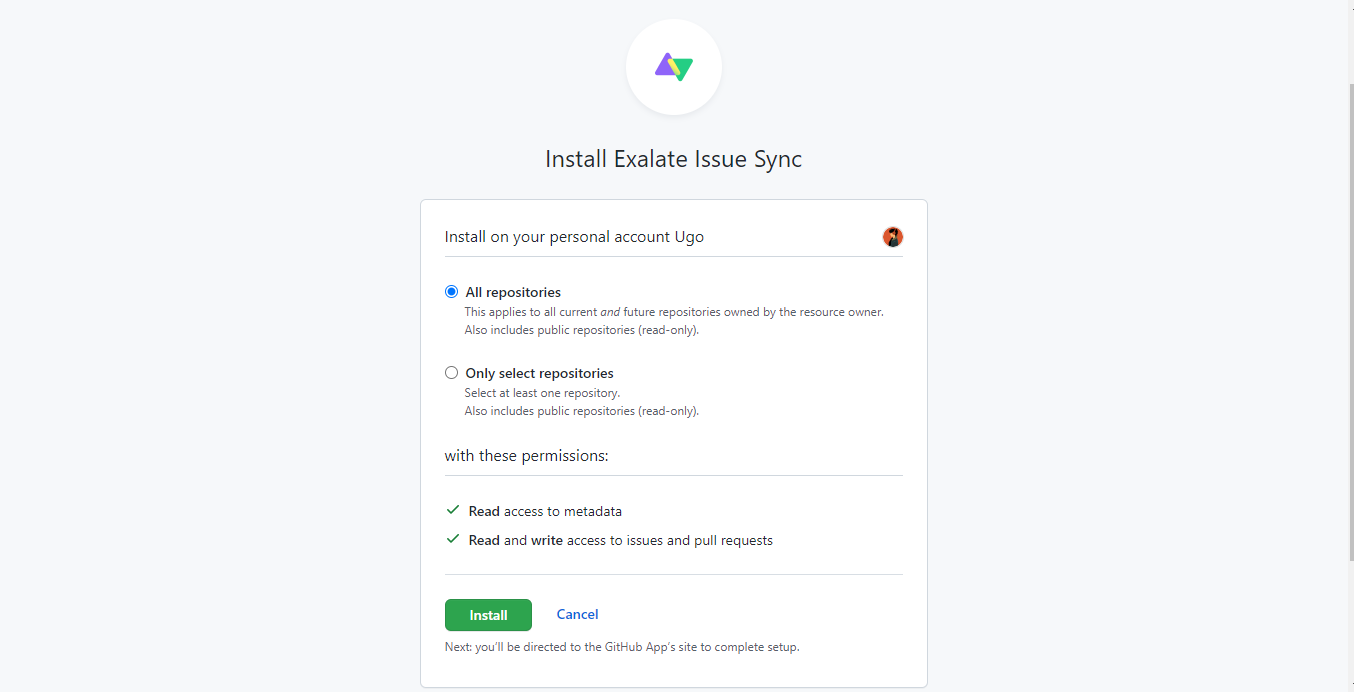
After you confirm your installation, you’ll need to grant Exalate permission to access your GitHub account. By default, it has access to all your repositories, but you can limit access to specific ones if you prefer. In either case, Exalate only needs access to metadata, issues, and pull requests, not the code itself.
Next, you’re directed to Exalate’s own site, where you need to accept the user agreement to continue.
After that, you need to select how Exalate will access your GitHub account. You can use your username and password, or create an OAuth token.
The username/password method will likely be phased out at some point, so be aware that you might have to change it later if you pick that option.
After this, you’ll need to request an evaluation license for GitHub, in a similar way you’ve done for Zendesk.
Note: If you do not request an evaluation license, you will not be able to synchronize issues later.
Step 3: Connect Zendesk and GitHub
Now that you’ve installed Exalate on both sides, it’s time to set up a connection between GitHub and Zendesk. Let’s take a look at how to do this.
We want tickets on one platform to show up on the other, and we want to create some rules to decide which ones are shared.
After setting up GitHub in the Exalate app, you should be redirected to a welcome screen.
Click on the “Connections” tab on the left-hand menu. From there, click on “Initiate connection”.
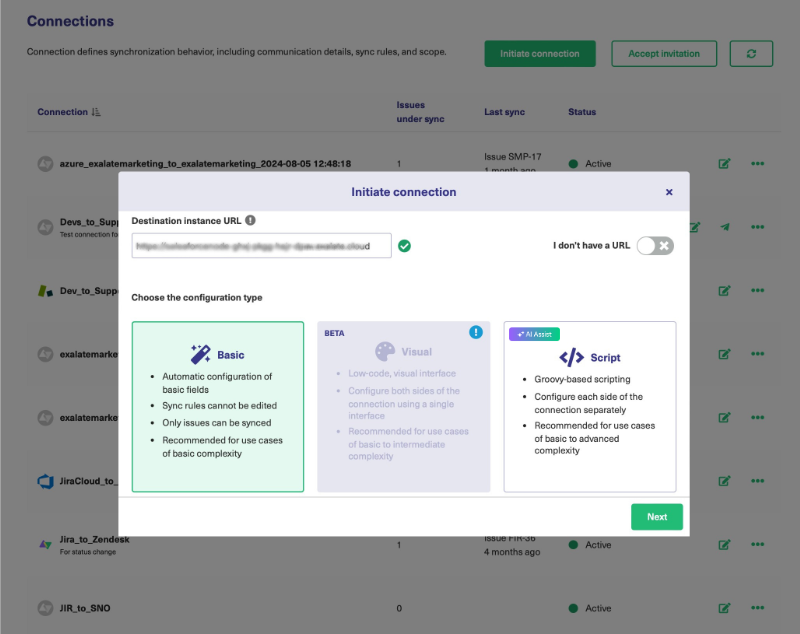
Next, you’ll need to enter the details of your other connection. In this case, that will be your Zendesk account URL.
As seen in the screen above, you will be prompted to select one of the two configuration modes. The Basic mode allows you to sync tickets or issues according to default mapping rules, which cannot be changed. The Script mode, on the other hand, allows you to change sync rules and experiment with advanced features. You can also use AI in the Script mode. We will cover that in the next section.
We will have a look at both these modes separately as they involve different ways of setting up connections.
Continue with the Basic Mode
Once you click on “Basic” and then “Next”, you will be asked to select a repository from a drop-down list.
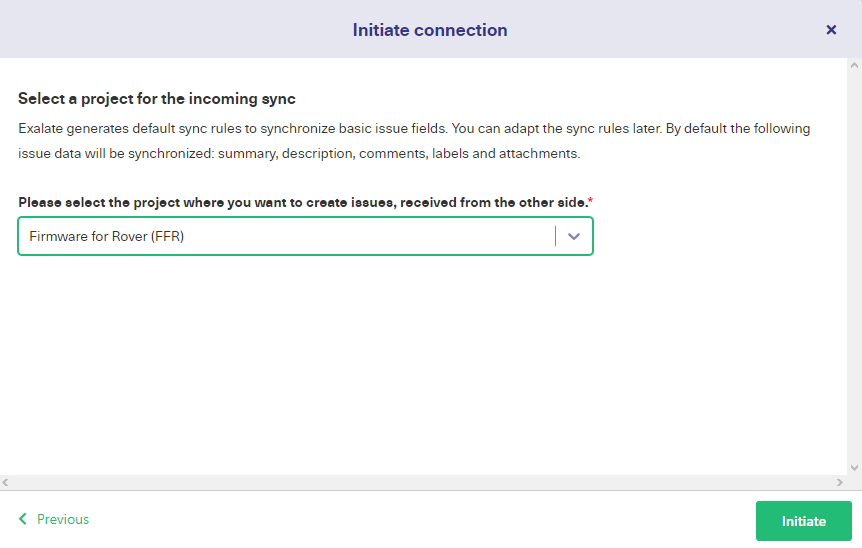
Select the correct one, and hit “Next”.
You are then required to confirm whether you have admin access to the destination instance, in our case, the Zendesk instance. Click “Yes, I have admin access” if you have the required access. If you click on “No, I don’t have admin access”, you will be required to copy and paste an invitation code manually on the Zendesk side.
For now, we click Yes and then “Initiate”.
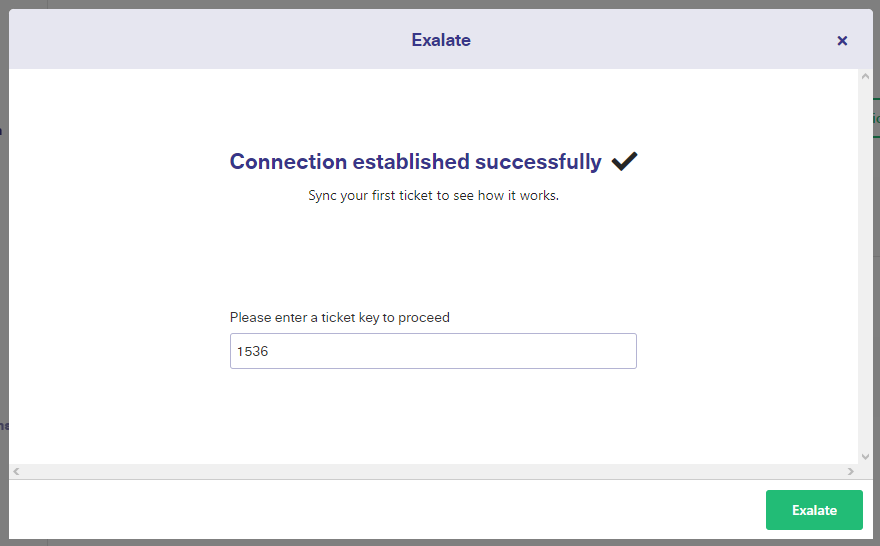
After verifying the admin access, you will be taken to the Zendesk side. Since Zendesk is a ticketing tool, we do not have to select any repository as we did on the GitHub side.
The connection here is successfully established, and you will be required to enter the ticket key directly. This ticket key will denote the ticket number you want to synchronize with the GitHub side.
Enter the required key number and click “Exalate”.
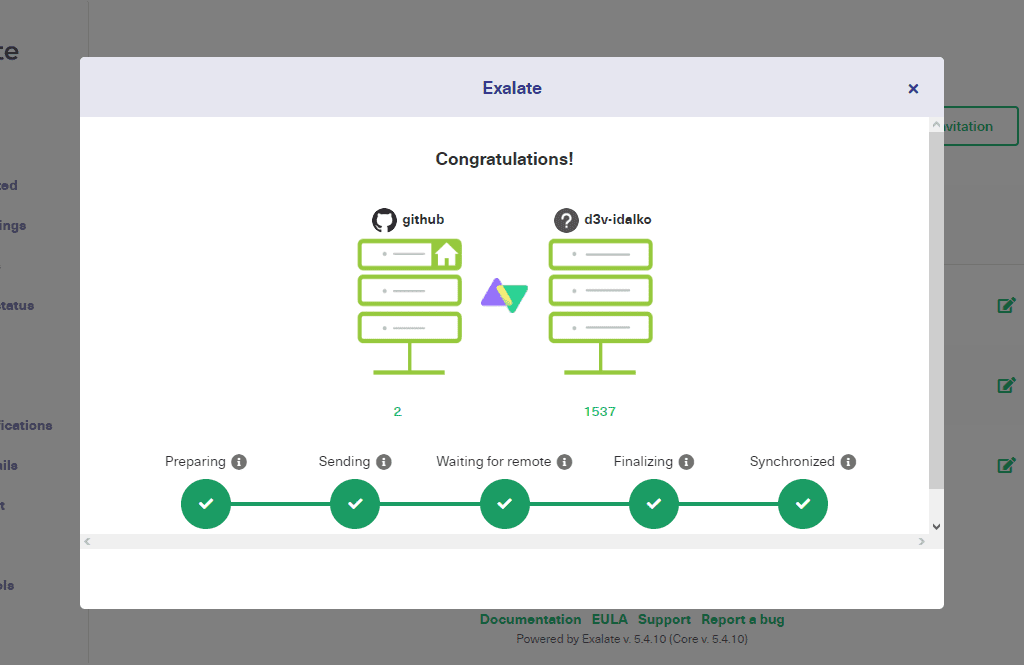
Wait for a while to get the ticket synchronized….
And after some time, Viola! You already have your ticket synchronized successfully.
You can sync tickets or issues as shown above, or you can create automatic triggers for syncing them, or you can even sync your tickets/ issues in bulk.
Continue with the AI-assisted Script Mode
Give your new connection a name and an optional description. A meaningful name and detailed description will make these easier to work with later, especially if you set up several connections.
The local instance’s short name denotes GitHub since you are initiating the connection there, and the remote instance will be Zendesk.
After entering the details, click “Next”. The next screen will prompt you to “Select Repository” from a drop-down list. Select the appropriate one and click “Initiate”
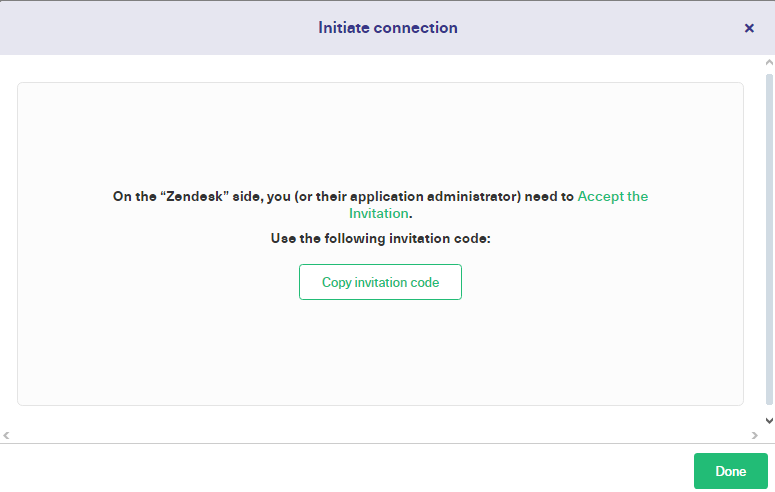
An invitation code will be generated now. Copy the invitation code somewhere. We’re done with GitHub for now, but if you look at the connections area, you can see our newly established connection listed there as “Pending”. It will become “Active” only when verification is completed on the Zendesk side.
Now go back to Zendesk and take a look at the Zendesk app tab. You can also go to Zendesk if you click “Go to remote” on the screen above. Click to accept the EULA license if you haven’t already. You should see a screen such as this:

Click on the light gray “Accept invitation” button and paste the code you just generated into the text area. Click “Next”.
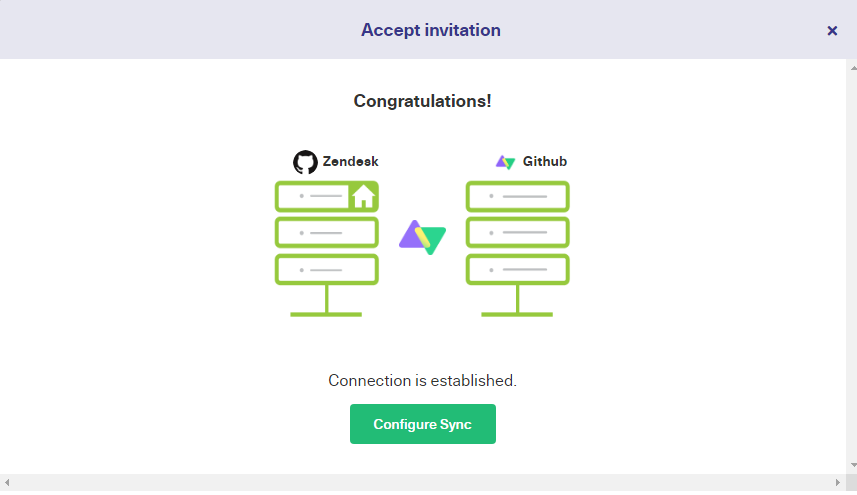
After this step, your connection between Zendesk and GitHub is successfully established. You can straightaway click on the “Configure Sync” button, or you can configure the connection by editing it later on. Both approaches will take you to similar screens. For now, we click the button.
To edit the connection later on, you can click the edit connection icon next to the name of the connection listed in the “Connections” tab on the Exalate console.
Step 4: Configure your Connection to Determine What Information Gets Shared
Now you’ll see a list of the automatically generated rules. You don’t need to change these yet, but if you want to configure things more precisely, you can do so.

Take a look at this guide to learn more about sync rules and how to work with them using script helpers.
If you’re happy with the rules and don’t want to change anything at this point, click on the “Publish” button to set up the connection.
Use AI to Generate Sync Rules
Exalate’s Script mode now features AI Assist, which appears as a chat window in both your incoming and outgoing sync rules tabs. Simply type in your sync requirements, and AI Assist will generate the scripts for you.
The scripts are crafted based on your input, existing configurations, and Exalate’s scripting API.
Keep in mind that AI Assist—like any AI—can occasionally make errors. So, the more precise and detailed your prompts are, the better the results will be.
Here’s an example of how it works:
Let’s say you want to map and sync statuses between Zendesk and GitHub. You could enter something like this into the AI chat:
For incoming sync (GitHub): “Create a status mapping that sets GitHub’s open status to Zendesk’s open status and done to done in the GitHub incoming configuration.”

After a moment, the script will be generated.
Red script rules indicate lines that will be removed from the current scripts, while green ones show new lines to be added. You can either accept or reject these changes. If needed, refine your prompt. Once you’re satisfied, publish the updates.
Step 5: Set up Automated Synchronization Triggers
In the Zendesk Exalate app, click on “Triggers”, and then on the green “Create Trigger” button.
Note: Triggers can also be created while configuring the connection for the first time after you click the “Configure Sync” button.
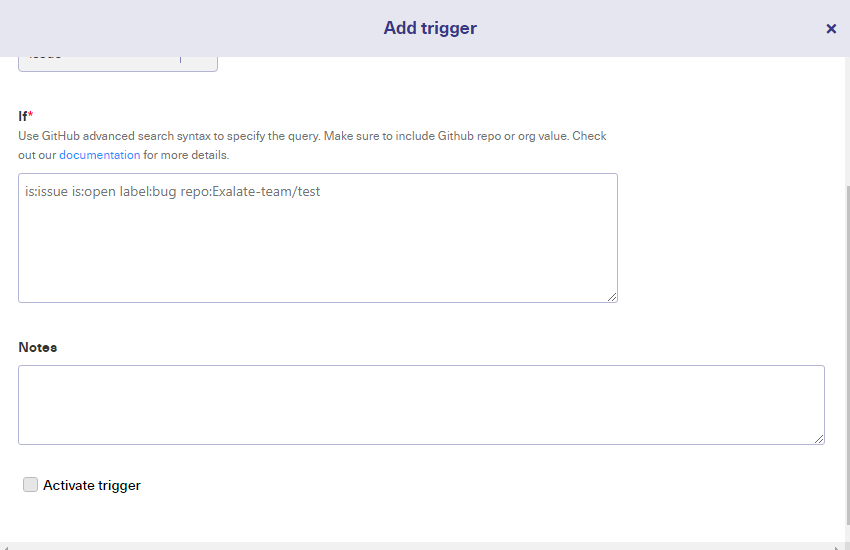
Here you can specify rules to decide when synchronization should happen automatically. We’re going to share all open tickets by typing “status: open” in the box.
We also choose the connection to share from the dropdown, selecting what we created earlier
If needed, we can leave notes here, too.
After creating the trigger, click where it says status to ensure the mark is green. Tickets added to Zendesk should now be sent to GitHub.
Note: When your tools are exchanging information, you may get lots of extra notification messages, so if you get too many, have a look at the settings and turn some of them off.
With our platforms connected together, information is shared consistently, but teams can still tune it to their needs.
Our new software makes our business more efficient and lets us focus on getting things done, without getting bogged down by communication issues.
Architecture, Security, and Deployment for a Zendesk GitHub Integration
Alright, let’s now discuss Exalate technology in more detail. If you’re using it, you may be curious about its architecture and the security features it has.
Architectural Autonomy
This diagram shows Exalate’s architecture:
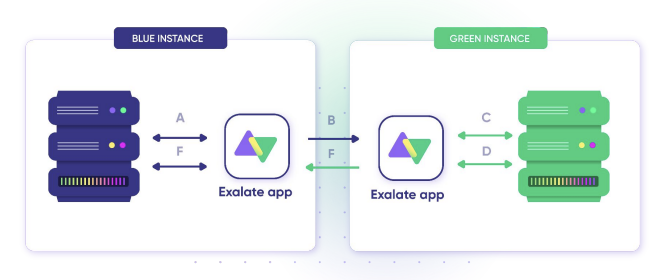
The blue end represents Zendesk, and the red end represents GitHub. Exalate agents for each platform sit in between these two services and handle the exchange of information between them.
- The letters A-F show how information flows between platforms. Both services use Exalate as an intermediary, which maintains the autonomy of each one.
- The Exalate agents control what gets sent and how information is matched from one platform to the other.
- As well as Zendesk and GitHub, there are Exalate agents available for Jira Cloud, Jira on-premise, ServiceNow, HP ALM/QC, and Azure DevOps. More services will be added soon, so check back later if the one you need isn’t ready yet. You can also request an integration.
Security
Security is definitely a key consideration when exchanging information between platforms. Exalate is designed with security in mind so you can trust it to synchronize information securely.
It uses the secure HTTPS protocol for most data exchange, and nodes use a reverse proxy for data termination. It also uses JWT to ensure data requests come from trusted sources.
Exalate protects your data by taking daily backups, which are retained for two days. It also conducts monthly penetration tests to help find and eliminate potential security issues.
To learn more about how Exalate keeps data safe, read this free Exalate Security and Architecture Whitepaper
This image shows the relationship between Exalate and the services it supports.
Conclusion
There are many software platforms around today that help you organize projects and make planning much easier. Linking them all together can be a chore, so automating the process of synchronization can help you improve productivity.
Moving information around isn’t enough. You also need to filter it, which means you need a system that can be tuned according to your needs.
A compatible system needs to combine reliability, flexibility, and autonomy. To achieve this, it needs to give teams a choice over what data is shared, as well as letting them work without having to worry about changes to the software other teams are using. It also needs to work consistently without the need to be micromanaged.
That’s it for now. In this guide, we’ve set up the integration using Exalate. And we’ve described the step-by-step process on how to complete this integration to bridge the gap between systems, different teams, and companies.
Frequently Asked Questions
Does Zendesk integrate with GitHub?
Zendesk can integrate with GitHub even though both platforms serve dissimilar functions. The secret to this integration is that both platforms use APIs, webhooks, flows, and actions to interact with internal systems, making it possible to access payloads.
How do I link GitHub to Zendesk?
It is possible to link GitHub with Zendesk by connecting both systems with GitHub Apps or OAuth Apps. You can also use Exalate and other third-party tools to link your GitHub repository with your Zendesk workspace.
Do I need to code to integrate GitHub and Zendesk?
Depending on the tool, you might not need to code in order to integrate GitHub and Zendesk. You can pick a plug-and-play integration tool with pre-built connectors. Or you can opt for code-based integration solutions such as Exalate for connecting GitHub with Zendesk.
What data can be synced between GitHub and Zendesk?
Exalate allows you to sync milestones, IDs, descriptions, task priority, comments, and attachments between GitHub and Zendesk. It is also possible to sync linked pull requests, users, and other custom fields.
Are there free GitHub Apps for Zendesk integration?
Yes, there are free GitHub Apps for Zendesk integration on the marketplace. Exalate is the only standout solution that allows you to sync a limited number of Zendesk tickets with your GitHub issues.
Recommended Reading:
- Jira Zendesk Integration: The Comprehensive Step-by-Step Guide
- How to Set up a Jira GitHub Integration
- GitHub Salesforce Integration: How to Set up a Sync in 6 Steps
- Zendesk ServiceNow Integration: The Complete Guide
- How to Set up a ServiceNow GitHub Integration
- Salesforce Zendesk Integration: The Guide (Step-by-Step)
- Zendesk Integrations: Streamline Teams Working in Zendesk and Other Tools
- How to Set up a Zendesk Azure DevOps Integration
- How to Set up an Azure DevOps GitHub Integration