Salesforce is perfect for teams working with customer data. Feature-rich and easy to use, it lets you control every aspect of the sales process without advanced technical know-how.
There are ways to get more from it, however. The data you store can be shared with teams using other tools like Jira, Zendesk, etc. That means your sales department can work with other departments more easily, with data filtered and shared automatically.
Why Integrate Salesforce Using a Third-Party Integration Solution
Though Salesforce includes a broad range of functionality, a third-party integration can take you beyond its default capabilities.
Note: If you want to learn more about the native Salesforce functionality, you can read this Salesforce to Salesforce integration guide.
Specialized applications bring features that can help you connect to other platforms with little development effort. Here are some examples of how that could work.
Common Use Cases
Salesforce is typically used by sales teams, but you can use a third-party integration to connect to other platforms.
If you have sales teams in different locations, you can integrate their data and exchange tickets. Perhaps they sometimes acquire customers that are best handled by other teams. An integration can help your teams share their details automatically.
Developers using Jira can share progress on new items with the sales team via an integration. The sales team can make developers aware of customer requests for features, and developer feedback can be automatically sent back to the original ticket.
Project managers working in Azure DevOps can share targets with the sales team, and the sales team can have that data automatically synchronized with the other team’s system.
There are many other ways a third-party integration can contribute to your business. All it takes is a little imagination.

Choosing the Right Solution for a Salesforce Third-Party Integration
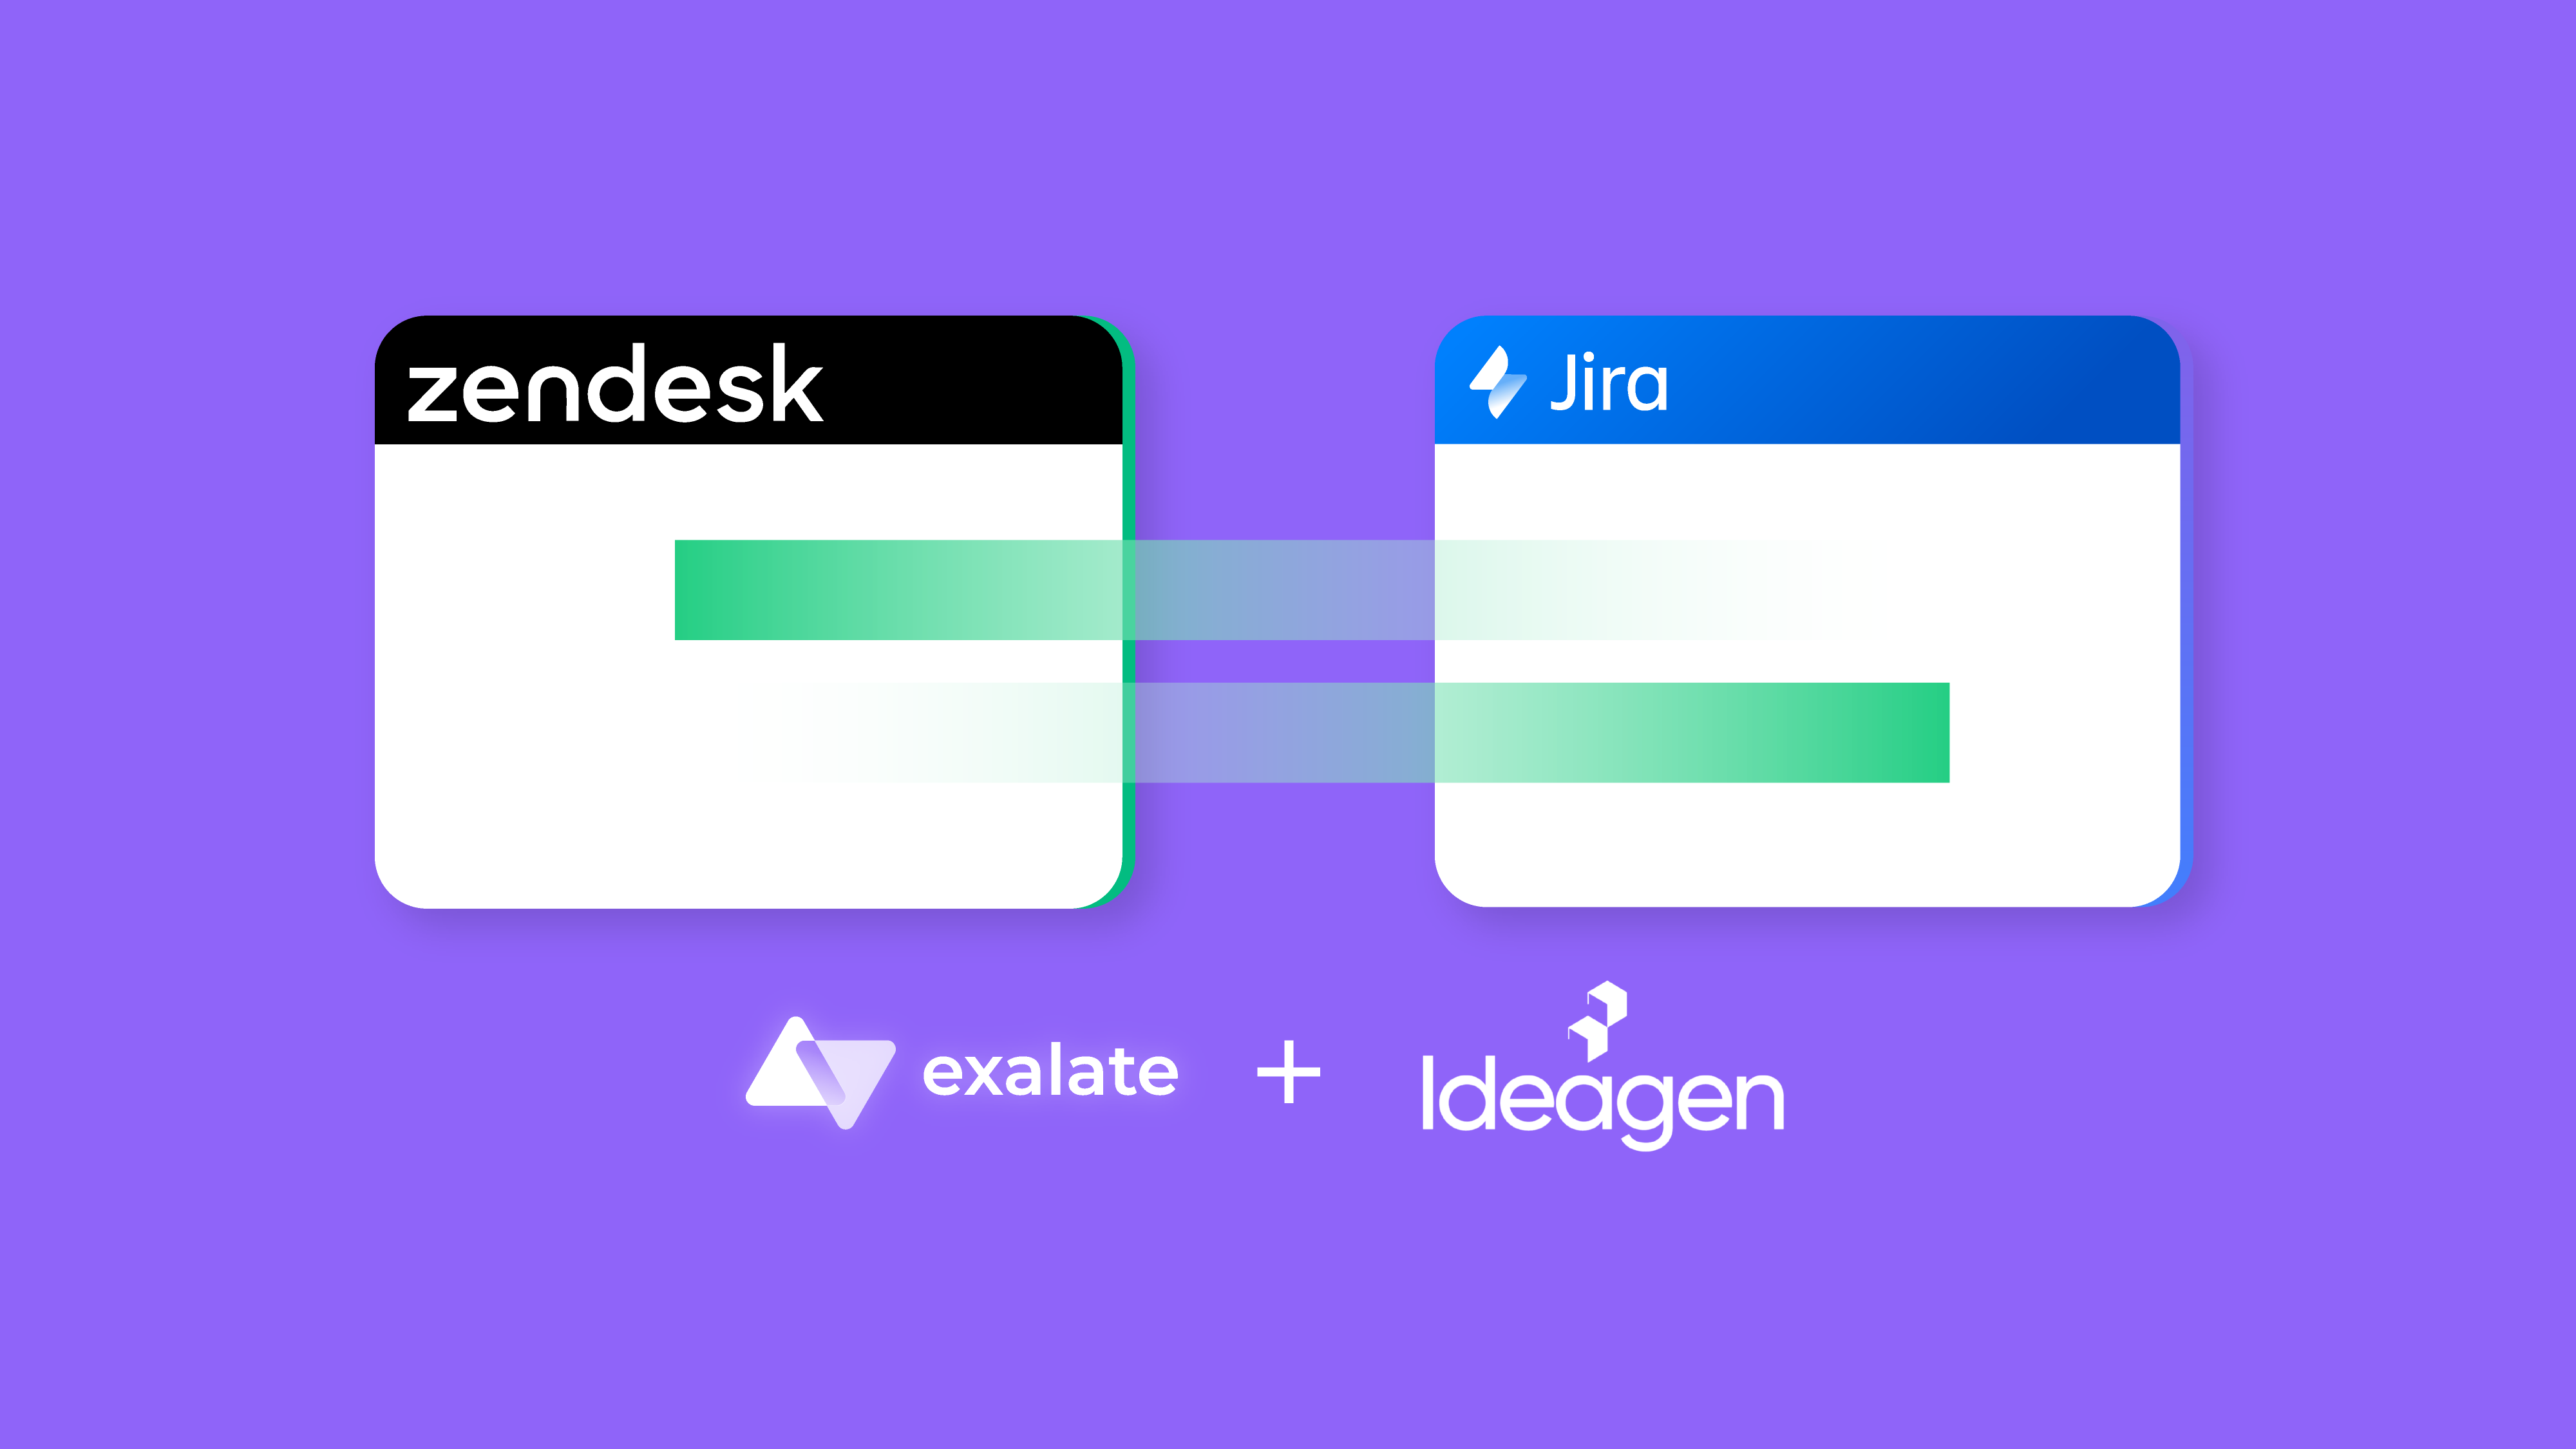
The integration solution we have chosen for this article is called Exalate. Exalate is an integration solution that enables two-way syncs between multiple tools like Salesforce, Jira, Zendesk, ServiceNow, HP ALM, GitHub, Azure DevOps, and more.
There are a few criteria that you need to take into consideration when choosing an integration solution for your specific use case.
Decentralized Integration

With a decentralized integration, neither side owns the connection. If different teams manage each platform, they retain their autonomy and have full control over what they share and how incoming data is mapped to their systems. Exalate gives each team an independent configuration screen, allowing them to choose what is shared.
Flexibility
Exalate is hugely customizable and suitable for many scenarios. Its scripting engine allows you to filter and map data using advanced logic.
With the Script Mode, users get access to the AI-powered assistant, AI Assist, which reduces the complex process of writing scripts into a simple 3-step process: prompt, edit, and accept.
Reliability

Exalate is designed with reliability in mind. If one side of the connection drops, it can recover gracefully. There’s no need for manual intervention. Once it is running, you can forget about it.
How to Integrate Salesforce with Other Tools through a Third-Party Solution
An advantage of using Exalate as a Salesforce third-party integration solution is that it uses a common interface on each platform.
In this example, we’ll connect it to Jira Cloud, but the process is the same for other platforms. You can integrate any of these with Salesforce or each other just as easily.
The process starts with installing Exalate on both platforms and then connecting them. Next are some optional configuration steps for controlling how data is shared and when data exchange happens.
Let’s go through each step.
Step 1: Install Exalate on Salesforce
Let’s start by installing Exalate on Salesforce. You can do that either from the integrations page or Salesforce AppExchange.
We’ll discuss the process via AppExchange in this section.
Start by deciding where you want to install Salesforce: either “Install in This Org” or in a Sandbox org. I chose “Install in This Org” for my installation.
After selecting your installation destination, scroll down to the bottom of the screen and agree to the terms and conditions. Once you’ve done that, click on “Confirm and Install”.
Next, you need to specify the users for whom you want to install Salesforce. Remember that you can modify this later if necessary. For my installation, I opted to go with “Install for All Users” and clicked “Install”.

Now, you’ll be required to “Approve Third-party Access”. Click on “Continue” to proceed with the installation process. After the installation is complete, click on “Done” to finalize the setup.
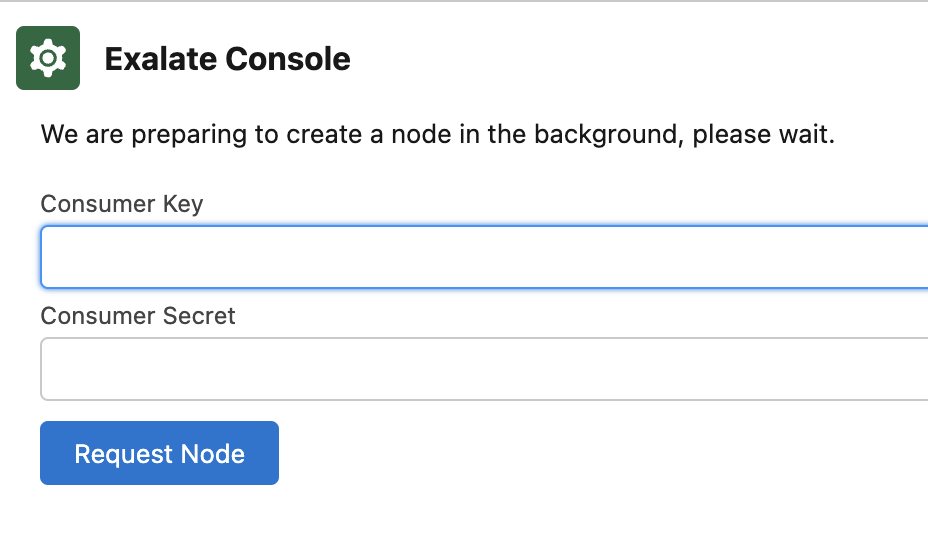
Moving on, access your Salesforce instance and create a connected app. Make sure to save the “Consumer Secret” and “Consumer Key” that are generated during this process. Then, within your Salesforce instance, navigate to “Apps” and search for “Exalate”.
To request an Exalate node, provide the “Consumer Secret” and “Consumer Key” you saved earlier, and then click on “Request Node”.
To add new “Trusted URLs”, go to “Setup” and search for “Trusted URLs”
In the “Trusted URL information” section, enter the following details:
- API name: free input string
- URL: *.exalate.cloud
Now, check all the checkboxes under the “CSP Directives” section and click “Save”.
To grant access permissions to Exalate, click on “Allow”. Afterward, enter your personal details and click on “Agree and Submit”. Now, wait for an email from the Exalate License Manager.
Upon receiving the email, click on “Verify Exalate instance” to be redirected to the Exalate admin console.
From this point onward, you can proceed to install Exalate on Jira. If you ever find yourself logged out of your Salesforce instance, simply refer back to these steps to log in again.
Step 2: Install Exalate on Jira
Next, switch to Jira and install Exalate on Jira as well. You can do that via the Atlassian marketplace.
Note: We’re using Jira Cloud, but you can read about how to set up Jira on-premise here.
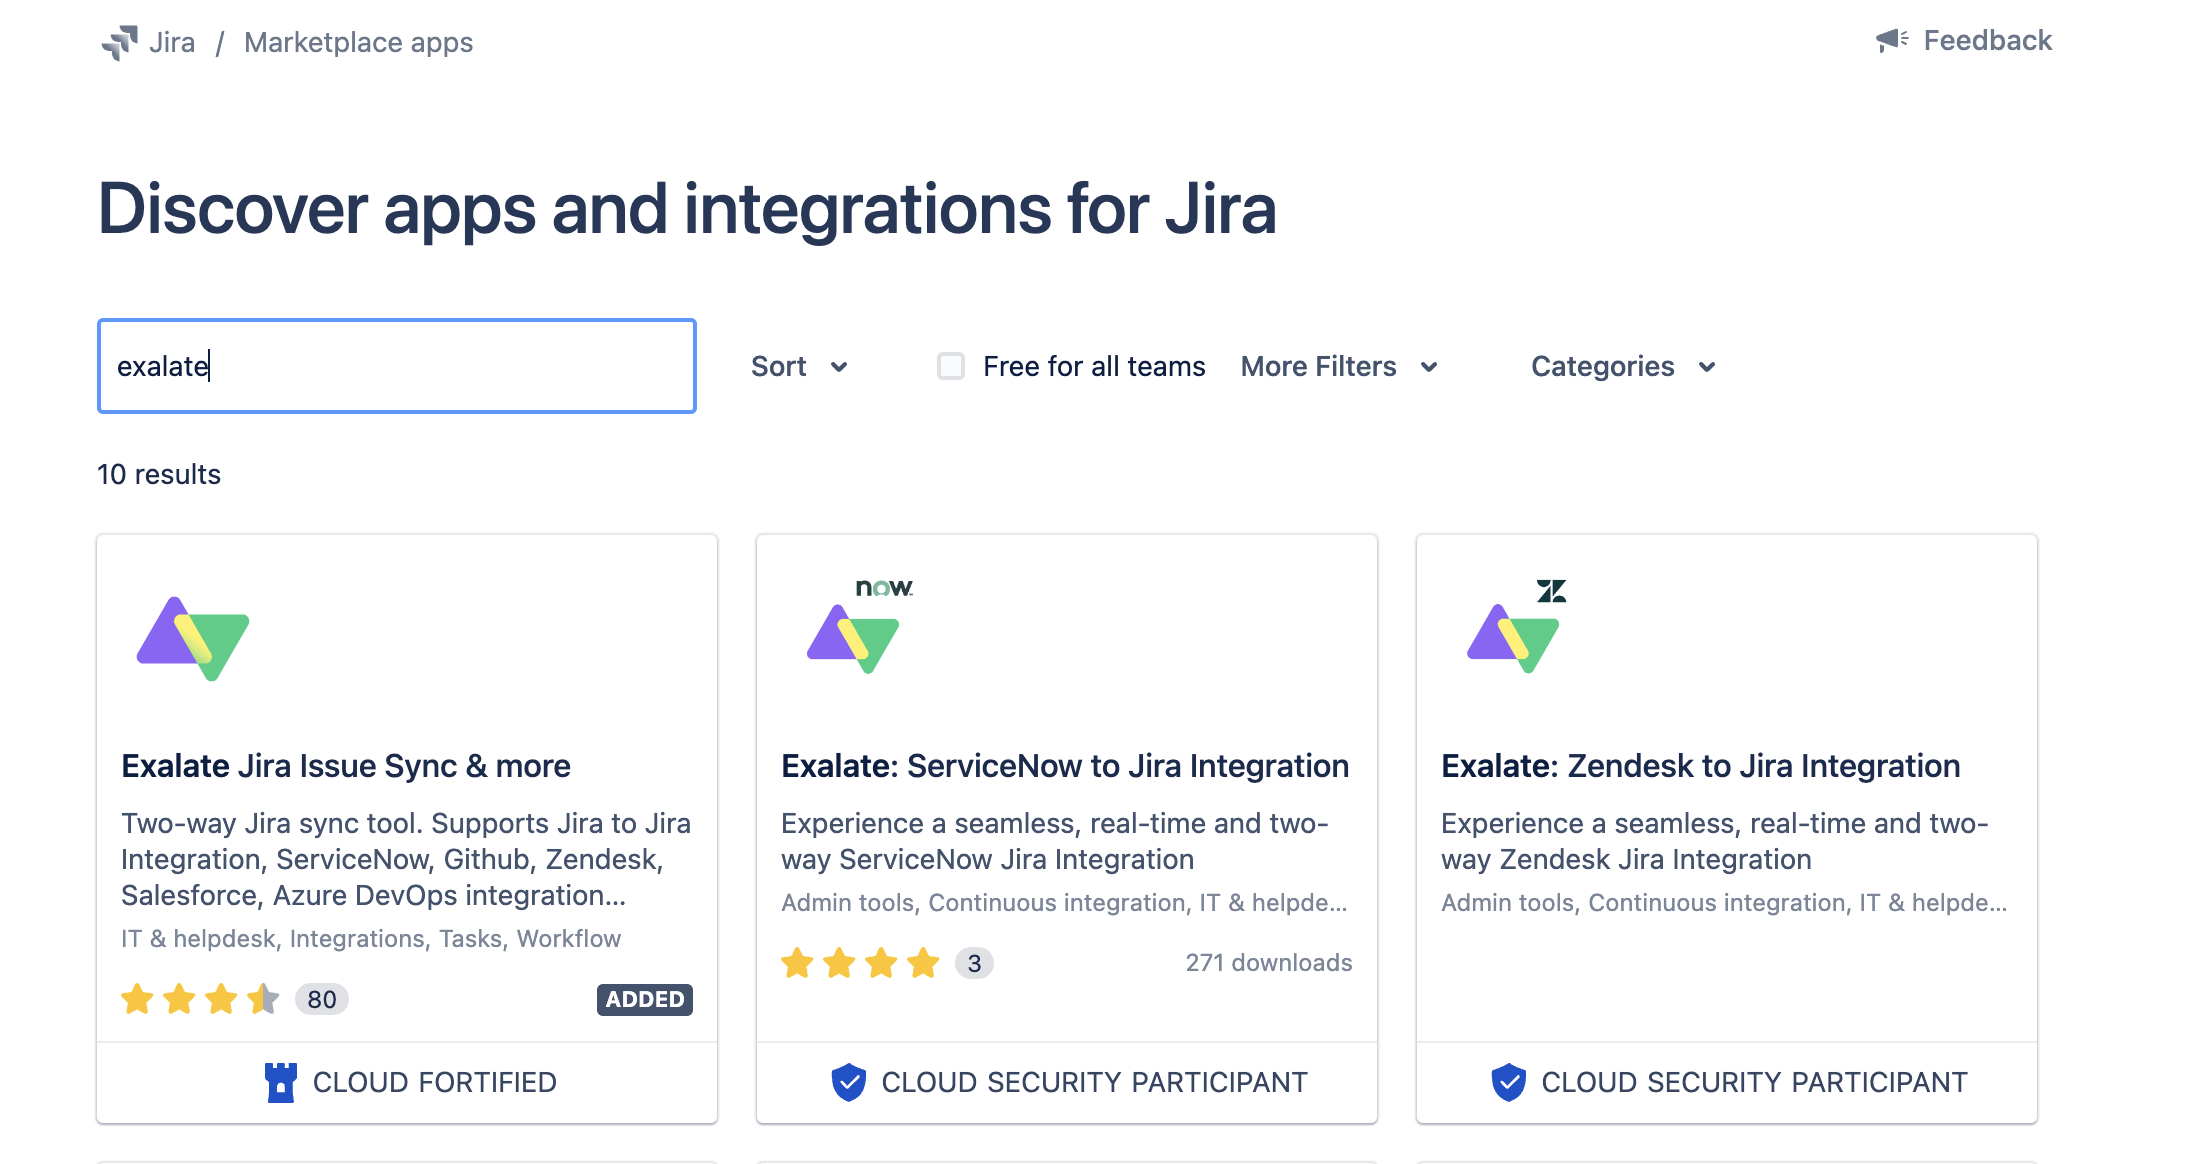
First, search for “Exalate” in the Atlassian Marketplace and install it via the “Try it free” button, followed by the “Start free trial” button.
After a brief install process, click “Get Started”.
Now you’re ready to connect your instances.
Step 3: Connect Salesforce and Jira
Now that Exalate is installed on both platforms, let’s create a connection between Salesforce and Jira.
You can start from either side of the connection. This guide uses Salesforce, so find the Exalate screen on your Salesforce installation, then click “Connections”. This screen shows any existing connections but will be empty the first time you use it.
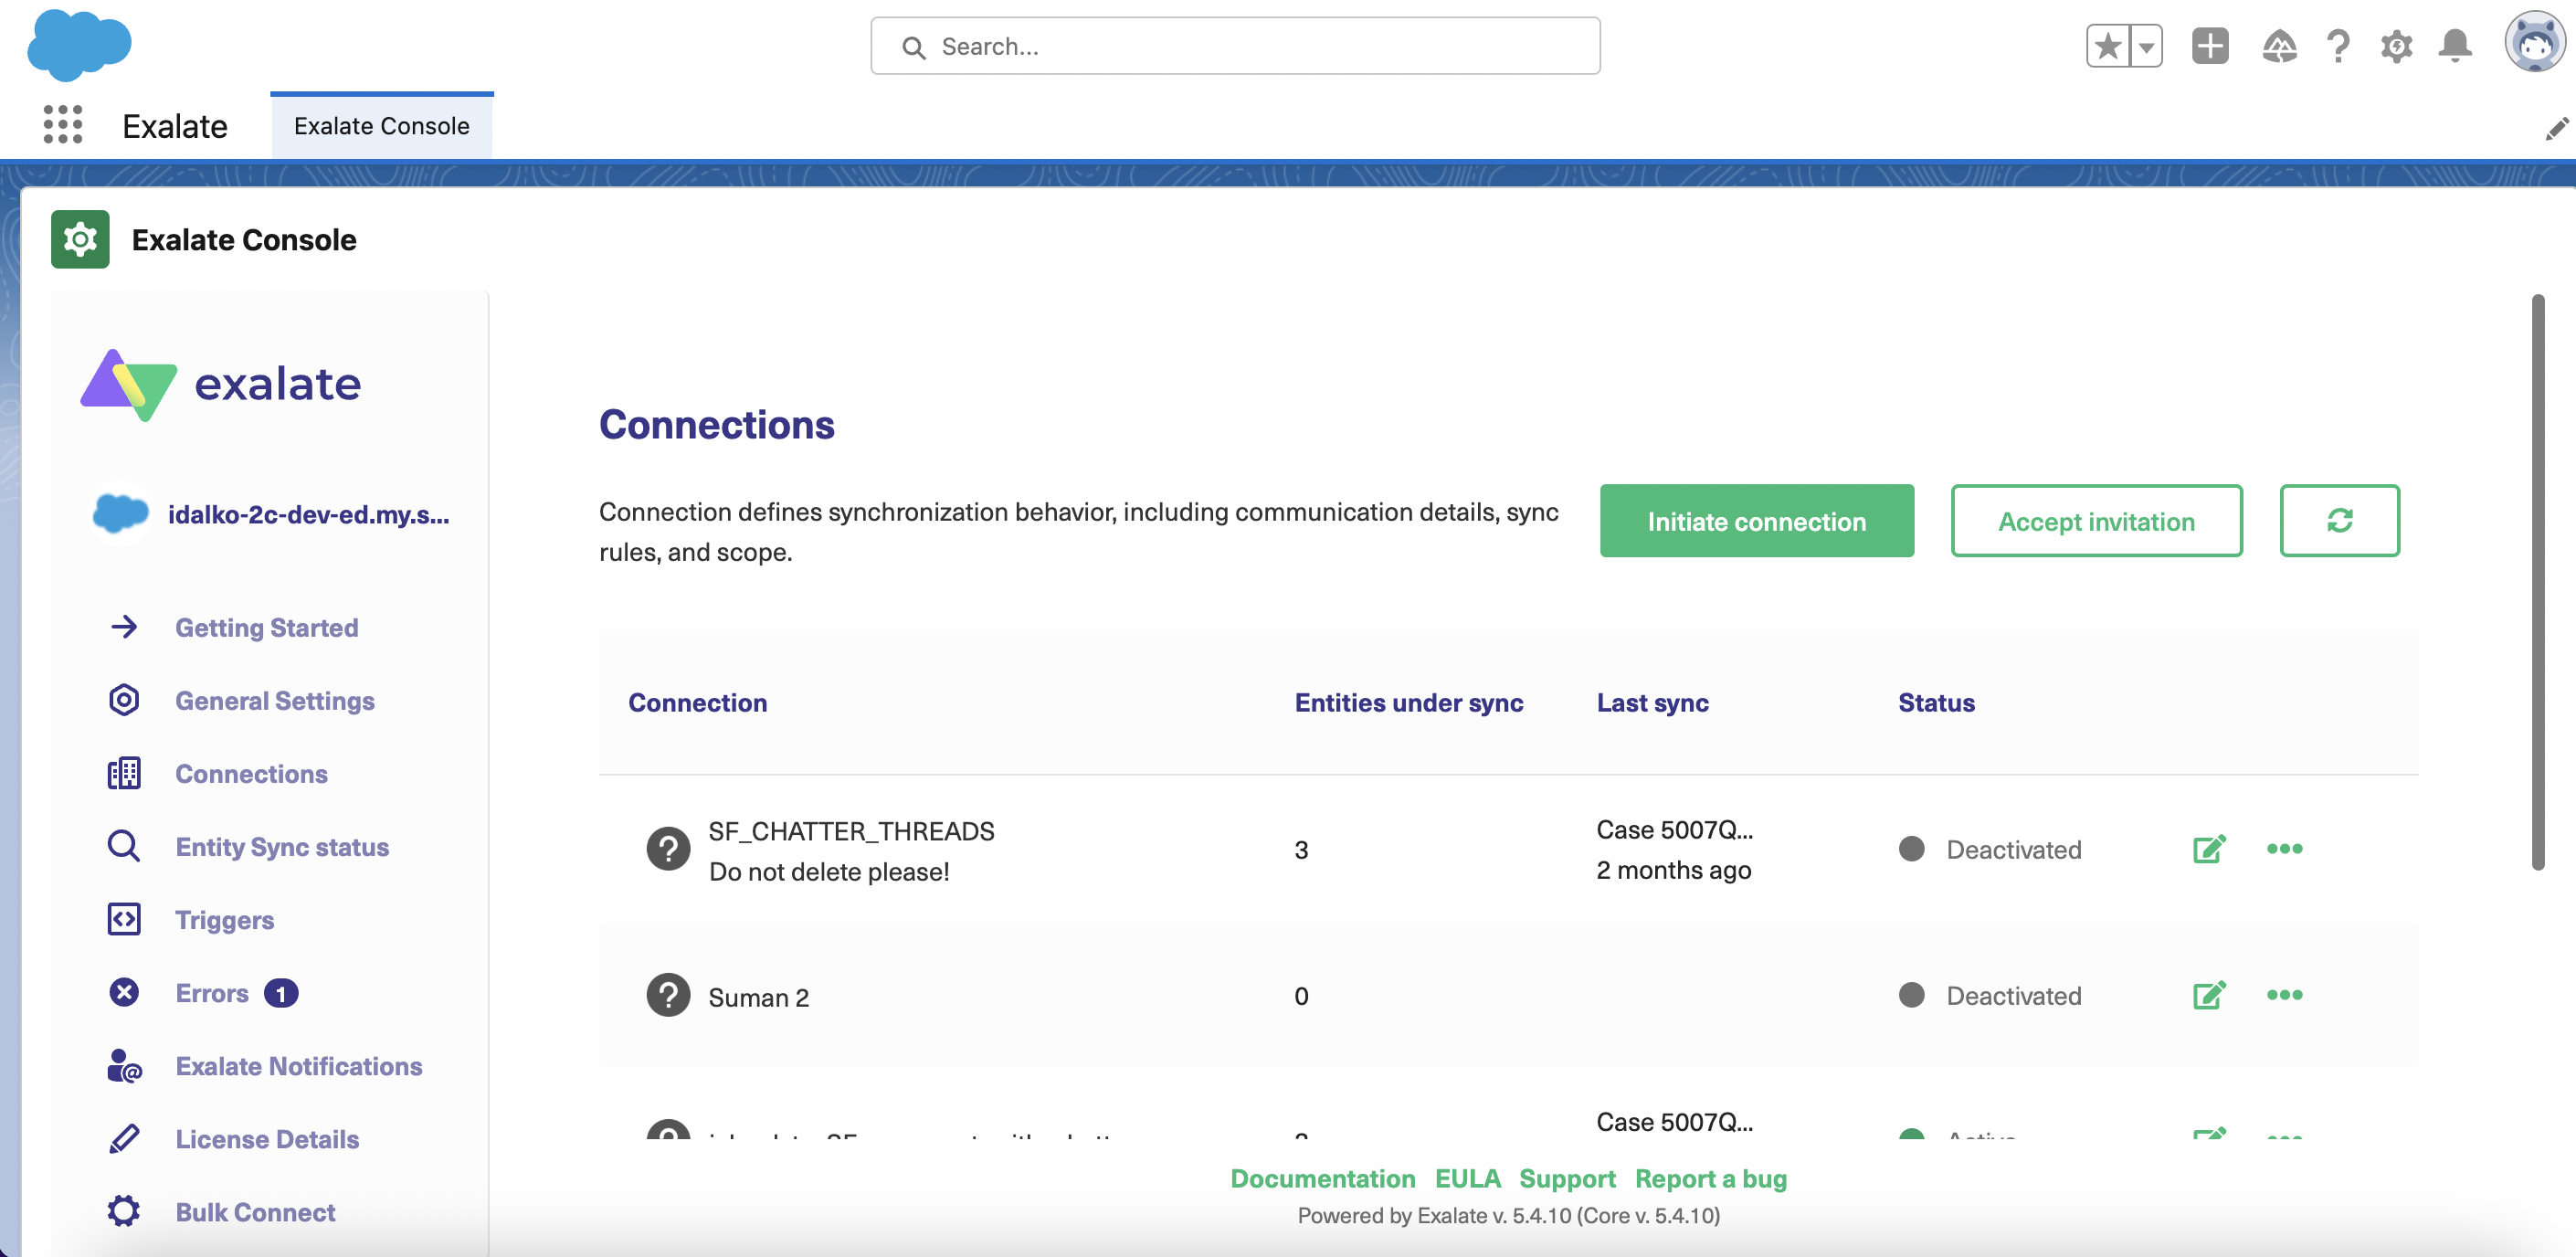
To create your first connection, click the “Initiate connection” button. Next, you’ll see a “Destination instance URL” box. Enter your Jira instance’s address, so that Exalate can verify it is available.
Next, you should select the Basic mode or the Script mode.
The Basic mode uses automatic configuration, with simple visual tools. The Scripting mode uses programming logic to set complex rules that control how your data is shared.
Let’s cover them in turn.
Continue with the Basic Mode
The Basic mode takes you through a few simple dialogue screens. You can head straight to the other side of your connection by clicking a button.
Once there, choose a project and click “Confirm”. Your connection is now ready and you can test it by picking a test issue to synchronize.
If you don’t have admin access to the other side of the connection, use the Script Mode guide to complete the process.
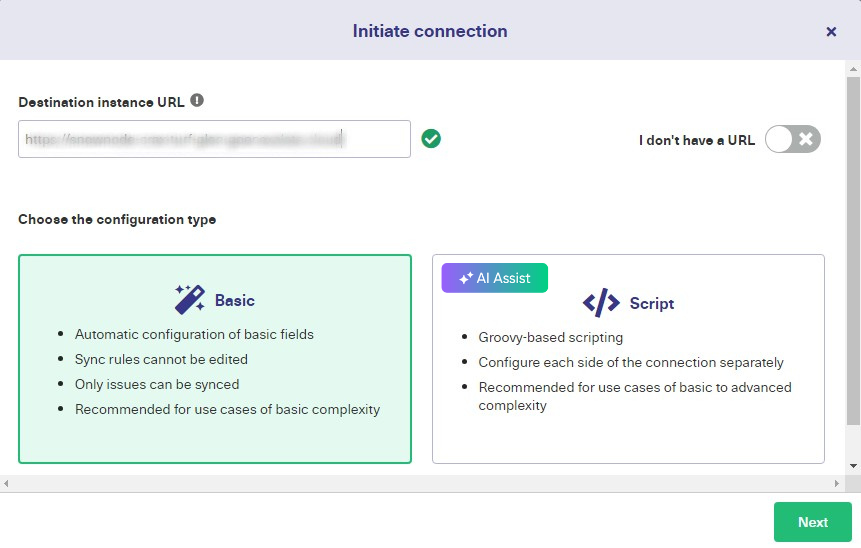
Continue with the Script Mode
In the Script mode, you need to choose a name for your connection and can optionally add a description, both of which can help you make sense of things later on, especially if you have multiple connections.
After adding these details, click “Initiate”. You’ll see a “Copy invitation code” button. Click that, and then click the “Done” button.
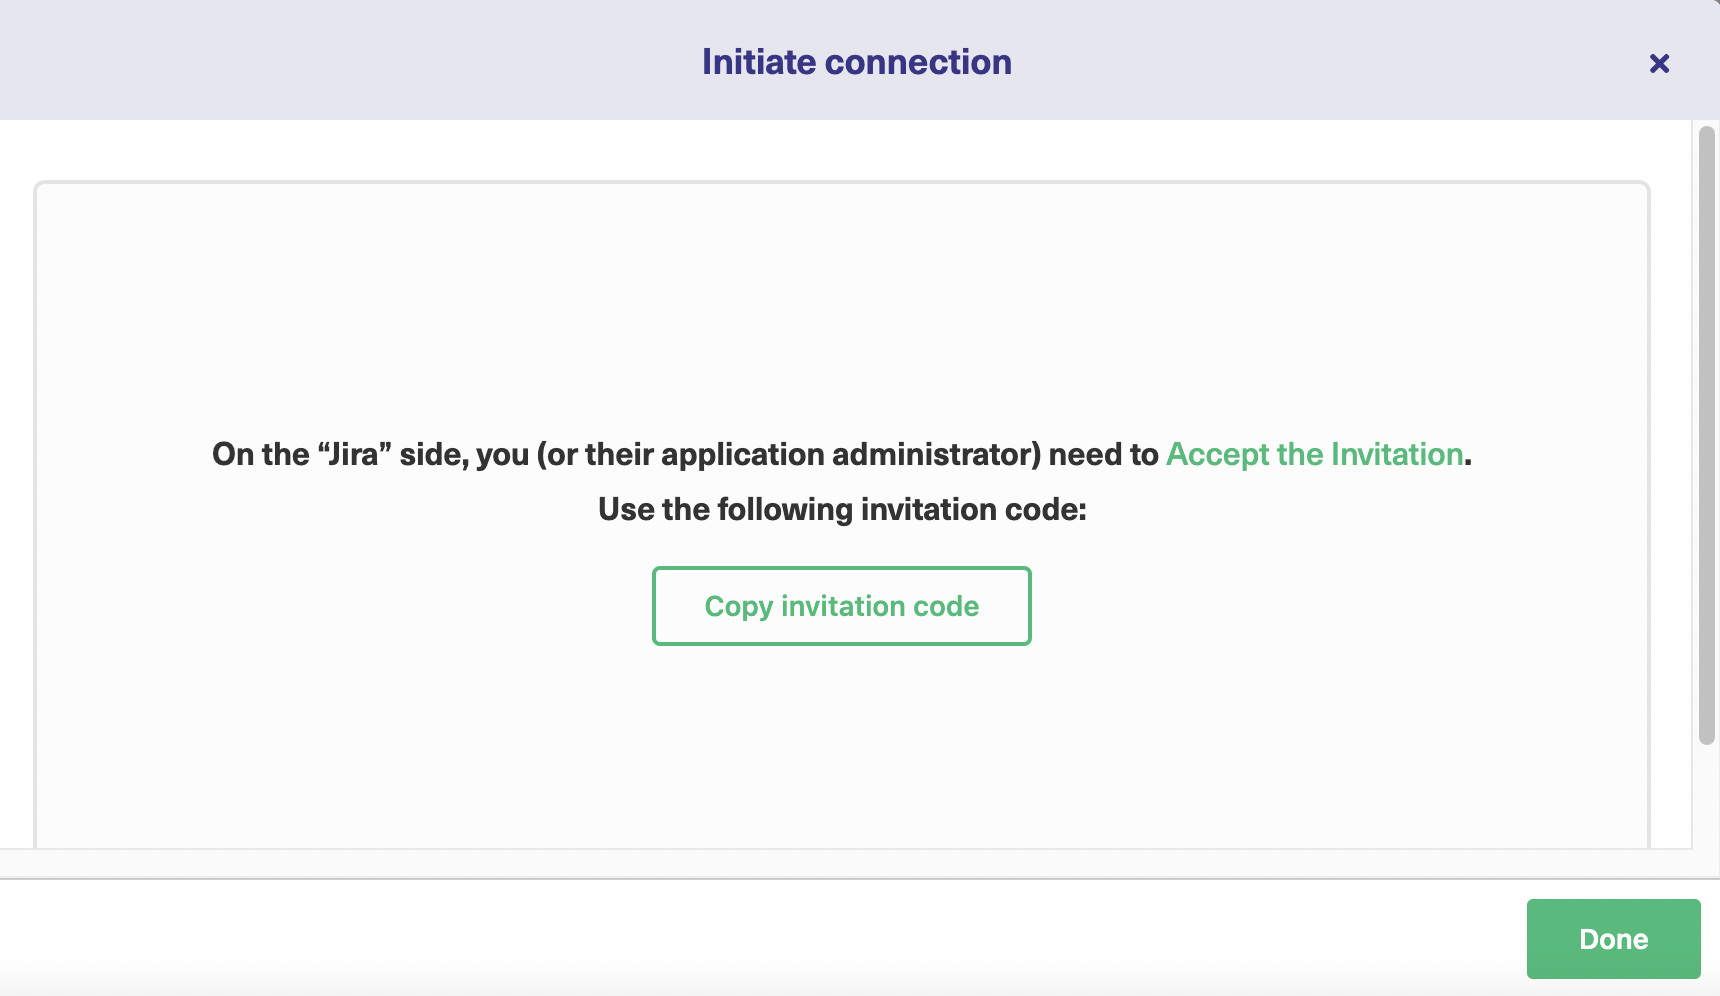
On the Jira connection screen, click the “Accept invitation” button and paste the code into the space provided. The code should be on your clipboard. If not, go back and copy it again.
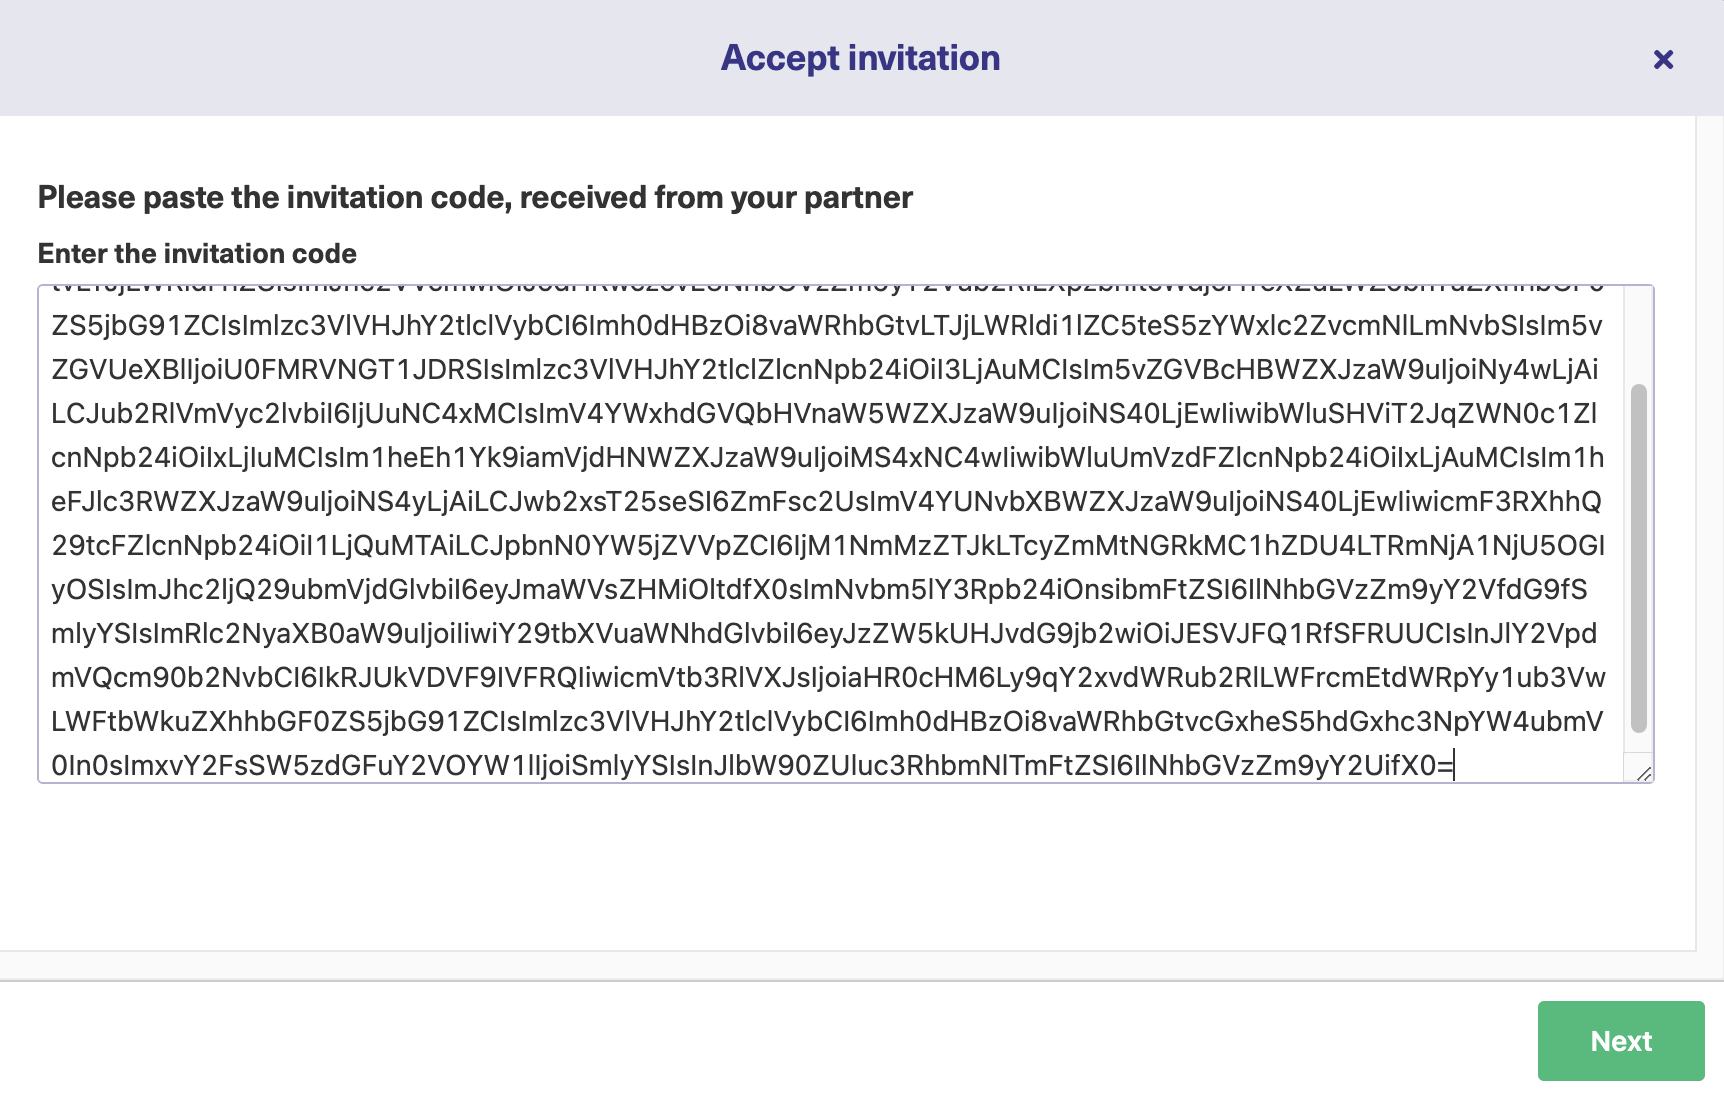
Click next, and Exalate will ask you a few questions, as in the Basic mode. When you’re done, the connection is created and you can move on to the next steps.
Step 4: Configure the Connection Rules
This allows you to control what is shared and how fields from each side of the connection are mapped onto each other.
To begin, find the newly created connection on the Exalate connections screen. Then click the “edit connection” button.
Multiple tabs appear on the screen, and “Rules” should be visible by default. Select it if not.

Here, you can see two sets of rules, one for incoming items and one for outgoing. These describe how each item is mapped to its equivalent on the other platform.
When you sync tickets, the data is copied between these fields, from the existing ticket to the new one.
By default, the mappings use identical, or similar fields. In the above screenshot, you can see that replica.description maps to entity.Description in the outgoing rules.
You can change, remove, or adjust any of these lines.
If you want to remove a line, delete it or comment it out. You could also add specific text. For example, you could change the description line to read: replica.description = “Synced from Salesforce”. That way all items in Jira that come from Salesforce will have that description.
You could match items to others if that suits you better. Perhaps you want to make the summary on one platform list the status on the other. In that case, you could change the summary line to replica.summary = entity.Status.
Use AI Assist with Script Mode
Exalate’s script mode now comes with AI Assist, which is available as a chat window in both the incoming and outgoing sync rules tabs. Just describe your sync requirements in the chat, and AI Assist will generate the necessary scripts for you.
These scripts are created based on your input, existing configurations, and Exalate’s scripting API.
Remember, like any AI, AI Assist isn’t perfect and may occasionally make mistakes. So, be as clear and specific as possible with your prompts.
Here’s an example of how you can use it:
Let’s say you need to map case statuses between multiple Salesforce instances. You can type something like this in the AI chat:
For incoming sync: “Create a status mapping that sets New to Open, Working to In Progress, and Escalated to Done in the Jira incoming configuration.”

The AI will generate the script in a few moments.
Lines in red show what will be removed from the current script, while green lines represent the new additions. You can accept or reject the changes and, if needed, adjust your prompt. Once everything looks good, publish your changes.
You can go further and use code to make decisions based on the values being exchanged. That’s beyond the scope of this article, but if you have any coding skills, you can probably think of a few ideas yourself.
Step 5: Set Up Triggers to Automate Data Exchange
In the previous step, you used sync rules to decide what maps to use. In this step, you’ll create a trigger that decides when items are exchanged. You can have as many triggers as you like, setting different conditions for sharing.
Perhaps you want to share high-priority items or items assigned to a particular person. You can create separate triggers for both of those things.
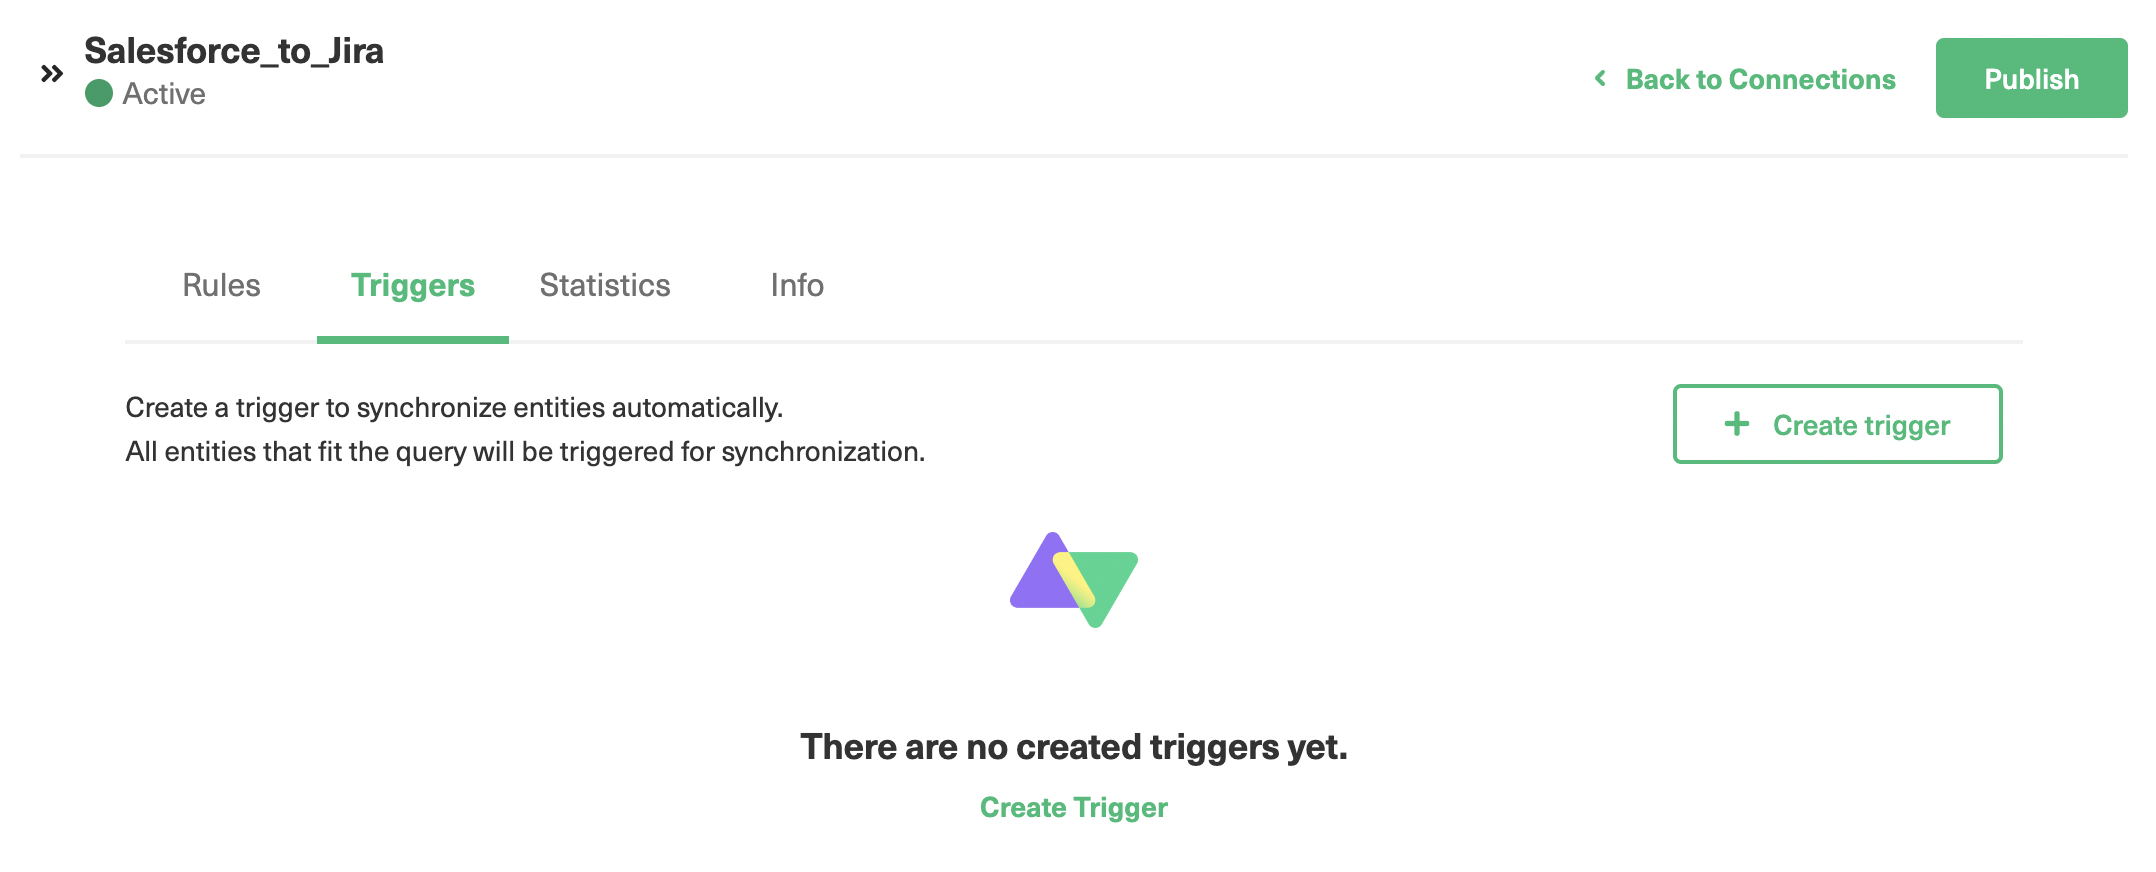
To get started, click the “Triggers” tab on the edit connection screen you accessed in the previous step. Then click the “Create trigger” button.
On the add trigger screen, there are several controls. Firstly, you can choose the type of entity the trigger synchronizes. There’s a notes section to describe the trigger and a checkbox to switch the trigger on and off.
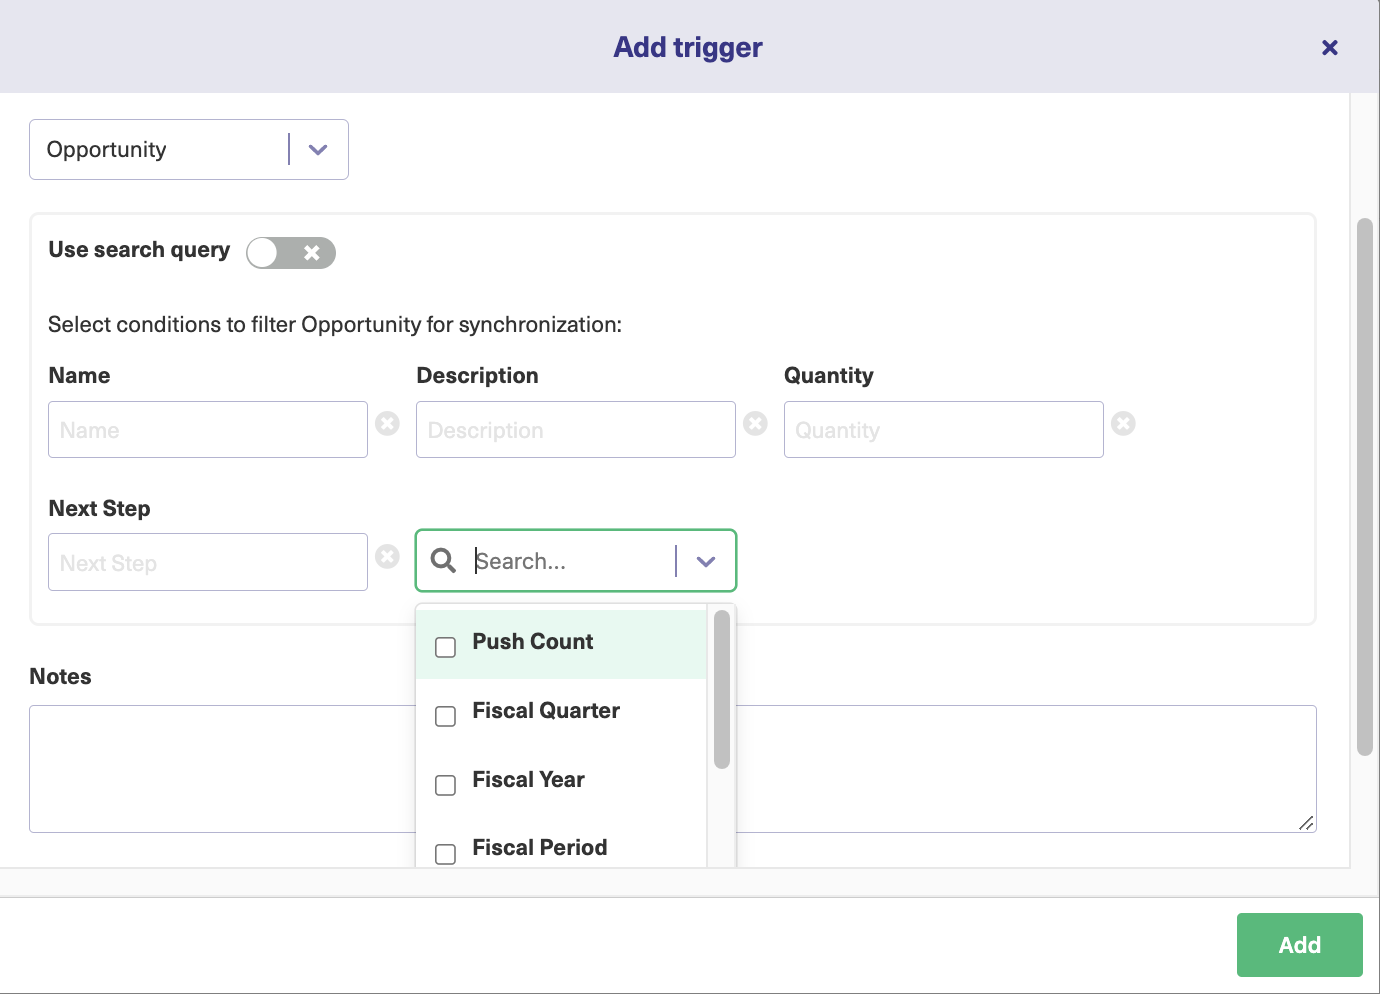
There’s also a “Use search query” switch that gives you a choice of how to do things. If you don’t use a query, you can specify values for fields that will activate the trigger if met.
For more advanced decision-making, you can use a search query. That uses code for more advanced control. In Salesforce, you use SOQL (Salesforce Object Query Language), and JQL (Jira Query Language) in Jira.
As an example, you could use Name = 'demo opportunity' to select items with the specified name. You can use programming constructs like AND and OR to combine conditions.
For more on using SOQL with Exalate, read this. For JQL triggers, check this guide.
When you’re done, click the “Add” button to create the trigger.
Step 6: Start Synchronizing Salesforce and Jira
Now the platforms are connected, you can start adding more triggers that match the data you want to share. The integration will automatically share this data between Salesforce and Jira. It’s a good idea to monitor what happens at first to make sure it matches your requirements.
Now that it’s working, you can make it do even more for you by creating advanced filters and sharing rules. Experimenting with the triggers and sync rules can give you new ideas on how you can use them, so try a few things out.
Conclusion
When you want to share data between platforms your choice of solution is key. Get it right and your teams will benefit.
Exalate, as a Salesforce third-party integration solution, is designed to deliver reliability and flexibility in a decentralized integration. It lets you integrate multiple platforms easily without leaving the tool(s) you are familiar with.
You can choose exactly how and when data is shared. Once set up, your integration does the hard work for you, leaving your teams free to get on with what they do best.
Recommended Reads:
- Jira Salesforce Integration: How to Set up a Two-Way Sync between Different Teams
- Salesforce to Salesforce Integration: Sync Multiple Salesforce Instances Bidirectionally
- How to Set up an Azure DevOps Salesforce Integration
- GitHub Salesforce Integration: How to Set up a Sync in 6 Steps
- How to Set up a Salesforce ServiceNow Integration
- Salesforce Zendesk Integration