If different teams (working in ServiceNow) have their own instances, they can easily manage that data independently while making it available to the other teams through a ServiceNow to ServiceNow integration.
Such integration can automatically exchange data between ServiceNow instances. Both sides can control what they send and set the conditions for data transfer.
This opens up all kinds of possibilities for teams wanting to help each other work more effectively. It can also make existing data transfer tasks faster, cheaper, and more reliable.
Setting up a two-way ServiceNow to ServiceNow integration can improve productivity, but it also comes with several challenges. Let’s discuss them in more detail.
Who Needs ServiceNow to ServiceNow Integration?
If your organization uses ServiceNow for IT service management (ITSM), then you’d need an integration to connect with other teams or companies using ServiceNow as well.
For example, IT teams in one organization can connect their ServiceNow instance with the instance of a customer support team in another company. This will help them improve the quality of services they deliver to customers.
ServiceNow to ServiceNow integration also helps to establish a collaborative environment between service providers, clients, vendors, and suppliers.
5 Things to Consider for ServiceNow to ServiceNow Integration
Here are a few things to factor in when choosing an integration provider or solution for two ServiceNow instances:
- What are the intended outcomes? You might want to share data with another team and keep them updated about service progress.
- What is the cost? Check how much you’ll pay for the solution’s maintenance and licensing.
- Who should have access? Conduct a thorough evaluation to determine who should have access to the system. This will inform how you share role-based access.
- What are the available integration options? Determine whether it will be better to use available native integration options or build a custom solution in-house.
- Is there a team available? Make sure you have a team of developers or engineers who can configure, customize, and optimize the ServiceNow integration solution.
What Are the Common ServiceNow Integration Solutions?
The ServiceNow to ServiceNow integration you need can either be a native solution, a custom application, or a third-party integration tool. You just need it to connect with the API to fetch and transform payloads in near real-time.
Integration Hub
Integration Hub allows users to connect their ServiceNow instances with other ServiceNow and third-party systems. It is a product of ServiceNow.
This solution also relies on Steps, Actions, and Spokes to call APIs in order to interact with other systems. Other available Integration Hub features include:
- Spoke Generator
- Flow Templates
- Remote Tables
- Rest API Trigger
- Stream Connect for Apache Kafka
Although Integration Hub supports eBonding, the scripting capabilities have limited scope and customizability.
Third-party Applications
If Integration Hub and third-party integrations cannot address your needs, consider a third-party solution like Exalate.
Exalate supports bidirectional ServiceNow to ServiceNow integration, which you can use to sync any entity.
The AI-powered scripting engine uses Groovy language to configure connections to your specific use case. You can also use automated integration triggers to control syncs independently.
What makes Exalate the standout option for ServiceNow to ServiceNow integration is that it has an AI Assist feature embedded into its UI, which you can use to generate prompts for scripting your connections.
We’ll discuss how to set up and use Exalate for ServiceNow to ServiceNow integration in further detail.
Custom Solutions
An alternative to Integration Hub and third-party integrations is to build one from scratch. This involves developing an application or module that can interact with ServiceNow APIs to fetch and transform vital data.
However, the major drawback of building custom ServiceNow integrations is that they require too much effort and money to get working.
Why Integrate Multiple ServiceNow Instances?
Here are some reasons why companies sync multiple ServiceNow instances:
- Consolidate data from both platforms to a centralized hub in order to make informed decisions.
- Increase workflow productivity by reducing the time spent on manual data requests and transfers.
- Save money by accessing only essential data without having to add extra instances to your stack.
- Improve the user experience by connecting service desks in order to decrease resolution time and increase customer satisfaction scores.
- Establish a transparent, trust-based collaborative environment for internal and external collaboration.
- Streamline intra-company and cross-company collaborations as well as mergers and acquisitions.
What Are the Use Cases for a ServiceNow to ServiceNow Integration?
Let’s look at a couple of specific examples of situations where you can benefit from this integration.
Quality Control and Customer Support
Your customer support team deals with incidents and problems reported by clients. They file these in ServiceNow and keep track of related customer communications. Quality Control tracks product issues themselves in their own system.

Both teams have an interest in some, but not all, of the other team’s data. With a ServiceNow to ServiceNow integration, you can exchange the appropriate entities and fields that are important to each team’s work.
Consolidating Regional Databases
If multiple sales teams run their own customer databases, you have a wealth of data that can be combined and studied. To your data analysts, this information is a treasure trove of insights waiting to be uncovered.

Using integrations, you can move data from regional servers to a common data store for your analysts to use to determine which customers are providing the most value and which marketing actions are most effective. They can then share that data with your regional teams.
Handling Supply Chains
When a customer support team and a service delivery team are using separate ServiceNow instances, the only way for both sides to keep updated is with the help of an integration solution.
So, if the delivery team encounters an incident or change request, they can forward it to the customer support team to escalate to the responsible team.
How to Set up a ServiceNow to ServiceNow Integration in 5 Steps
Now you’ll learn how to set up an integration between multiple ServiceNow instances. The tool I’ll use to do this is Exalate.
Exalate meets the challenges you encounter when setting up a potentially complex data integration.
Firstly, it is reliable, meaning you don’t have to worry about fixing it when something goes wrong. If one end of your connection experiences an outage, it can handle it and will start working again automatically when the connection is restored.
Secondly, it supports decentralized integration. You can manage your own end of the connection autonomously, controlling what is allowed out, and how what comes in is mapped to items on your system.
Thirdly, it is flexible, giving you easy ways to decide what is exchanged, how it is mapped between instances, and when data exchange takes place.
So let’s see how a ServiceNow to ServiceNow integration is implemented, step by step.
Step 1 – Install Exalate
The first step is to install Exalate on your ServiceNow instances. If connecting two instances, you need to repeat this step for each of them.
You can also set up an integration on a single server if you need to exchange information between projects. That can be useful if your departments share a server. In that case, you’ll get the option to create the connection locally in step two.
The easiest way to get started is to request an instance from Exalate via its integrations page. Alternatively, you can install Exalate yourself via docker, though that can be complicated. I’ll discuss the first way.
For more details on either method, consult our documentation.
If you have teams using other platforms, you can use Exalate to integrate them with ServiceNow too, so take a look at what else is available.
Once you have your Exalate node, go back to your ServiceNow account.
You need to create a proxy user with the correct permissions, which you can read about here. You’ll also need the Role Management V2 REST API plugin available and active. It’s included from the ‘New York’ version of ServiceNow onwards.
Now access the Exalate node, using the URL you got in the email. You’ll need to accept the EULA. After that, provide the node with the details it needs to connect to your ServiceNow instance. Enter the URL, along with your proxy account details. You’ll also need to provide your evaluation key, which was also in the email you received.
Now you’re ready to move to the next steps. You’ll need a ServiceNow account with administrative access to proceed.
Note: You can install Exalate for ServiceNow from the Atlassian marketplace and the ServiceNow Bridge app the ServiceNow store.
Step 2 – Connect Your ServiceNow Instances
To connect your ServiceNow instances, you need to generate an invitation code on one end and paste it into the other. That creates a link between the two, that you can then configure to exchange the data you want.
Open your Exalate node in your browser and navigate to the Connections screen via the left-hand menu. Click the “Initiate connection”.
Enter the URL of the instance you want to connect to. Exalate will look for it, and check Exalate is also installed there. When it finds it, you’ll be given the option to proceed using the Basic mode, or Script mode.
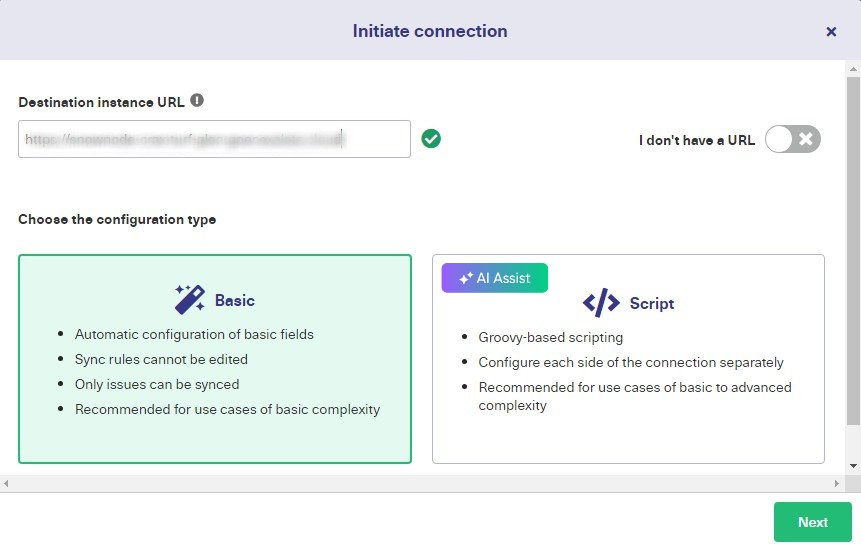
The Basic mode is free and configures everything for you automatically. It’s great when you don’t want to worry about the details, and also lets you test everything out easily.
The Script mode is more advanced and lets you decide the details of how things are shared. You can specify what fields are shared, how they are mapped, and set the conditions for sharing. You can also use this mode with AI. We will learn about that in the coming section.
Let’s start with the Basic mode and return to Script mode later. Click “Basic” and click “Next”.
You will then be asked to choose whether you have admin access to the destination ServiceNow instance. Click “Yes, I have admin access” if you have access. Else click “No, I don’t have admin access.”
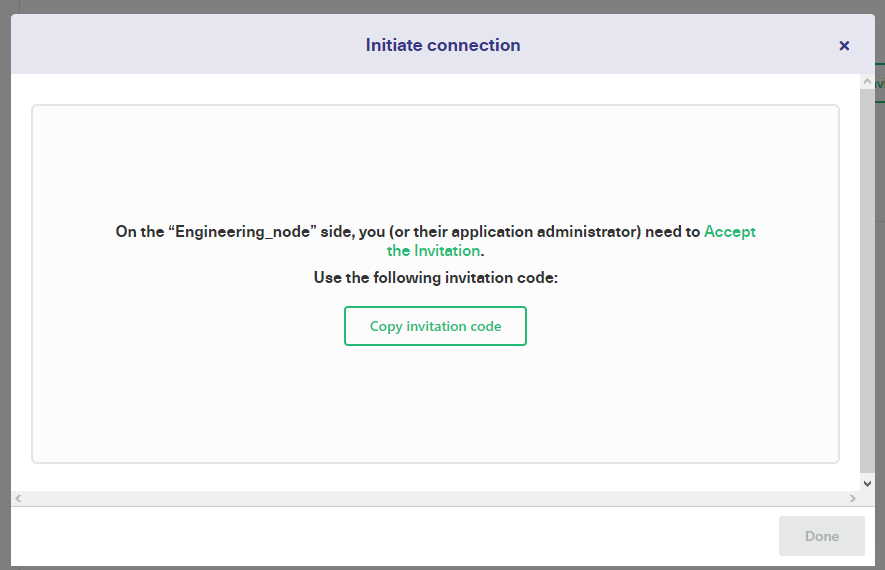
In case you don’t have access, you can generate a code to paste into your other instance. Click “Copy invitation code” to copy the code to your clipboard as shown in the image above. Paste it somewhere safe, you’ll need it later.
Click “Go to remote” to access your other instance or navigate there directly. On the connections screen, click “Accept invitation”. You’ll see a text field where you can paste the code you just generated. Do that, and click “Next”.
After a brief wait, Exalate will establish the connection. To give you a taste of how it works, you can enter an incident number to test the synchronization.
Now let’s try setting up a connection in Script mode.
Initiate a connection using the green button as before, but on the mode selection screen, choose the Script mode before clicking next.
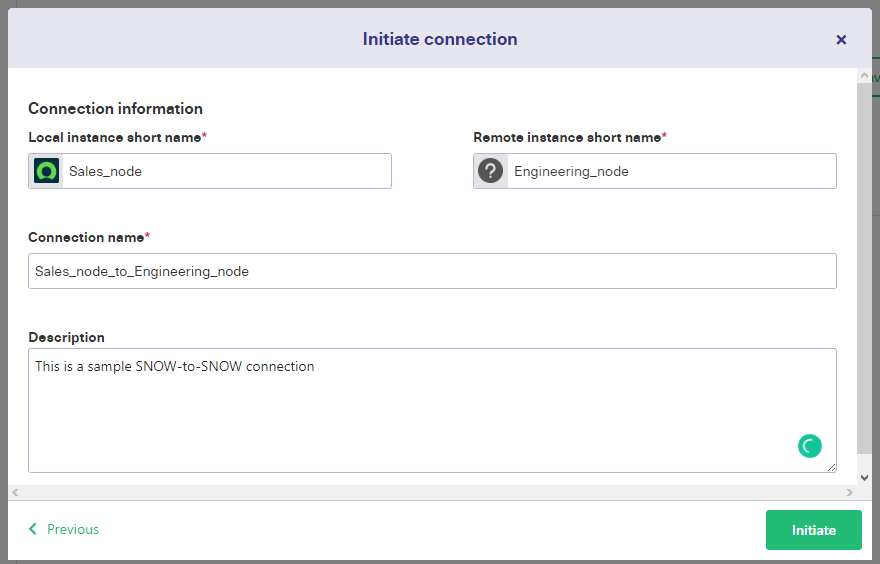
This time, you’ll get more advanced options to choose from. Firstly, decide what you want to name each side of your connection. The names you choose will be combined automatically to create a connection name, but you can overwrite that if you prefer.
You can also add a description which is highly recommended. If you have multiple connections, or several people use the same connection, the description can help identify it. That’s very helpful when returning later to modify it.
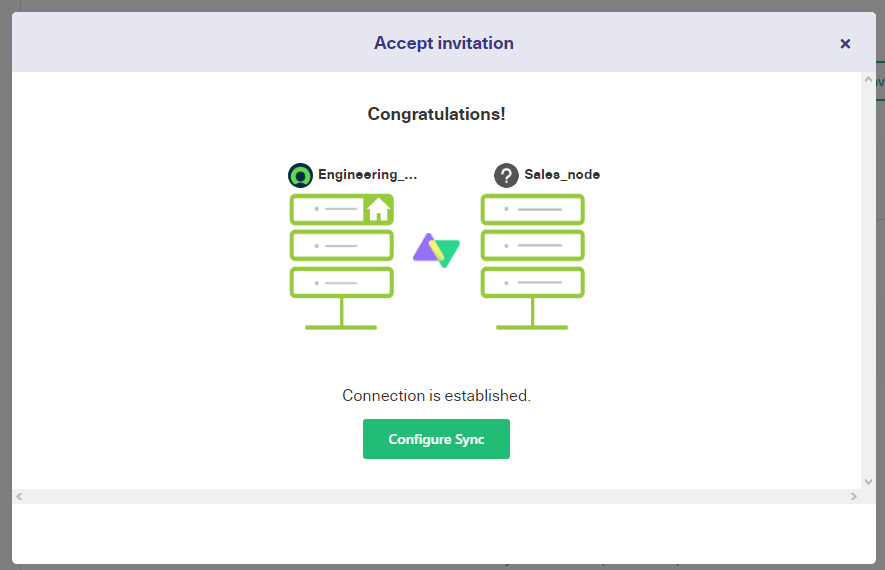
Click “Initiate” when you’re ready. You’ll receive a code to copy as before, so follow the same steps. When the connection is ready, Exalate will let you know.
Click “Configure Sync” to choose some of the details that control how your connection behaves.

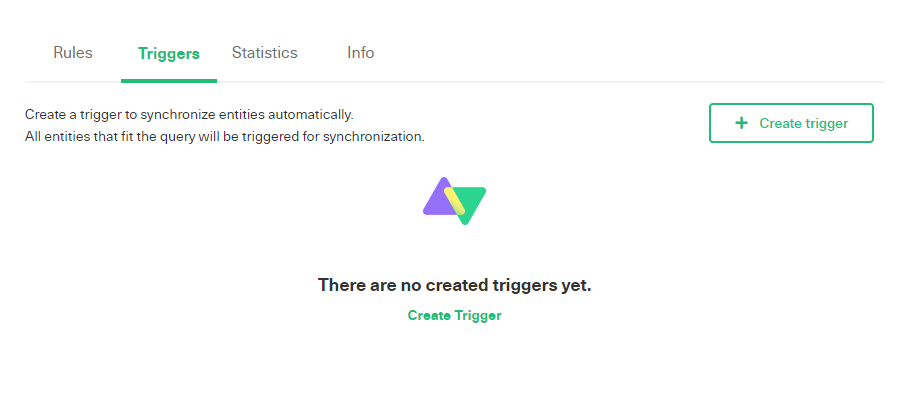
You’ll see four tabs:
- Rules
- Triggers
- Statistics
- Info
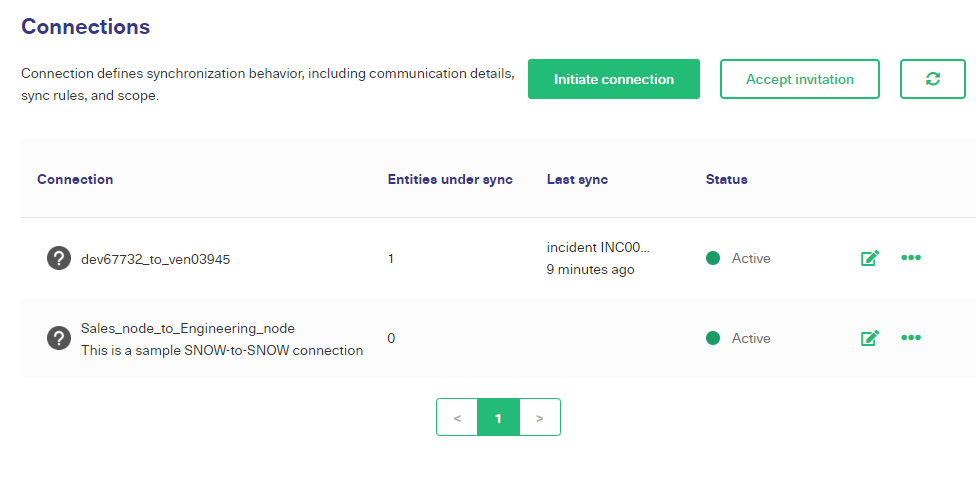
You’ll look at the rules in step three and the triggers in step four. The Statistics tab shows data on how many items you are sharing and when you last synced them. The Info tab provides a few details, including the URL for the other side of the connection.
When you’ve made changes, click “Publish” to save them. You can return to this screen any time by finding your connection in the list and clicking the “edit connection” button.
The connections screen also lets you delete or deactivate any of your existing connections.
Step 3 – Configure Your Connection to Share the Right Data
Take a look at the first screen, the rules tab.
When items are synced, they are copied from one side of your integration to the other. Items contain multiple fields.
You can choose which ones to sync, and can also set specific values if you prefer. For example, you might want to mark a field as ‘synced from the Sales team’. You can also use code to create advanced rules or to conditionally determine the system shares.
The rules use the Groovy scripting language.
The Outgoing sync rules define how items on the instance you are looking at will go over to the other instance. The Incoming rules define how the data your instance receives is mapped onto the synced items on your side.
Each line corresponds to a field. For example, in the outgoing sync, you can see the line replica.description = entity.description.
That means the description will be copied from items on this node to the corresponding items on the other node. If you don’t want that to happen, just delete the line.
If you want synced items to have a fixed description, you could change it to replica.description = ‘synced from sales team’
You could even change it to add that text at the beginning of the existing description with replica.description = ‘synced from sales team’ + entity.description
There are also helper functions you can use to manage items like comments and attachments. For more on those and other things you can do with sync rules, take a look at Exalate’s documentation.
Use AI Assist to Generate Sync Rules
Exalate’s script mode includes AI Assist, accessible through a chat window in both the incoming and outgoing sync rules tabs. Simply enter your sync requirements into the chat, and AI Assist will generate the scripts for you.
The scripts are built based on your input, existing configurations, and Exalate’s scripting API.
However, like any AI, AI Assist isn’t flawless and can sometimes make mistakes. To get the best results, make sure your prompts are as clear and detailed as possible.
Here’s an example of how to use it:
If you want to map statuses between multiple ServiceNow instances, you could type something like this into the AI chat

The AI will generate the script shortly.
Red lines indicate what you should delete from the existing script, while green lines represent new additions. You can accept or reject these changes and refine your prompt if needed. Once everything is correct, don’t forget to publish your changes.
Step 4 – Create Automated Synchronization Triggers
Synchronization triggers determine when synchronization takes place. To create one, you define a condition using ServiceNow search syntax.
To start, go to the “Triggers” tab and click “Create trigger”. On the dialog box, you can choose the type of entity the trigger applies to, using the dropdown box.
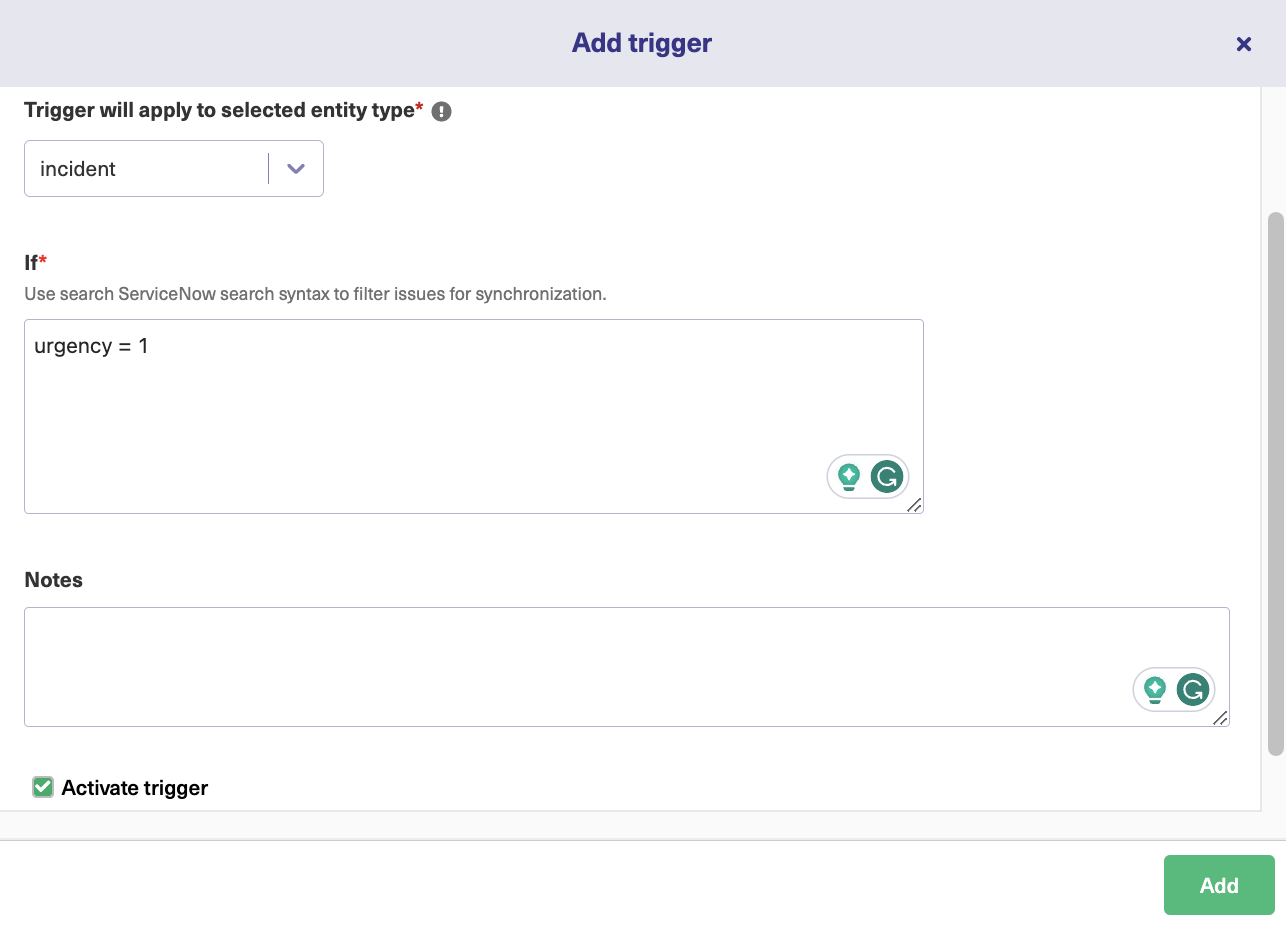
There’s also a field to enter your condition. Entities that meet this condition will be synchronized.
The suggested example is urgency = 1, so any items that have their urgency attribute set to one will be exchanged with the other side. You can use any field to decide whether to sync.
The system is highly flexible. You could sync tickets that are assigned to a specific person, sync tickets with comments, or have specific text in their description.
There’s also a field to make notes. Again, it’s a good idea to do so. It will help you keep track of things if you add more triggers, connections, and users later.
Finally, there’s a checkbox to activate the trigger. Naturally, you’ll want to activate this if you want anything to happen. You can switch triggers on and off, which is useful if you have one you want to apply temporarily, but regularly. Perhaps you want to share work with another department when things get busy, for example.
Once done, click “Add”. The trigger is ready and you’ll see it in the list.
For each entry in the list, you can edit or delete it using the icons on the right. You can also click the dots on the right and select “Bulk Exalate” which will tell you if any items match the query and synchronize them for you. That’s a great way to test if your triggers are working as you expect.
Step 5 – Start Task Synchronization
Now your instances are connected and will automatically exchange information at regular intervals. It isn’t instantaneous, as that would create performance issues, so grab a coffee, come back, and see if items are exchanged. If it doesn’t happen within an hour or so, have a look, and check that there are items matching the conditions you have set.
Once it works, you can sit back and let Exalate do the hard work of synchronizing your data. Enjoy!
What are the Common Challenges when Integrating Multiple ServiceNow Instances?
Here are some potential obstacles when integrating two ServiceNow instances:
Network Issues and Delays
Integration solutions require an active internet connection to perform as expected. So when the system goes offline or the solution malfunctions, the syncs will end up in the queue.

Scripting Accuracy
Unlike no-code integration solutions, script-based tools require extensive scripting and knowledge of a programming language.
However, that presents a different problem: The admin or engineer in charge of the integration needs an in-depth understanding of debugging and optimizing the code snippets to deliver the expected results.
Notification Overload
When setting up a brand-new integration, it can be tempting to share as much information as possible. Be cautious. Filtering what people see is important. If people keep getting alerts when synchronizations happen, they might start ignoring them.
If people are only alerted to the items they need to deal with, they are more likely to check their notifications and spend their time on things that are relevant to them.
Role Clarification
When integrating systems, there is a risk of going too far and having teams perform the same tasks. It is important to clarify who is responsible for what and avoid the replication of efforts.

If there’s a risk of overlap, make sure your integration labels items appropriately so everyone knows who is ultimately responsible for each one.
Also, ensure progress-related data in areas of overlap is shared and not stored exclusively in different systems so people on different teams can see what has already been done.
Security and Privacy
ServiceNow data usually contains sensitive user and business information, so it needs to be secure at all times—at rest or in transit.
In some cases, lax data management practices on one end of the connection can put both sides in jeopardy.
If people are only alerted to the items they need to deal with, they are more likely to check their notifications and spend their time on things that are relevant to them.
Note: Exalate lets you filter items using the username field, and you can use the configuration to have separate behavior for teams or individuals, so you can control synchronization on a very granular level if you need to.
What Are the Best Practices for Servicenow to Servicenow Integration?
Integrations go wrong all the time. But if you follow these best practices, your integration will deliver accurate exchanges when needed.
- Define the expectations and objectives of the integration on both sides of the connection to establish a clear pathway to success.
- Work with the right stakeholders to design an integration workflow that every team member buys into.
- Choose the right integration solution that will allow your administrators to write scripts for connections and advanced use cases.
- Give access only to the right people based on their roles in order to track their activity and limit who can make changes to the system.
- Use automated triggers to make sure the exchange happens based on specific conditions and stipulations instead of manually.
Key Takeaways
Setting up a ServiceNow to ServiceNow integration is easy, provided you use the right tools, and the rewards are more than worth it. By connecting your teams, you can make sure everyone in your organization benefits from sharing knowledge.
With Exalate, you sync systems in minutes and have complete control over what you share and when you share it. It’s fast, efficient, and reliable. You can leave it to work autonomously and easily update it when you want to make changes.
If you want to implement a ServiceNow to ServiceNow integration, book a demo with our engineers right away.
Frequently Asked Questions
What is a ServiceNow integration?
ServiceNow integration is the process of connecting a ServiceNow instance with another application so that both systems can share data. This involves getting the APIs of both platforms to interact via a third-party application.
How Long Does it Take to Implement an Integration with ServiceNow?
When working with Exalate, you can set up a Script mode connection between two ServiceNow instances within 10 minutes. If you use the AI Assist feature for scripting, you can reduce the overall setup time to 5 minutes at most.
What is ServiceNow to ServiceNow integration?
ServiceNow to ServiceNow integration is the process of connecting two separate ServiceNow instances to share information. With ServiceNow to ServiceNow integration tools, you can sync comments, attachments, and custom fields within one organization or externally.
How can I integrate two ServiceNow instances?
You can integrate two ServiceNow instances using a connector. This connector could be a native app from the Atlassian marketplace or a standalone third-party solution such as Exalate. The most important thing is that both Exalate instances will maintain autonomy within the ecosystem.
Do I Need a Tool to Connect Two ServiceNow instances?
Yes, you need an integration solution to connect two ServiceNow instances. This tool will help you activate automated syncs and reduce human error when moving data between instances. Exalate is an excellent option if you are looking for a decentralized integration solution that supports bi-directional synchronization.
Recommended Reading:
- ServiceNow Integrations: Integrate ServiceNow and Other Systems Bidirectionally
- How to Set Up a Salesforce ServiceNow Integration
- Jira ServiceNow Integration: How to Set up an Integration in 6 Steps
- Zendesk ServiceNow Integration
- How to Set up a ServiceNow GitHub Integration
- How to Set Up an Azure DevOps ServiceNow Integration