Zendesk is a customer service platform that over 100,000 businesses rely on to create complete, pleasant customer experiences. This tool makes it easy for companies to connect with customers, communicate with them, and address their concerns quickly.
But using Zendesk presents a challenge: businesses often find it difficult to integrate other tools with this platform. If you want to integrate Zendesk with Salesforce Service Cloud or sync with Jira work items, native Zendesk integrations often fall short on robustness and flexibility. You’ll likely need a third-party integration to guarantee your sync’s success.
This guide explores the benefits and shortcomings of existing Zendesk native integrations, reviews the best integration tools available, and helps you discover the right third-party integration solution for syncing your customer service data across independent platforms.
Key Takeaways
- Zendesk integrations help automate data synchronization, establish a unified view of customer information, and improve collaboration between internal and external teams.
- Native Zendesk integrations offer quick setup but come with limitations, including uni-directional syncs, minimal configuration options, and admin account dependencies.
- When choosing a third-party integration tool, prioritize security, bidirectional sync capabilities, and reliable customer support.
- Common use cases include support-to-development team collaboration, customer data migration, cross-company partnerships, and multi-platform ticket management.
- Exalate provides enterprise-grade security, AI-assisted configuration with Aida, full scripting control over data synchronization, and support for Zendesk integrations with other tools.

Why Use Zendesk Integrations?
Development and customer support teams use Zendesk for Service to handle customer support tickets. The ticketing system enables support agents to track all communications in order to provide better assistance in the future.
Similarly, marketers can use Zendesk for Sales to attract prospects and nurture existing leads, regardless of where they are in the buying journey. Team managers can also use Zendesk to improve team productivity and keep the entire organization on the same page.
But on its own, Zendesk has several limitations. The most common one is that you cannot create follow-up tickets for messaging, and many other problems we’ll discuss later.
Notwithstanding, integrating Zendesk with other CRM and ticket management tools is essential because of the following reasons:
- Automate all synchronizations: Teams need Zendesk integrations to automatically sync their data with other internal and external teams without manual data migration.
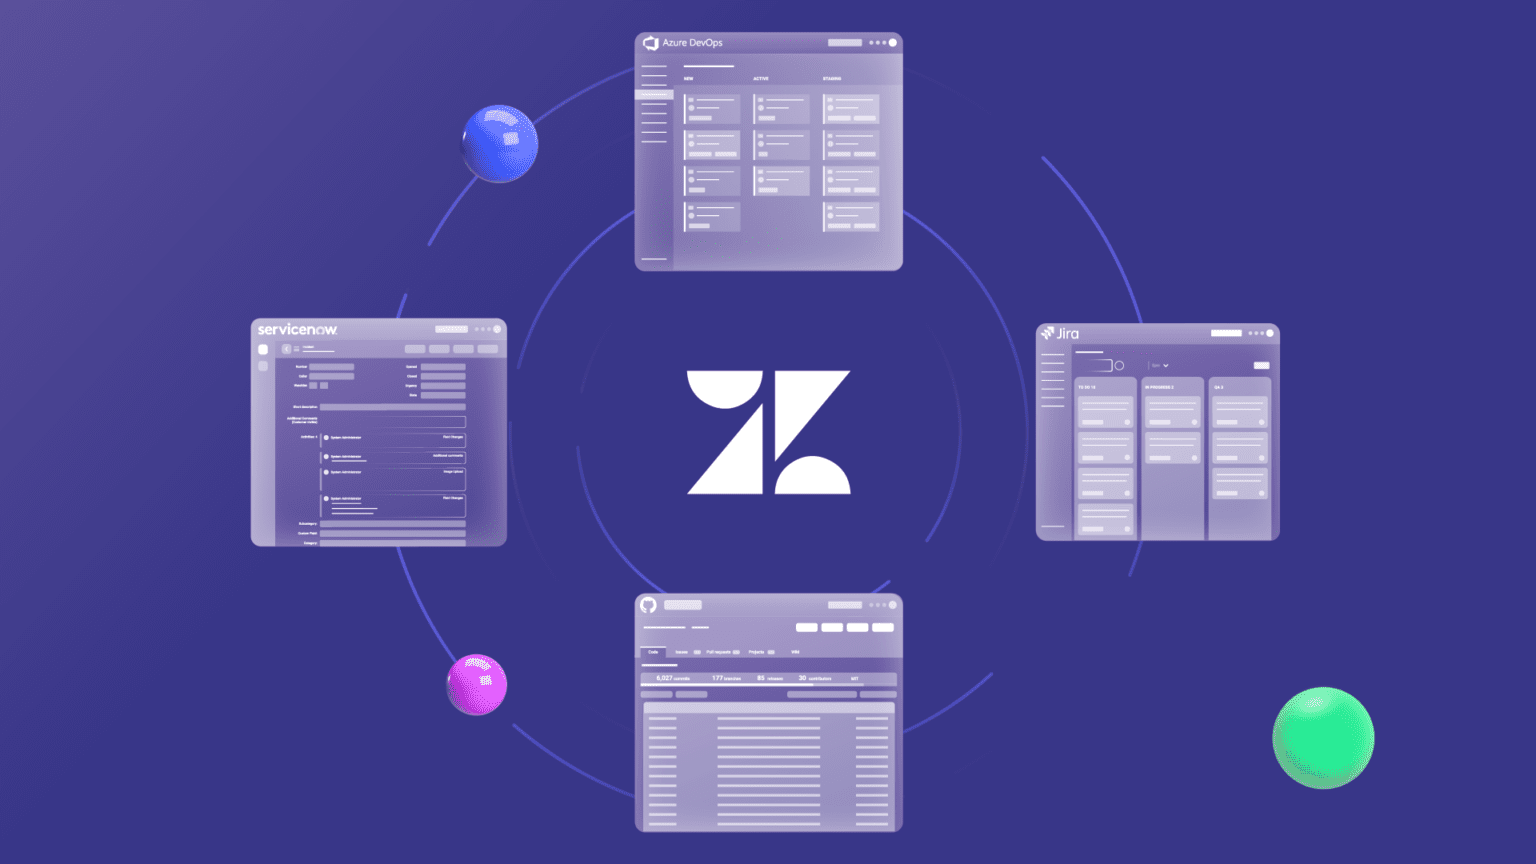
- Establish a unified view: Using Zendesk integrations to gather information from Salesforce, GitHub, Jira, ServiceNow, and others helps you establish a single source of truth, which is Zendesk in this case.
- Choose what matters: Integration tools for Zendesk usually come with filters and triggers that help you configure what needs to be synced and what should stay separate.
- Enhance collaboration: With Zendesk support integrations, teams can improve collaboration and communication instead of allowing the creation of information silos due to a lack of a unified data source.
- Increase transparency: Since every team member now has access to the data source (depending on role and authorization), useful Zendesk integrations will foster an atmosphere of openness. This encourages seamless cooperation toward achieving business goals.
Zendesk Integrations: Common Use Cases
Let’s cover the common scenarios for using Zendesk integrations:
Cross-Company Collaboration
Many enterprises work with external partners, MSPs, vendors, or outsourced development teams who use different tools. Zendesk integrations enable:
Challenge: Your support team uses Zendesk, but your outsourced development team uses Jira. When customers report bugs, your team manually copies ticket details into emails, leading to delays and lost context.
Solution: With a bidirectional Zendesk-Jira integration, tickets automatically create linked work items in Jira. Status updates, comments, and resolution details sync in real-time across both platforms.
Real-World Application: A SaaS company reduced its average bug resolution time by 40% after implementing automated Zendesk-Jira syncing, eliminating the communication gaps between their support and development teams.
Multi-Tenant Support Operations
Organizations managing support for multiple clients or business units often need to route tickets to different systems while maintaining visibility.
Challenge: An MSP handles support for 15 different clients, each with their own ServiceNow, Jira, or Salesforce instance. Support agents waste hours manually routing and updating tickets across platforms.
Solution: Zendesk integrations with triggers and filters automatically route tickets to the correct external platform based on client, priority, or ticket type—while keeping all data synchronized.
Real-World Application: A managed services provider supporting healthcare clients uses Exalate to sync Zendesk tickets with client ServiceNow instances, ensuring HIPAA-compliant data handling while maintaining real-time visibility for both teams.
Escalation Workflows Between Support Tiers
L1, L2, and L3 support teams often work in different tools. Seamless escalation requires data to flow between platforms without manual intervention.
Challenge: L1 support works in Zendesk, but L2/L3 engineering support works in Jira. Escalations involve copying ticket details, attachments, and customer history manually, leading to incomplete information and frustrated customers.
Solution: When a ticket meets escalation criteria (priority, type, customer tier), it automatically creates a linked work item in the engineering team’s Jira instance with full context, attachments, and history.
Real-World Application: A fintech company automated their escalation workflow so that when support agents change a Zendesk ticket status to “Escalated to Engineering,” a corresponding Jira work item is created within seconds, complete with customer communication history and technical details.
Customer Success and Account Management
Customer success teams need visibility into support interactions to proactively manage accounts and prevent churn.
Challenge: Account managers use Salesforce to track customer health and renewals, but have no visibility into the support tickets their customers are filing in Zendesk. High-value customers sometimes churn before CS teams even know there were problems.
Solution: Integrate Zendesk with Salesforce to automatically sync ticket data, allowing account managers to see support history, open tickets, and sentiment indicators directly in their CRM.
Real-World Application: An enterprise software company reduced churn by 25% after implementing Zendesk-Salesforce integration, enabling CS teams to proactively reach out to customers with multiple open tickets or negative satisfaction scores.
Store and Track Information
Keeping track of information is easier with Zendesk integrations for customer support since your business has a unified source of truth. All user comments and attachments are synced (and stored) bidirectionally, making it possible for teams to have a 360-degree perspective when communicating with clients.
For instance, the sales team can view a customer support ticket to figure out potential problems that users face at every stage of their journey with the product. This helps the sales team tailor their processes to the customer experience.
Customer support agents can even sync the required data, including custom fields, between Jira (the development team’s tool) and Zendesk. They can even append the Jira work item key to a private Zendesk comment to directly keep track of dev work in their environment.
Connect Internal and External Teams
Zendesk app integrations are valuable to interdependent teams, whether internally or externally. Here is a typical scenario between development teams and customer support representatives:
A customer opens a ticket about a failing sync. The support agent analyzes the root of the problem and then forwards the ticket to the development team. In turn, the development team starts working on a fix while providing real-time feedback and updates in the same ticket.
It’s also common for customers to raise the same concerns in Zendesk. You can then sync multiple related Zendesk tickets to a single Jira work item for the dev team to work on. Statuses will then be synced back and forth automatically to get real-time updates.
Teams in different organizations can also use Zendesk integrations externally to create a harmonious environment for collaboration with partners, vendors, and clients.
Migrate Customer Data
If you want to migrate data from an external system, or vice versa, you’ll need an integration to bridge both systems.
Let’s say you want to move your customer service tickets from Zendesk to ServiceNow; this is where third-party integrations shine.
Note: Before migrating your data out of Zendesk, always back up every file, ticket, or line of code. This will help you retrieve them if anything goes wrong during migration. You also need to plan the migration scope and map the fields that should be shared to avoid losing data during the process.
Native Ways to Implement Zendesk Integrations
The Zendesk Marketplace contains many solutions that integrate with GitHub, Asana, Jira, Azure DevOps, Slack, Salesforce, ServiceNow, and other platforms.
Some noteworthy ones include:
- Zendesk for Jira (native integration)
- Slack for Zendesk Support
- Salesforce integration
- WooCommerce integration
- Appy Pie Automate
- Cisco CTI integration
- Amazon Connect
- Strongpoint (for Salesforce and NetSuite)
- Various integrations from IntegrateCloud
All Zendesk integration services (ZIS) have 3 fundamental components: Flows, Actions, and JobSpecs.
A ZIS Flow is a JSON-based object that defines the number of steps to follow when passing data between states. This includes flow timeouts (usually 100 seconds) and state transition limit (250 max). Flow states can obtain information from configuration settings and OAuth tokens.
ZIS Actions are wrappers for HTTP requests, typically used for simple data transfers. ZIS Actions allow you to send requests (or create external actions) to 3rd-party APIs for systems like Slack.
A Job Spec object specifies the event triggers and the flow to run. JobSpecs covers native Zendesk events, 3rd-party events, and custom Zendesk events.
Benefits of native Zendesk integrations:
- Installation is swift and easy
- The integration focuses on one specific tool
- You can sync with the remote side instantly
- You have absolute control over what syncs—and what doesn’t
- You can map multiple work items to one Zendesk ticket
Potential Challenges of Native Zendesk Integrations
Here are some of the drawbacks of using native Zendesk API integrations:
- Error reporting is non-interactive
- You can’t set automatic triggers on the remote side
- Field mappings are limited to uni-directional syncs
- Configuration options are minimal
- The system is not flexible for other scenarios outside support and development
- The integration is centered around one Zendesk admin account, which could break the integration once the account owner leaves the organization
- Limited support for complex field mappings and transformations
- No support for cross-company integrations with autonomous control on each side
Bearing these constraints in mind, you’ll need a third-party integration tool that guarantees a smooth bidirectional synchronization between different work management systems.
Best Third-Party Zendesk Integration Tools
Here’s a comprehensive overview of the best Zendesk integration solutions available:
Exalate
- Enterprise-grade bidirectional integration platform supporting Zendesk, Jira, ServiceNow, Salesforce, Azure DevOps, GitHub, Freshdesk, Freshservice, Asana, and custom connectors.
- Features AI-assisted configuration with Aida, full scripting control, and autonomous sync rules on each side.
- ISO 27001 certified with role-based access controls and encrypted data transfer.
- Best for complex enterprise integrations requiring flexibility and security.
Unito
- No-code two-way sync platform connecting Zendesk with Jira, Asana, Trello, and 40+ other tools.
- Offers field mapping through a visual interface.
- SOC 2 certified.
- Best for teams wanting quick setup without scripting.
Zapier
- Automation platform connecting Zendesk with 5,000+ apps through trigger-based workflows.
- Creates automations like “when ticket created, send Slack notification” without code.
- Best for simple automations and connections to niche tools.
Workato
- Enterprise integration platform with AI-powered automation recipes.
- Connects Zendesk with ERP systems, databases, and legacy applications.
- Best for large organizations with complex IT environments.
Getint
- Focused on Jira-Zendesk synchronization with no-code setup.
- Offers one-way or bidirectional sync, cloud, or on-premise deployment.
- ISO 27001 and SOC 2 compliant.
- Best for teams specifically needing Jira-Zendesk integration.
What to Consider When Choosing a Third-Party Solution for Integration
The best Zendesk integrations must have the following attributes:
Security
Using a third-party integration to synchronize your data across systems presents security risks; hackers can exploit vulnerabilities in the connector or on the remote side. When choosing a third-party solution for integration, look for one with a proven track record of protecting sensitive communications.
Check if the solution has role-based access controls, OAuth verification, and multi-factor authentication (MFA), as well as uses HTTPS and other secure protocols to fetch and send data. Solutions that are ISO 27001 certified must be your top choice.
Additionally, look for encryption of data both in transit and at rest. You can verify a vendor’s security posture by visiting their trust center. For more details on Exalate’s security practices, visit the Exalate Trust Center.
Versatility
Every company uses a preferred tool for their stack: some prefer ServiceNow over Salesforce, while others find Jira more convenient than Trello.
So, instead of getting a different tool for every platform, you can find Zendesk apps and integrations that interconnect multiple platforms. This will give you the leeway to connect with any client or partner without having to add another tool to your workflow.
Look for solutions supporting Zendesk integrations with Jira, ServiceNow, Salesforce, Azure DevOps, Azure DevOps Server, GitHub, Freshdesk, Freshservice, Asana, and custom connectors.
Ease of Use
Remember that your sales and customer service teams might lack the coding skills required for advanced configurations. To make things easy for everyone, look for a tool that is easy to use.
Although some tools require advanced scripting to get some functionalities to work, always look for solutions with an intuitive, low-code, user-friendly interface. AI-assisted configuration (like Exalate’s Aida) can help technical and non-technical users create complex integration rules using natural language prompts.
Full Control Over Your Sync Side
The best integration tools provide full scripting and operational control over your synchronization. This means you can decide exactly what data leaves your system, how incoming data is mapped, and what transformations occur during sync, all without depending on the other party’s configuration.
Reliability
Automating your syncs doesn’t make them foolproof. One mistake can muddle up the entire synchronization process. To ensure your syncs are successful, use Zendesk integrations with a longstanding reputation for reliability. You can read customer reviews from independent sources to get a broader picture of the solution’s competence.
Brands use Exalate for the following reasons:
- It provides a secure synchronization environment using role-based access controls, HTTPS, encryption of data both in transit and at rest, and a JWT-based token mechanism. Exalate is ISO 27001 certified.
- Exalate is a versatile tool that supports integrations between Zendesk and platforms like Jira, Salesforce, Azure DevOps, Azure DevOps Server, ServiceNow, GitHub, Freshdesk, Freshservice, Asana, and custom connectors.
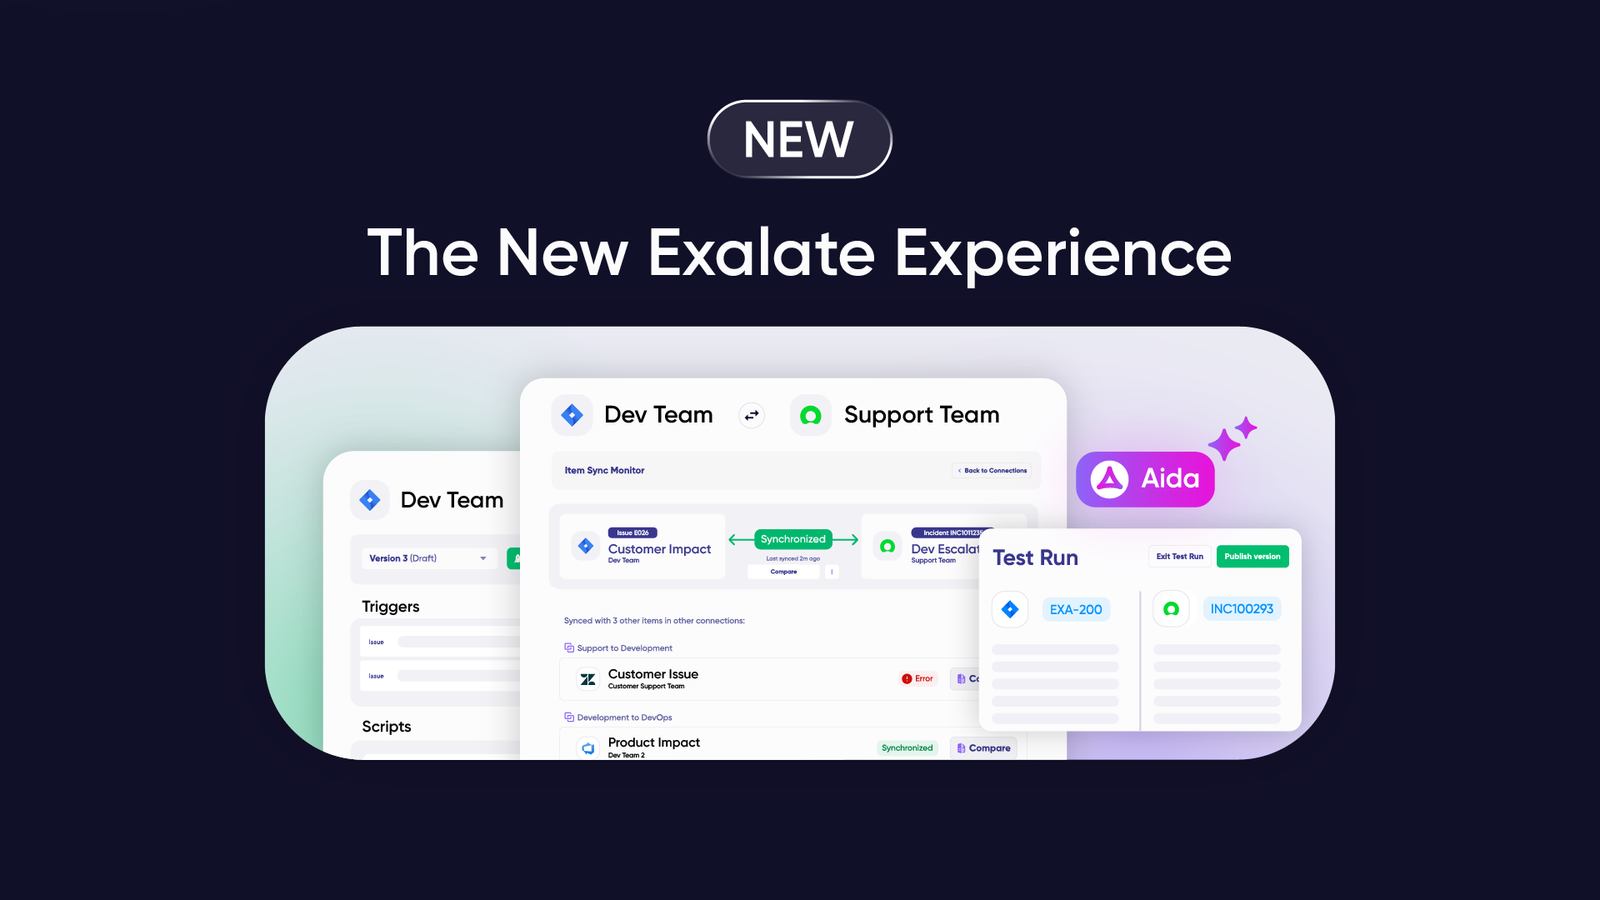
- You can use Aida, Exalate’s AI-assisted configuration, to simplify the process of creating advanced integration use cases using natural language prompts.
- It is easy to use, thanks to a user-friendly interface. The interface is consistent across all platforms, making it easier to learn and use.
- Exalate allows you to create rules and triggers, as well as to customize scripts for specific (outgoing and incoming) integration scenarios on both sides, giving you full operational control.
- Exalate makes it possible to sync multiple Zendesk tickets with a single Jira work item, which is unavailable with native Zendesk integration tools.
Calculate time and money savings from automated bidirectional sync.
This walkthrough demonstrates connecting Salesforce and Zendesk using Exalate. The process involves creating a workspace, establishing a connection, configuring sync rules, and setting up triggers.
Getting Started
Access the Exalate console. Create an account if you’re new, or log in to your existing workspace.
Creating a Workspace
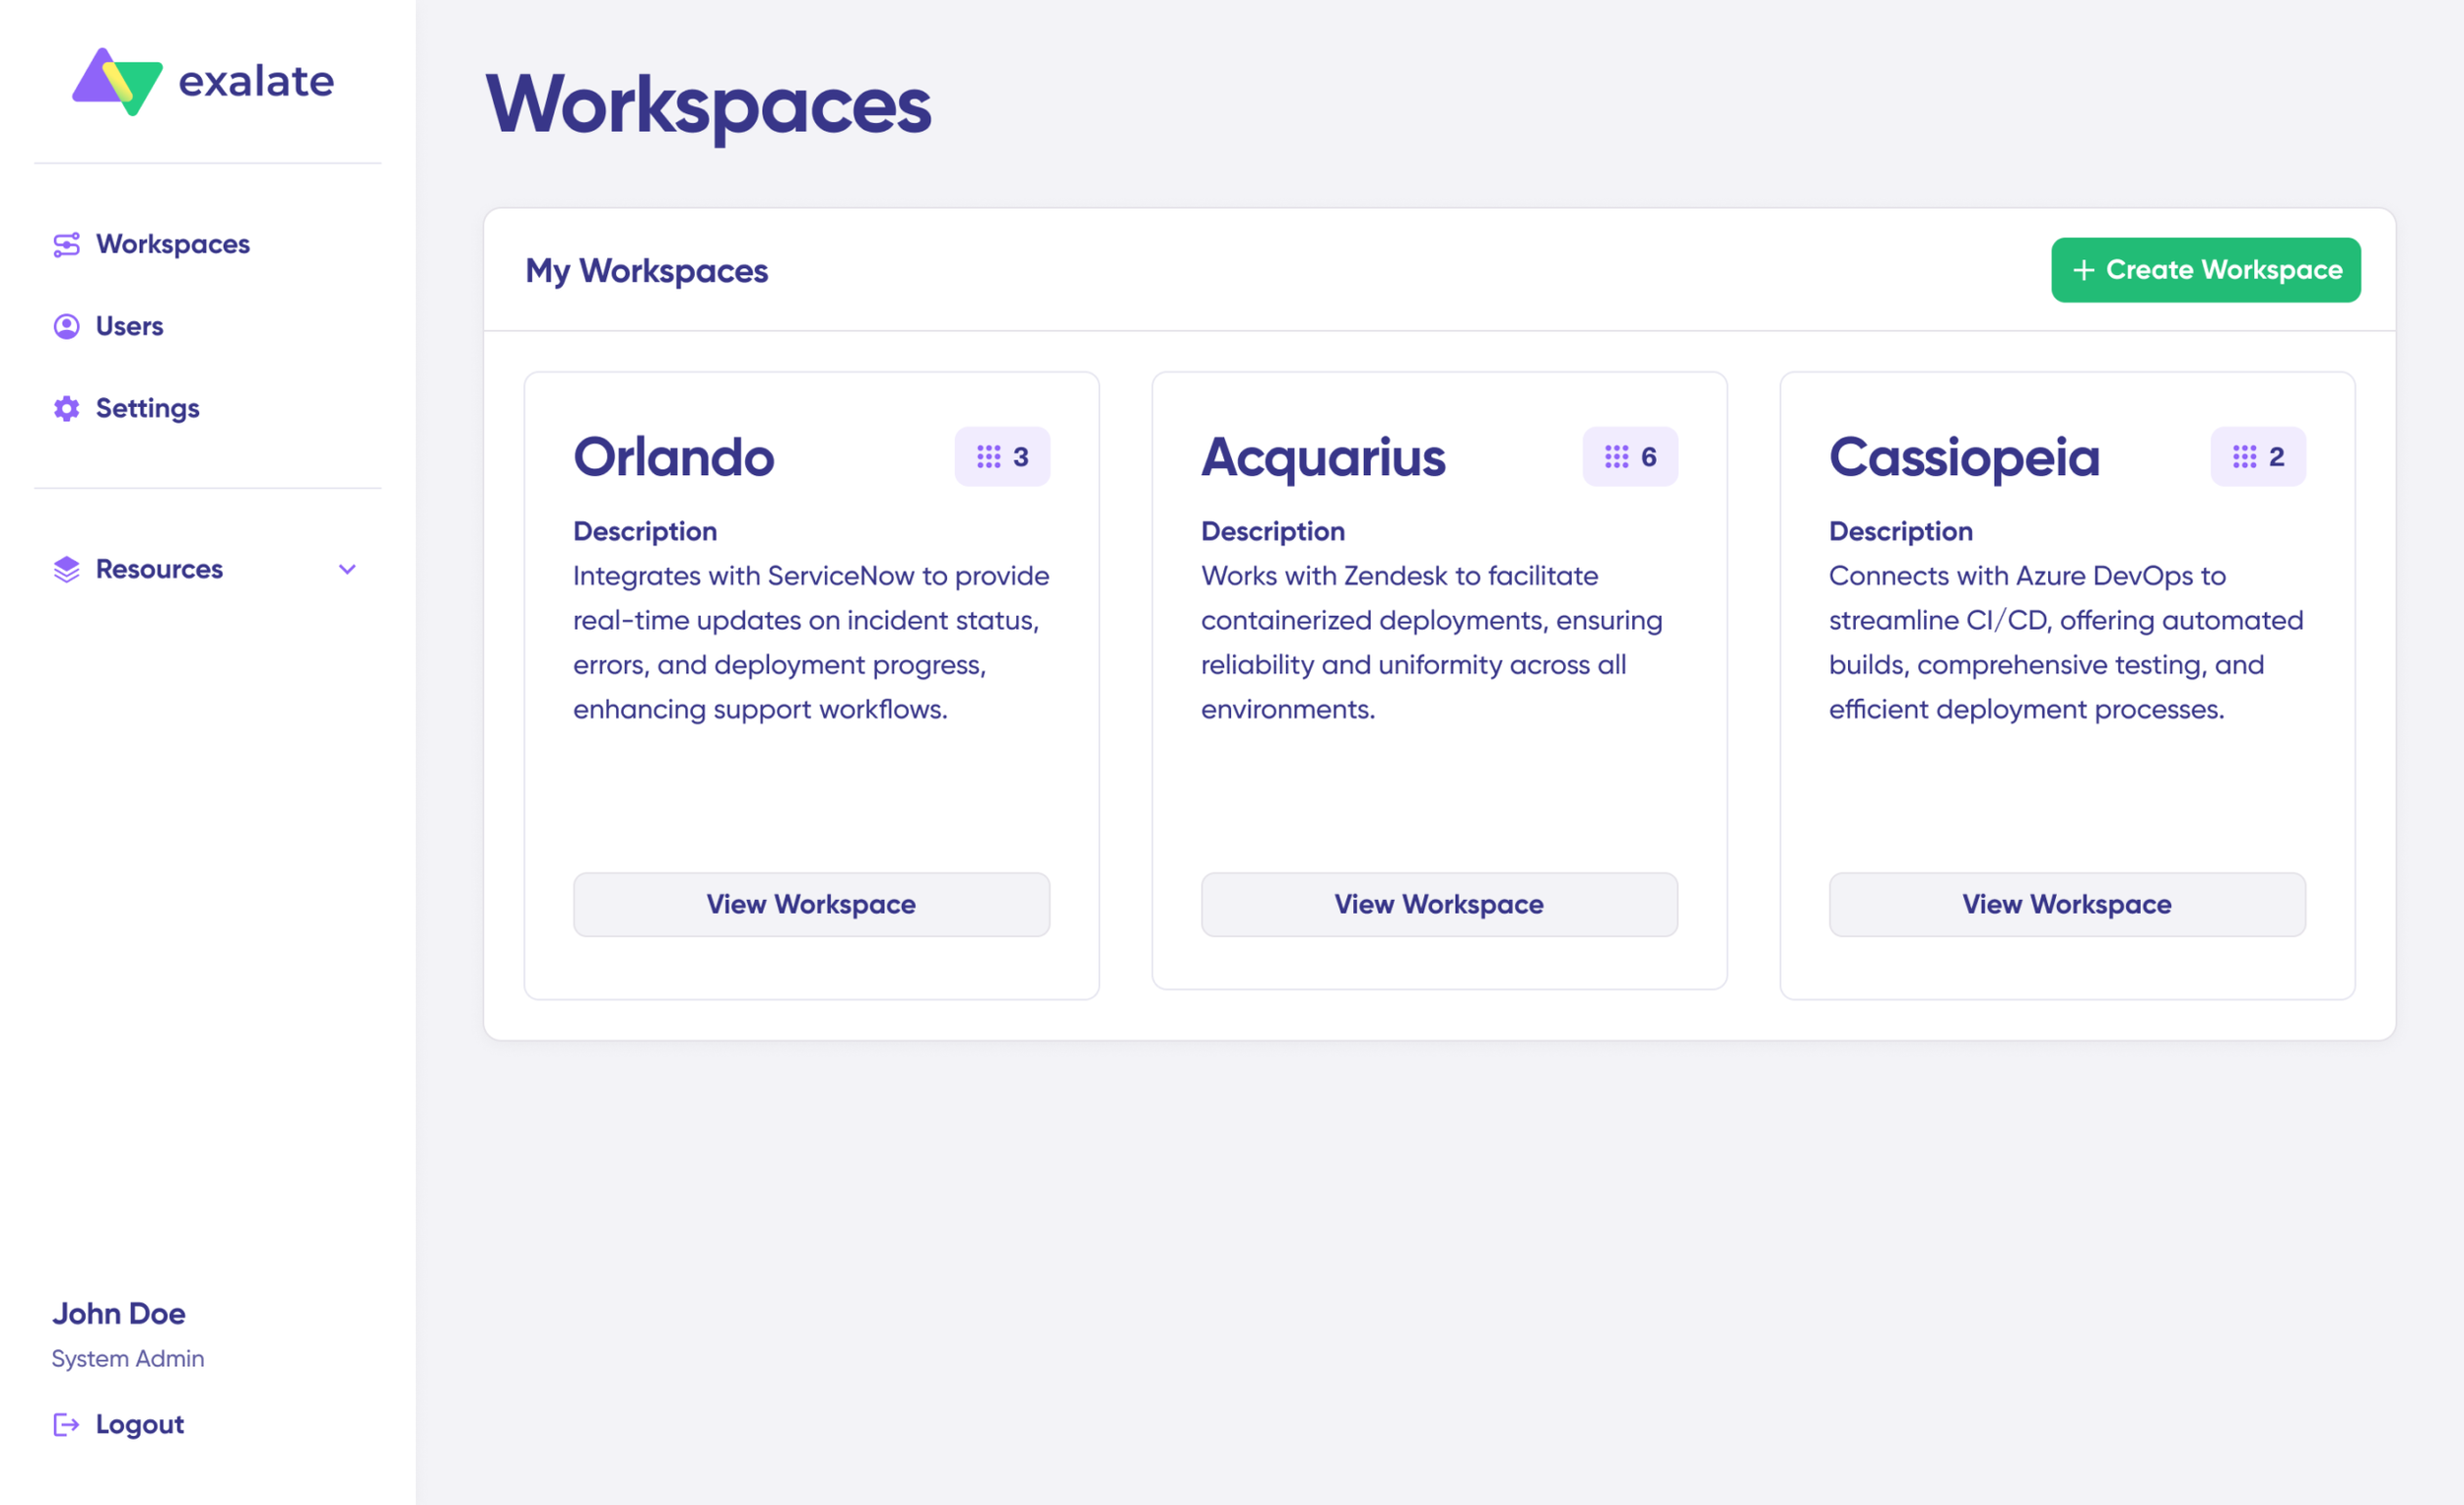
Workspaces organize your integrations. All connections between your systems live within a workspace.
Navigate to the Workspaces tab and click “+ Create Workspace”. Provide a name that reflects your use case (e.g., “Sales-Support Sync”) and add an optional description.
Connecting Salesforce and Zendesk
From your workspace, go to the Connections tab and select “+ Add connections” → “Create new connection”.
System A (First Platform): Enter “Salesforce” as the system name and your Salesforce instance URL. Exalate auto-detects the platform and prompts for the API token. Authorize Exalate to access your Salesforce org.

System B (Second Platform): Enter “Zendesk” as the system name and your Zendesk subdomain URL (e.g., yourcompany.zendesk.com). Provide your Zendesk token when prompted.
Connection Details: Name your connection descriptively (e.g., “Support Tickets to Sales Cases”). Click Next, review the summary, and confirm.

Configuration Options
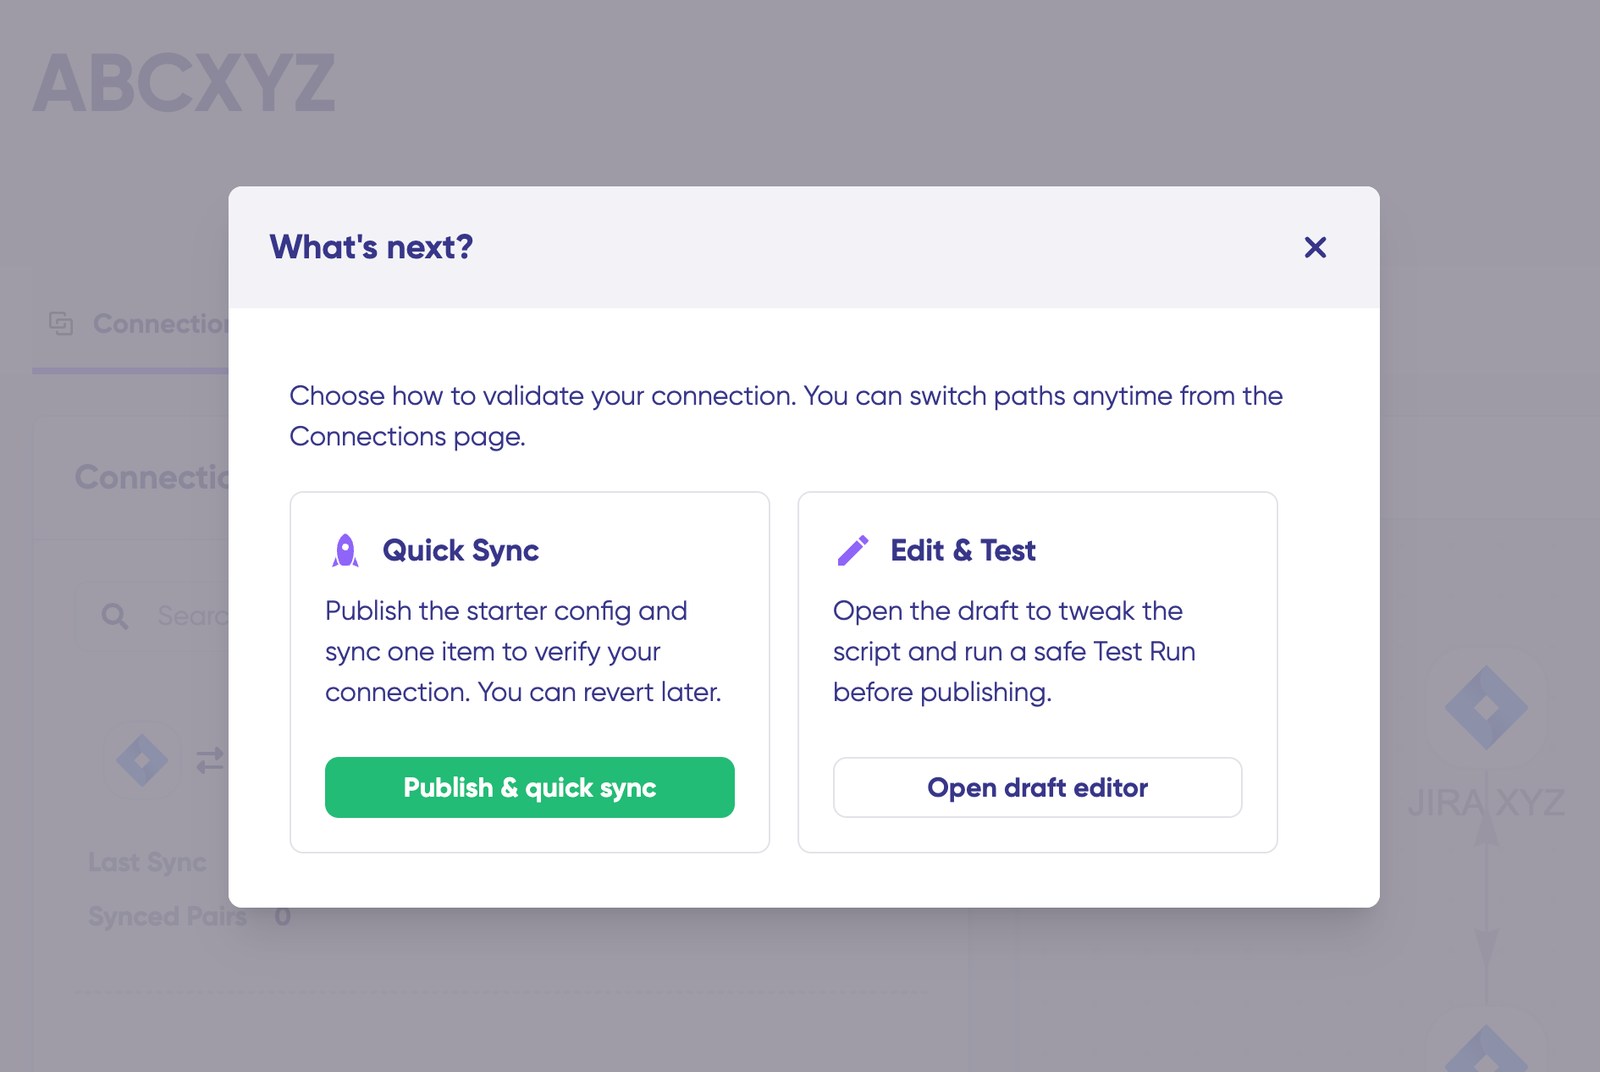
Quick Sync (Publish & Quick Sync): This option immediately publishes the default sync configuration and lets you test with a single item. Use this to verify the connection works before customizing.
Under “Item sync monitor,” enter a Zendesk ticket ID or Salesforce Case number. Click “Sync Now” to create a linked item on the other side, or “Link with existing” to connect two items that already exist in both systems.
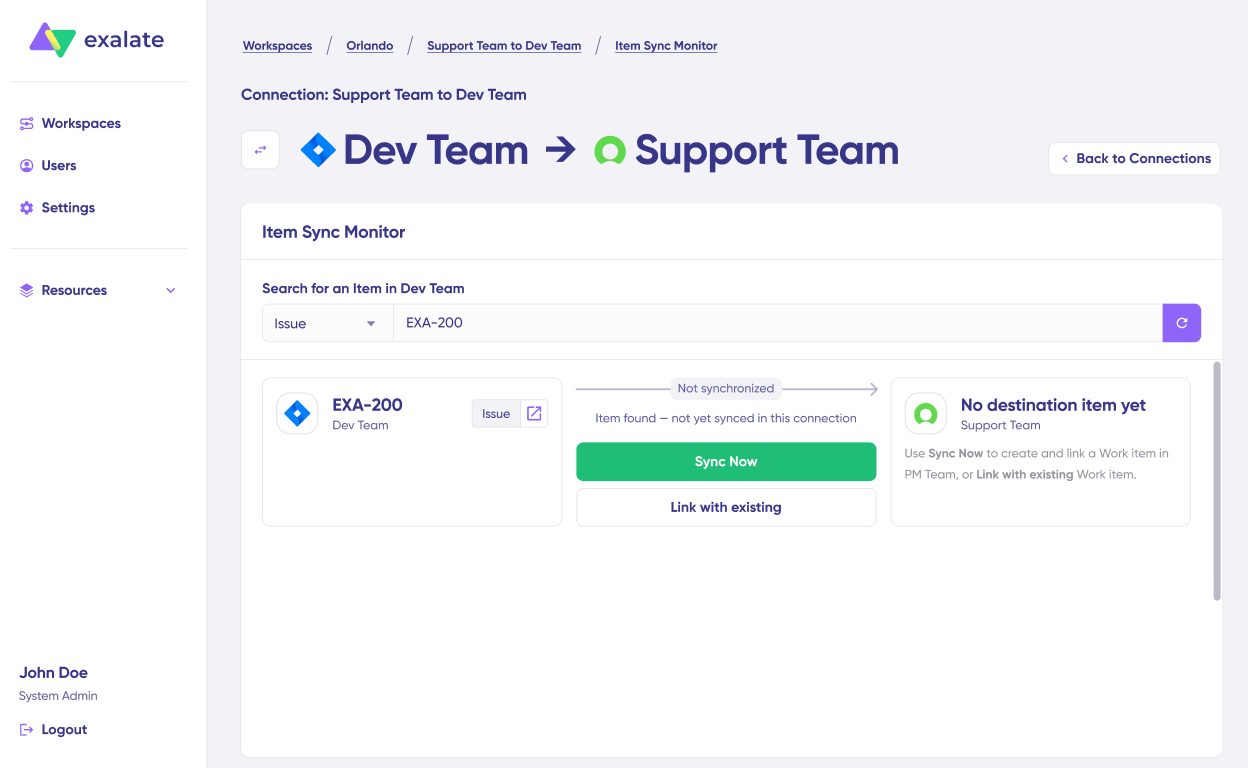
The sync monitor shows real-time status. Once complete, you can open both items to verify data transferred correctly.
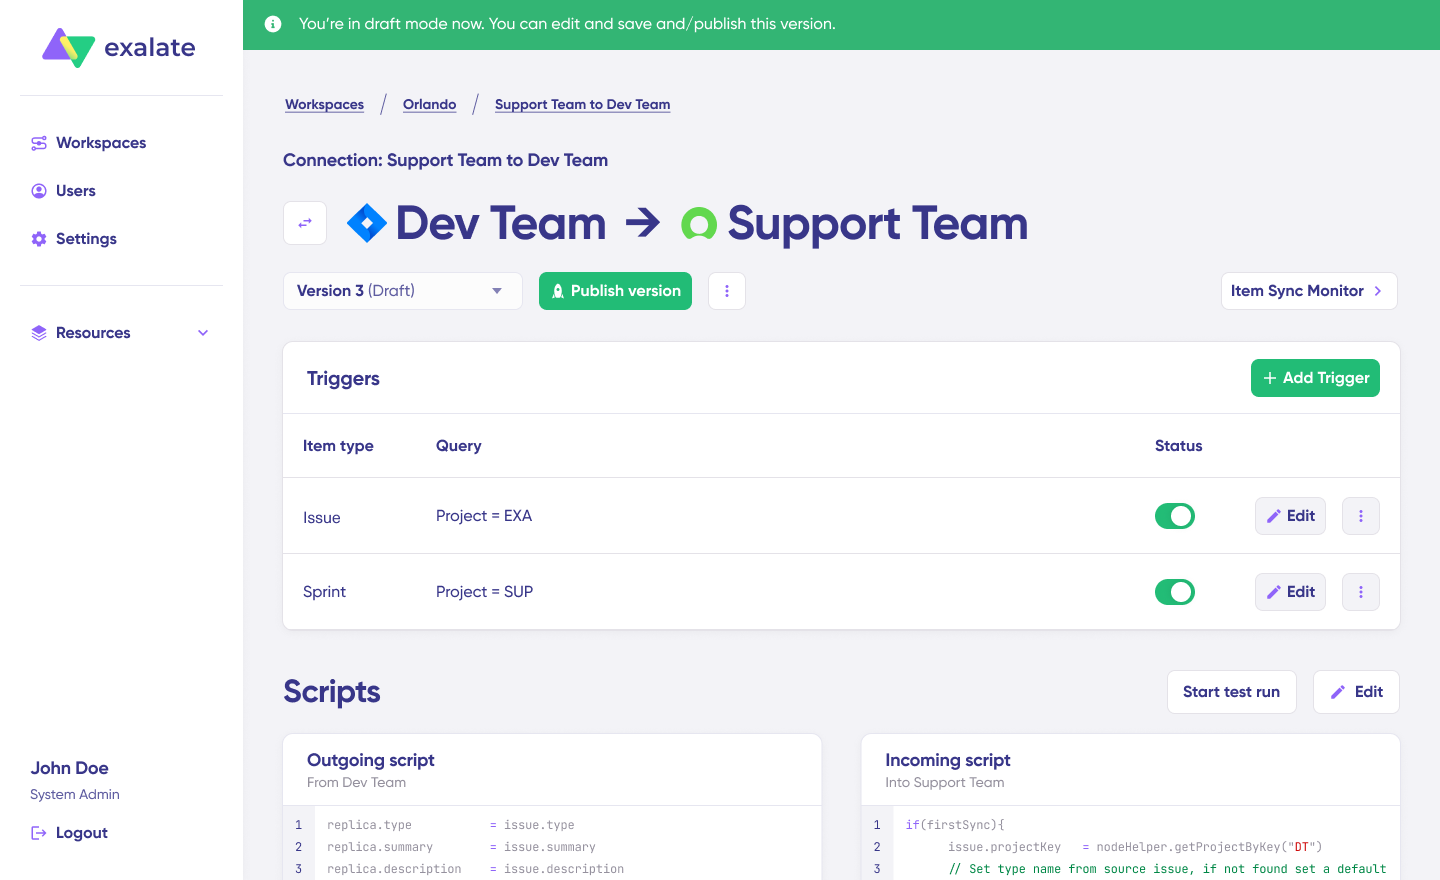
Edit & Test (Open Draft Editor): This option opens the configuration editor where you customize sync rules before publishing. Recommended for most implementations where default mappings need adjustment.
Understanding Sync Rules
Exalate uses Groovy-based scripts to control data flow.
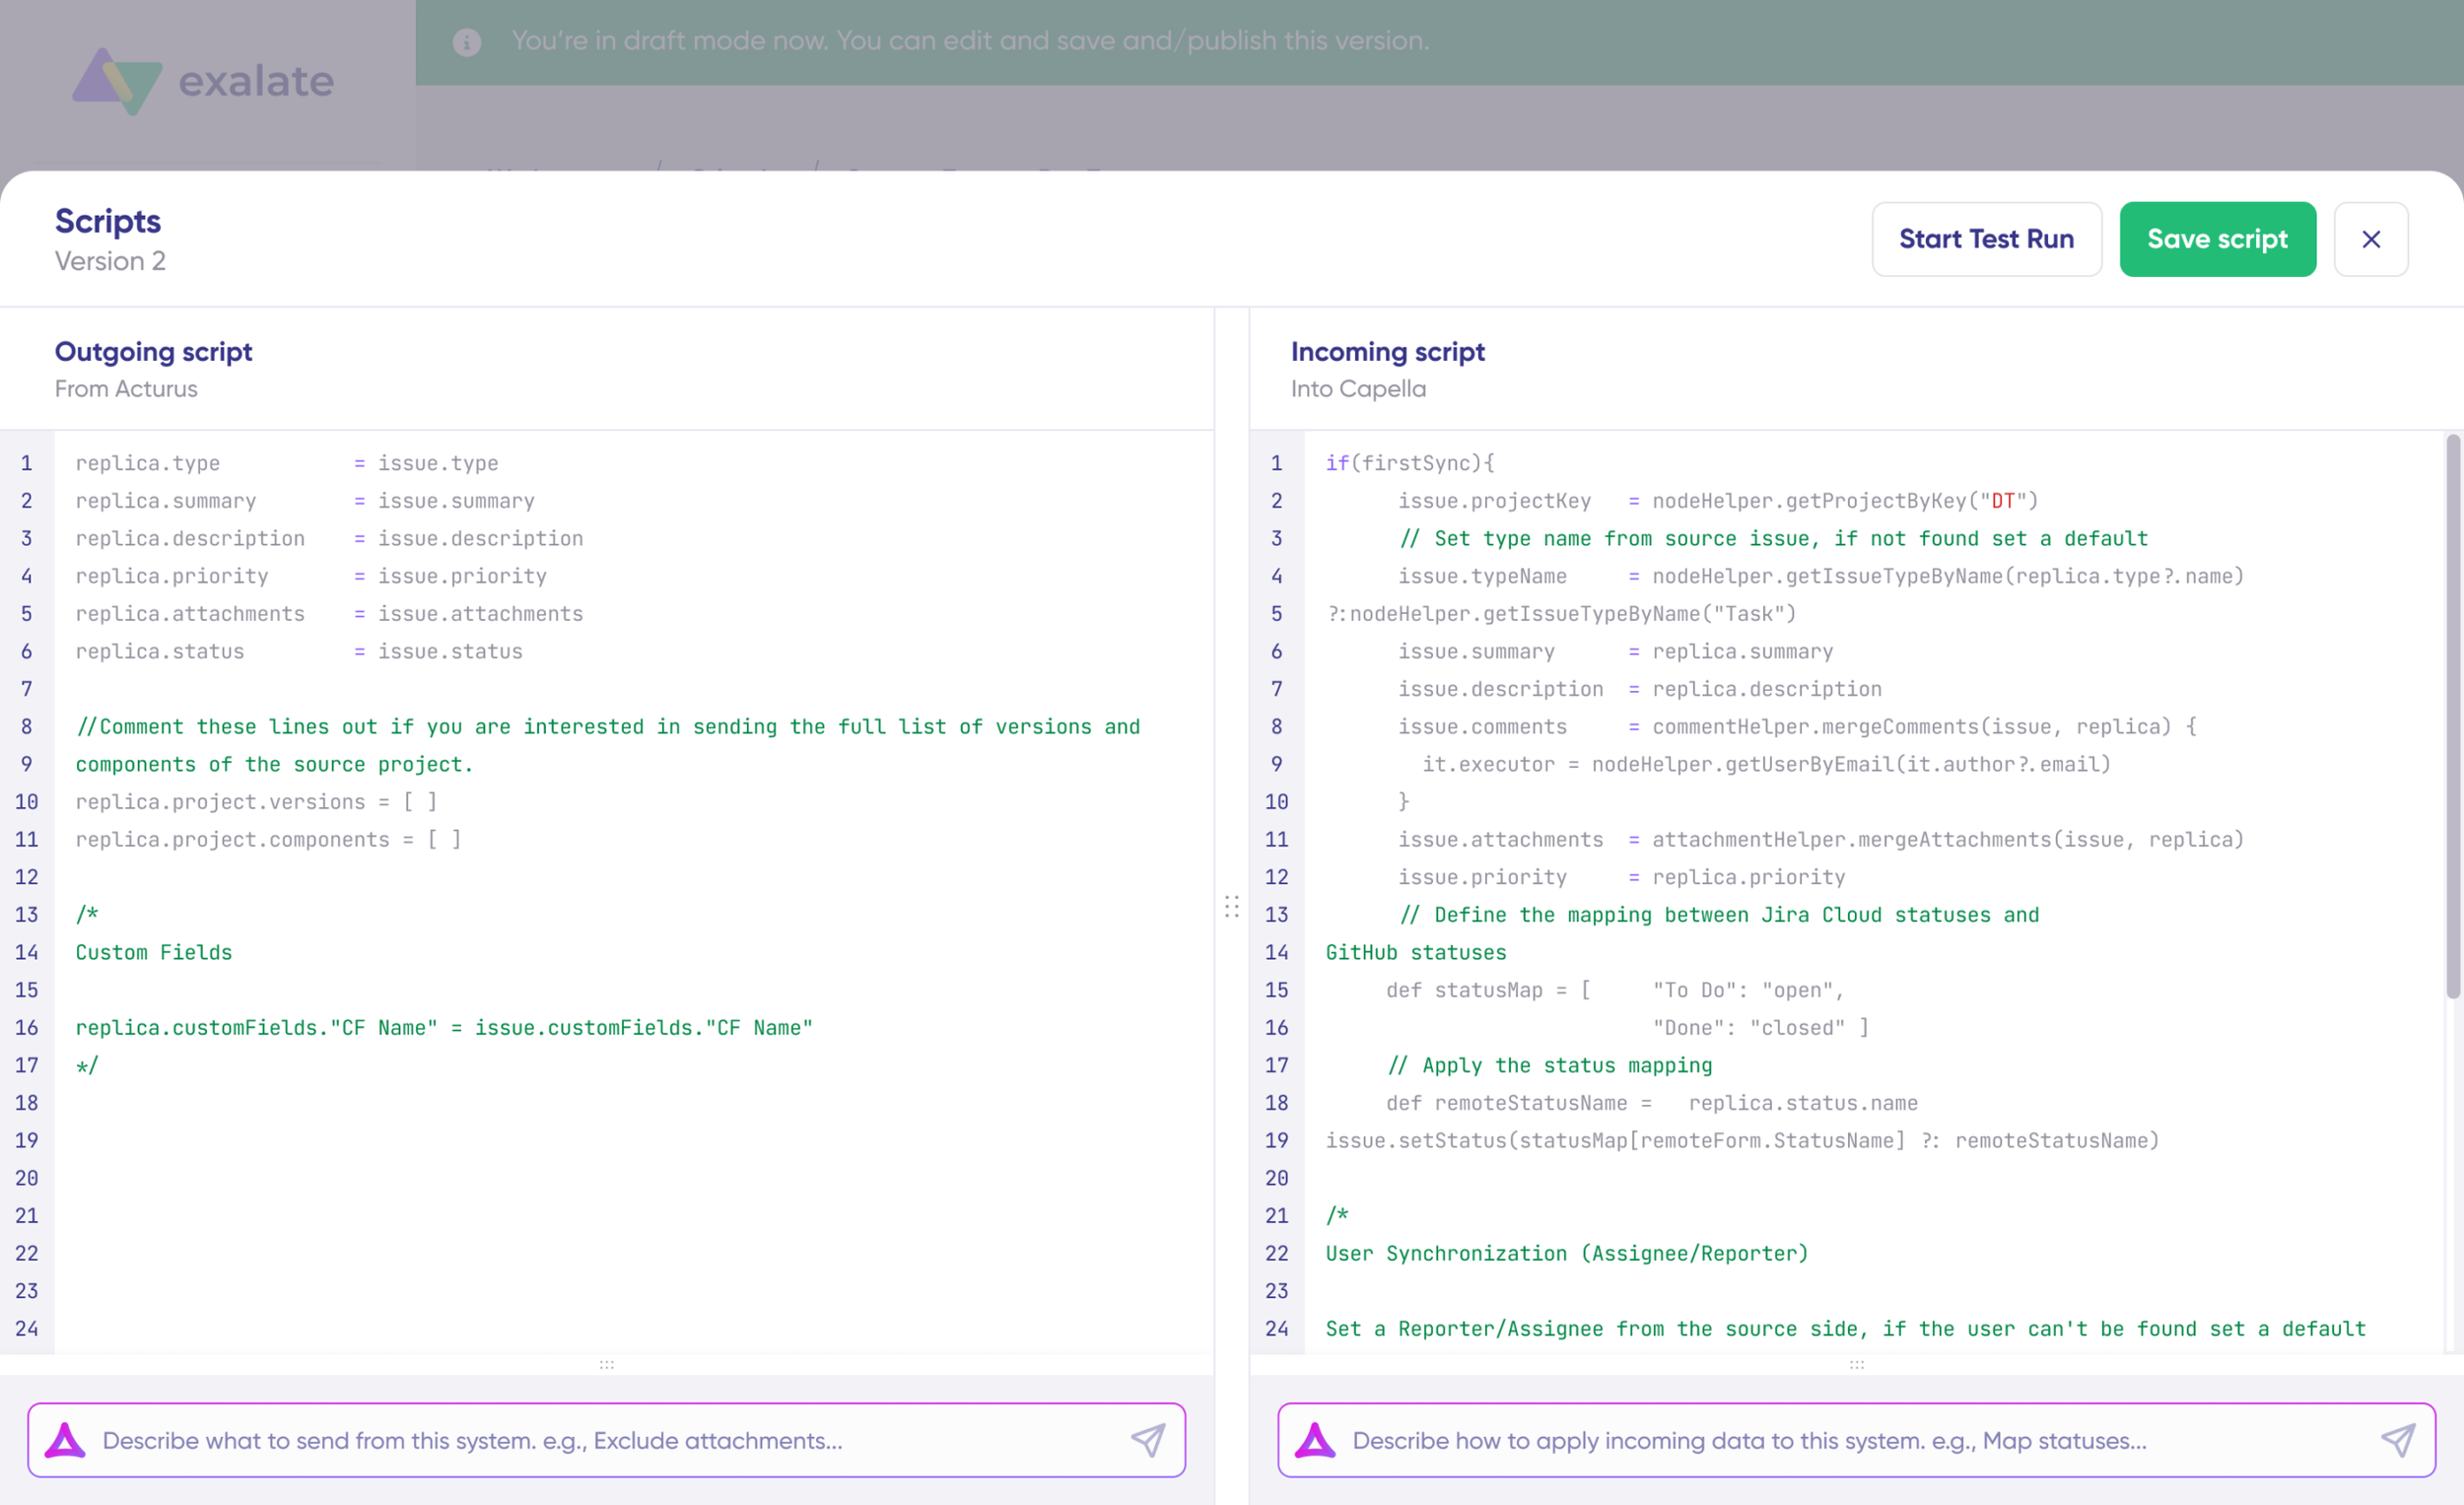
The Replica: Think of the replica as a data payload traveling between systems. It’s a JSON-like object that carries field values from source to destination. The outgoing script populates the replica; the incoming script reads from it.
Two scripts govern each connection side:
Outgoing Script: Defines what data leaves your system. The script populates a “replica” object with field values.
Example (Zendesk outgoing):
replica.summary = ticket.subject
replica.description = ticket.description
replica.priority = ticket.priority
replica.status = ticket.status
replica.comments = ticket.comments
Incoming Script: Defines how incoming data maps to local entities. The script reads from the replica and writes to local fields.
Example (Salesforce incoming):
if(firstSync) {
    entity.projectKey = "SUPPORT"
}
entity.summary = replica.summary
entity.description = replica.description
entity.priority = replica.priority
Code language: JavaScript (javascript)
The replica acts as a payload carrying data between systems. Each side controls its own scripts independently.
Editing Sync Rules
To customize the sync, click “Open draft editor” or navigate to your connection and click “Edit.”
Before modifying the active configuration, create a new version by clicking “+ New version” or “Open latest draft.” This ensures you don’t accidentally change production settings. Draft changes save automatically.
Click “Edit” next to the Scripts section to open the script editor.
The Script Editor Interface:
The editor displays two panels side-by-side:
- Left panel: Outgoing script (data leaving this system)
- Right panel: Incoming script (data entering this system)
Use the direction toggle (arrows near the connection name) to switch between viewing Salesforce-side scripts and Zendesk-side scripts.
The default script sends common ticket fields:
replica.key = ticket.key
replica.summary = ticket.subject
replica.description = ticket.description
replica.priority = ticket.priority
replica.status = ticket.status
replica.assignee = ticket.assignee
replica.reporter = ticket.reporter
replica.comments = ticket.comments
replica.attachments = ticket.attachments
Each line maps a ticket field to the replica. The replica carries these values to Salesforce.
To sync additional fields, add lines to the outgoing and incoming scripts depending on how you want the data to flow. To exclude a field, remove or comment out the corresponding line.
Using AI-Assisted Configuration
Aida, Exalate’s AI assistant, generates sync scripts from natural language descriptions. Instead of writing Groovy manually, describe what you want:
“Sync the ticket subject to the Case subject. Map Zendesk priority High to Salesforce priority Urgent. Only sync tickets tagged ‘escalate’ to Salesforce.”
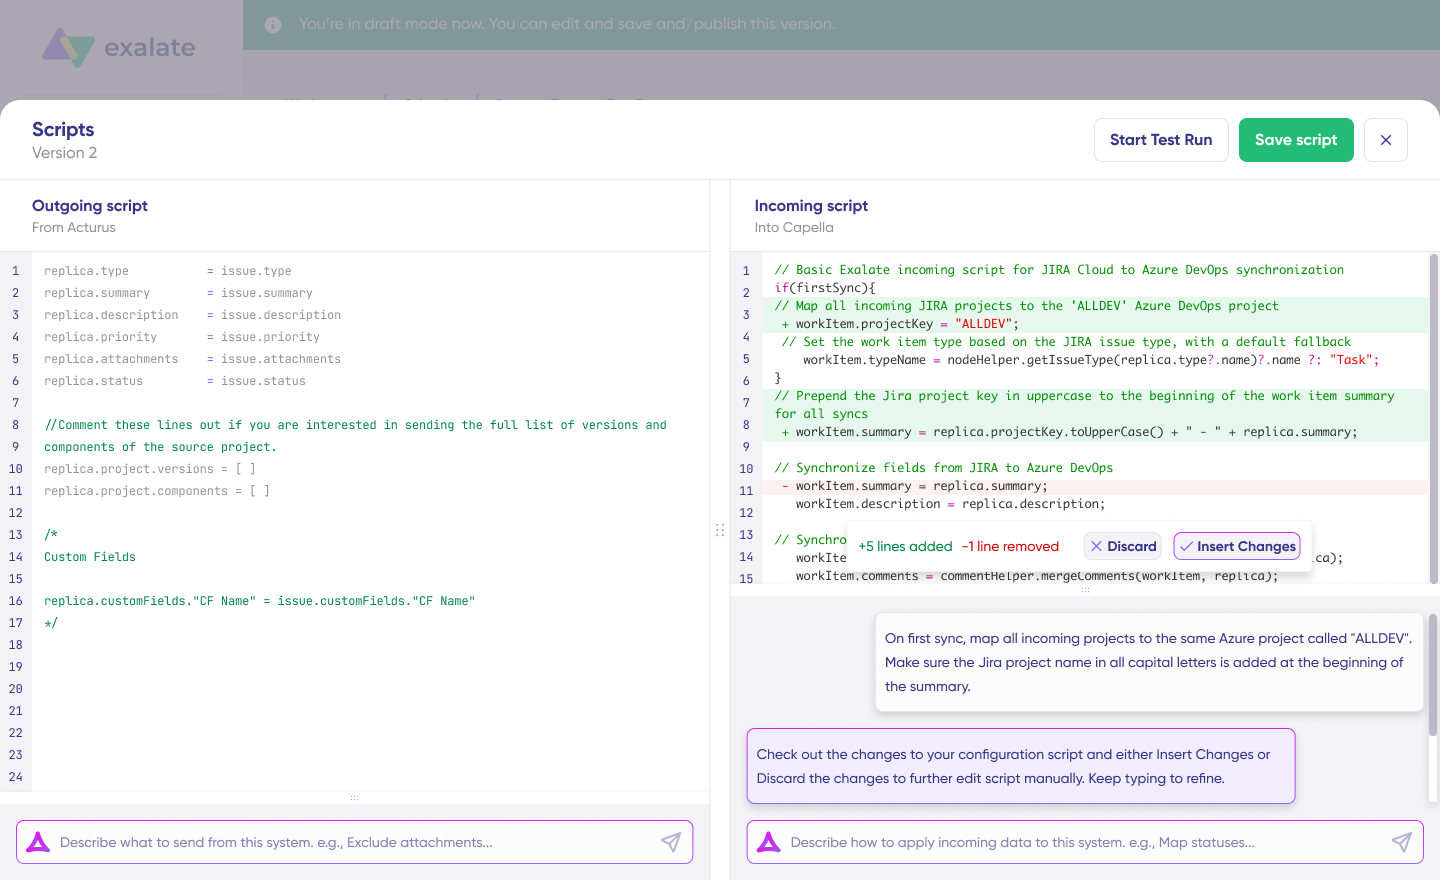
Aida generates the corresponding script. Review the suggested changes where green highlights show additions, red shows removals. Insert valid suggestions or refine your prompt.
Testing Before Deployment
Click “Start Test Run” to validate your configuration against real data without affecting production.
Select one or more items to test. The Test Run shows how the replica looks on both sides, what data leaves the source, and how it maps at the destination.
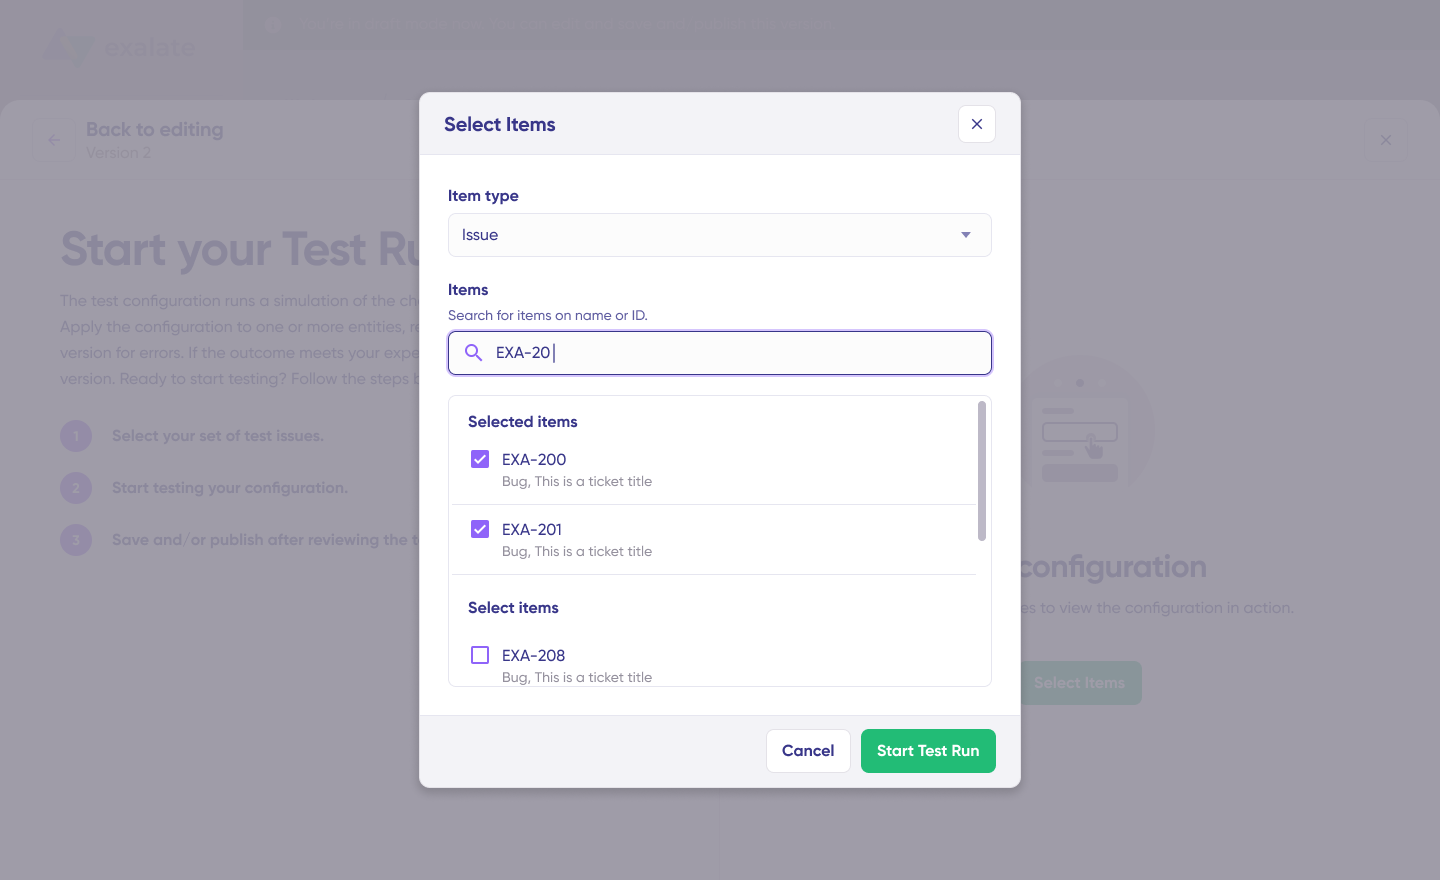
Review field mappings. If something looks wrong, go back, adjust the scripts, and test again. Publish only when the preview matches expectations.

Setting Up Triggers
Triggers define which items enter the sync automatically. Without triggers, you’d manually initiate each sync.
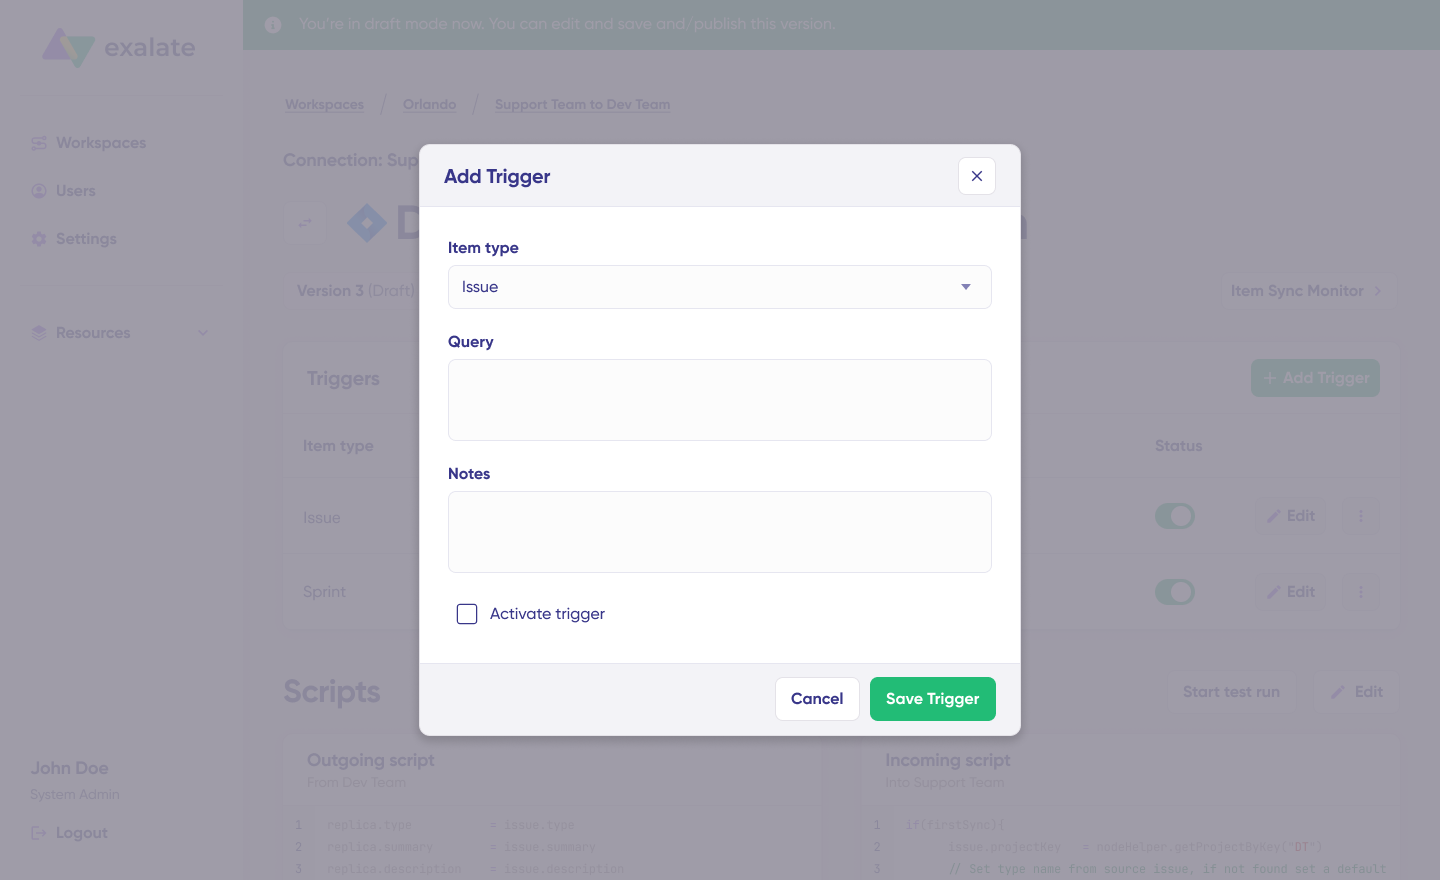
Zendesk Triggers: Use Zendesk search syntax.
- Sync all open tickets:
status<solved - Sync escalated tickets:
tags:escalate - Sync high priority:
priority:high
Salesforce Triggers: Use SOQL (Salesforce Object Query Language).
- Sync all Cases:
Status != 'Closed' - Sync specific record type:
RecordType.Name = 'Support Case'
Click “+ Add Trigger”, select the entity type, enter your query, and activate.

Deploying and Monitoring
Publish your configuration to go live. Exalate begins processing items that match your triggers.
Monitor sync health from the workspace dashboard. The Activity Dashboard shows sync status across all connections. The Troubleshooting tab displays errors with Aida-powered diagnosis.

If errors occur, Aida explains the issue in plain language and suggests fixes. Click the error, review the diagnosis, and resolve.

Conclusion
Zendesk integrations help improve internal and cross-company communication and collaboration. You can use a properly curated Zendesk integration workflow to sync data and exchange information between platforms like Jira, Salesforce, ServiceNow, Azure DevOps, Freshdesk, Freshservice, and more.
Although Zendesk provides native integrations, they present challenges in terms of functionality and flexibility. We proposed using a third-party solution like Exalate because of its user-friendly interface, enterprise-grade security (ISO 27001 certified), full scripting control, AI-assisted configuration with Aida, and extensive support.
With the right integration strategy, your support team can collaborate seamlessly with development, sales, and partner teams, reducing resolution times, improving customer satisfaction, and eliminating the manual data entry that slows everyone down.
Frequently Asked Questions
Can you integrate Salesforce and Zendesk?
Yes, you can integrate Salesforce with Zendesk using Zendesk for Salesforce integration or a bidirectional third-party integration tool like Exalate. Exalate allows you to sync information from fields, including custom fields, to unify the efforts of the sales and customer support teams.
What are Zendesk Integration Services?
Zendesk Integration Services (ZIS) refers to a system that handles integrations within the Zendesk ecosystem. ZIS handles business logic and workflow automation between Zendesk and other work management systems. Using ZIS simplifies the process of building integrations. With the ZIS Connections Service, you can fetch and store API credentials.
What is the difference between native and third-party Zendesk integrations?
Native integrations are built by Zendesk or platform vendors (like Atlassian’s Zendesk for Jira), offering basic functionality with easy setup. Third-party integrations like Exalate offer more advanced features, including bidirectional syncing, complex field mappings, cross-company integrations, and autonomous control over data flow on each side.
Can Zendesk integrate with ServiceNow?
Yes, Zendesk can integrate with ServiceNow using third-party integration tools like Exalate. This integration is valuable for organizations where support teams use Zendesk while IT operations or enterprise service management teams use ServiceNow. You can sync tickets, incidents, and related data bidirectionally.
What security certifications should I look for in a Zendesk integration tool?
Look for ISO 27001 certification, SOC 2 Type II compliance, GDPR compliance, and features like role-based access controls, data encryption (both in transit and at rest), OAuth authentication, and MFA support. Always verify the vendor’s security posture by reviewing their trust center documentation.
Can I sync Zendesk with multiple Jira projects?
Yes, with third-party tools like Exalate, you can create multiple connections between a single Zendesk instance and multiple Jira projects or instances. This is particularly useful for organizations where different development teams work in separate Jira projects, but all support tickets come through one Zendesk instance.
How does Exalate’s Aida help with Zendesk integrations?
Aida is Exalate’s AI-assisted configuration feature that helps you create integration rules using natural language prompts. Instead of writing complex scripts, you can describe what you want to sync (like “sync high-priority tickets to Jira with all comments and attachments”), and Aida generates the configuration. This makes advanced integrations accessible to non-technical users while giving technical users a faster starting point.
Can I integrate Zendesk with Azure DevOps?
Yes, Exalate supports Zendesk integrations with both Azure DevOps (cloud) and Azure DevOps Server (on-premise). You can sync tickets with work items, map custom fields, and create bidirectional status updates between your support and development teams.
What’s the best way to integrate Zendesk with Freshdesk or Freshservice?
Exalate supports direct integrations between Zendesk and both Freshdesk and Freshservice. This is valuable for organizations going through platform migrations, managing multi-brand support operations, or collaborating with partners who use different helpdesk systems.
Recommended Reads:
- Jira Zendesk Integration: The Comprehensive Step-by-Step Guide
- Salesforce Zendesk Integration (Step-by-Step Guide)
- How to Set up a Zendesk Azure DevOps Integration
- How to Set up a Zendesk GitHub Integration
- Zendesk ServiceNow Integration: The Complete Guide
- ServiceNow Integrations: Integrate ServiceNow and Other Systems Bidirectionally
