This article was originally published on the Atlassian Community and the Salesforce Community.
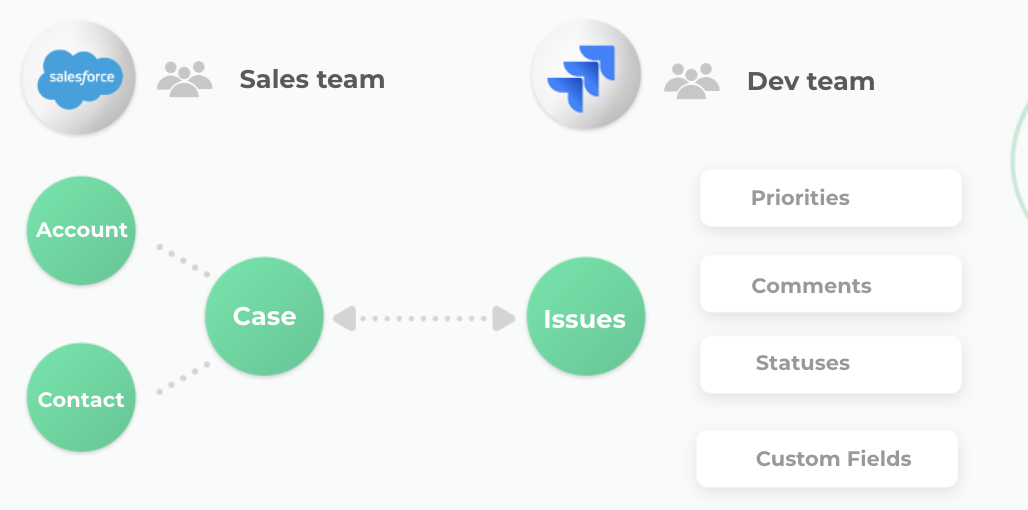
Salesforce often involves multiple objects that have an association between them. For instance, an Opportunity can have an Account or Product association, or a Case can have a linked Account or Contact, or there can be a completely new custom object.
And then I have often come across requests where these related objects in Salesforce need to be synced over to Jira for better visibility to different teams.
This article is to help you understand how this can be achieved using a 3rd-party integration solution like Exalate.
Jump to:
- The Use Case
- Using a 3rd-party Integration Solution: Exalate
The Use Case
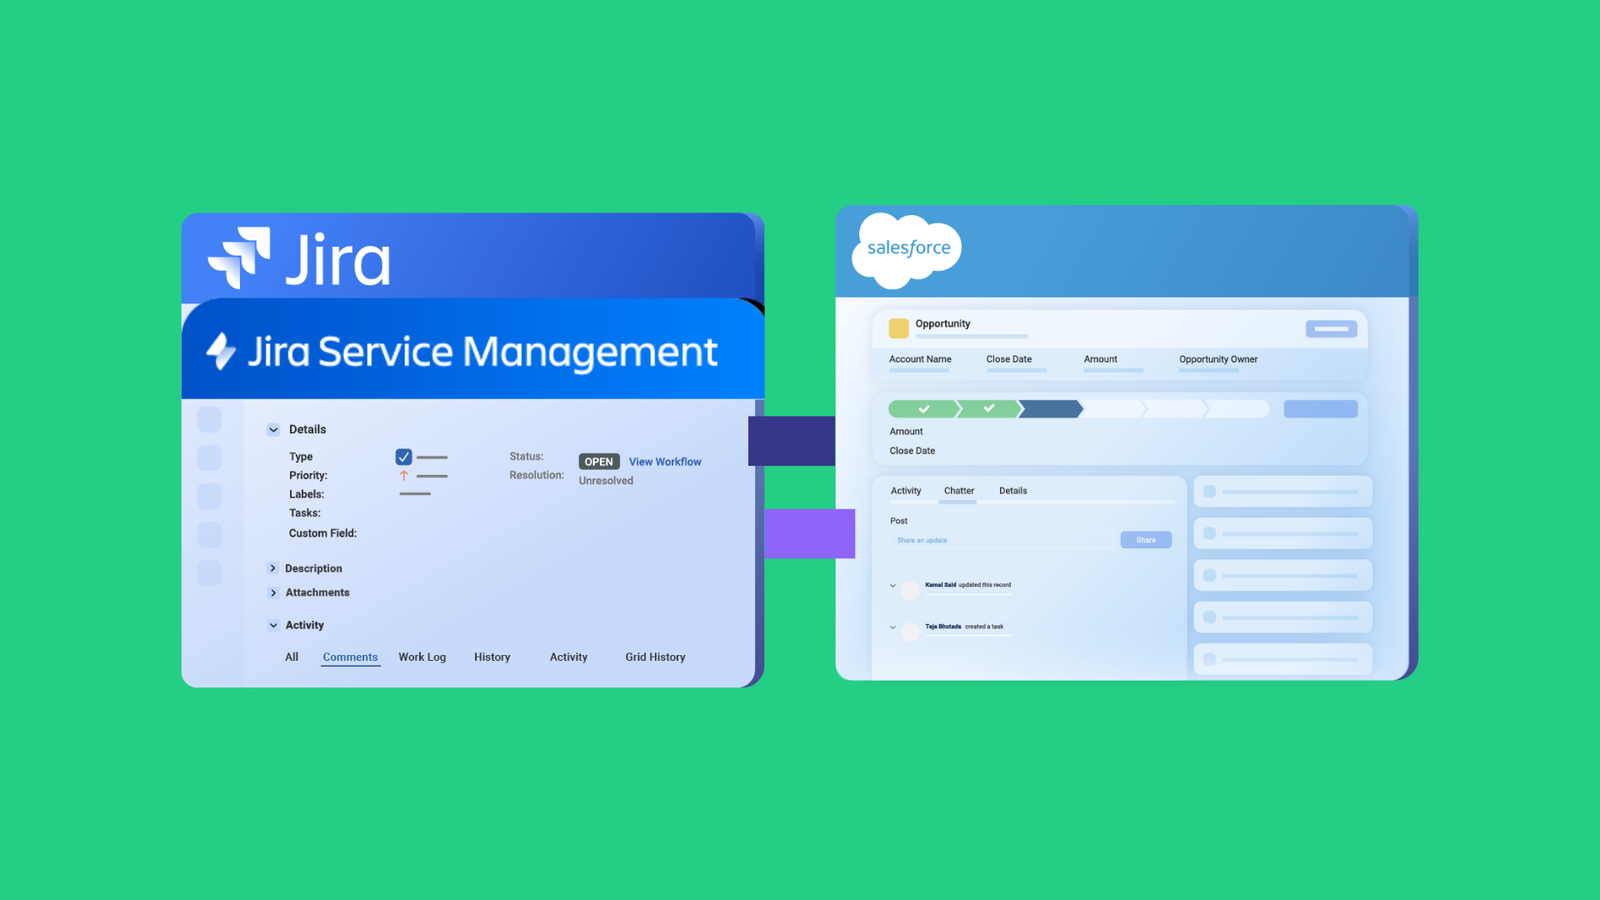
We have a Case object that has a Contact and Account linked to it and that needs to be presented on the Jira side.
The specifics:
- Case information like subject, description, comments, status, and attachments needs to be synced bi-directionally between Jira and Salesforce.
- On the Jira side there are 2 custom fields: ‘SF Contact’ and ‘SF Account’ to display the Account and Contact information related to the above Case.
- Name, title, and email of the Contact to be displayed on the Jira side.
- Name and description of the Account to be displayed on the Jira side.
- Any changes or updates in the Account or Contact need to be reflected on the Jira side.
The Challenges:
- Fetching information related to Case, Account and Contact individually from Salesforce to Jira can be simple. The real challenge lies in connecting the Account and Contact to the correct Jira issue that has been created while syncing the Case.
- Changes in the Account or Contact should pass over correct updates to the synced Jira issue.
Using a 3rd-party Integration Solution: Exalate
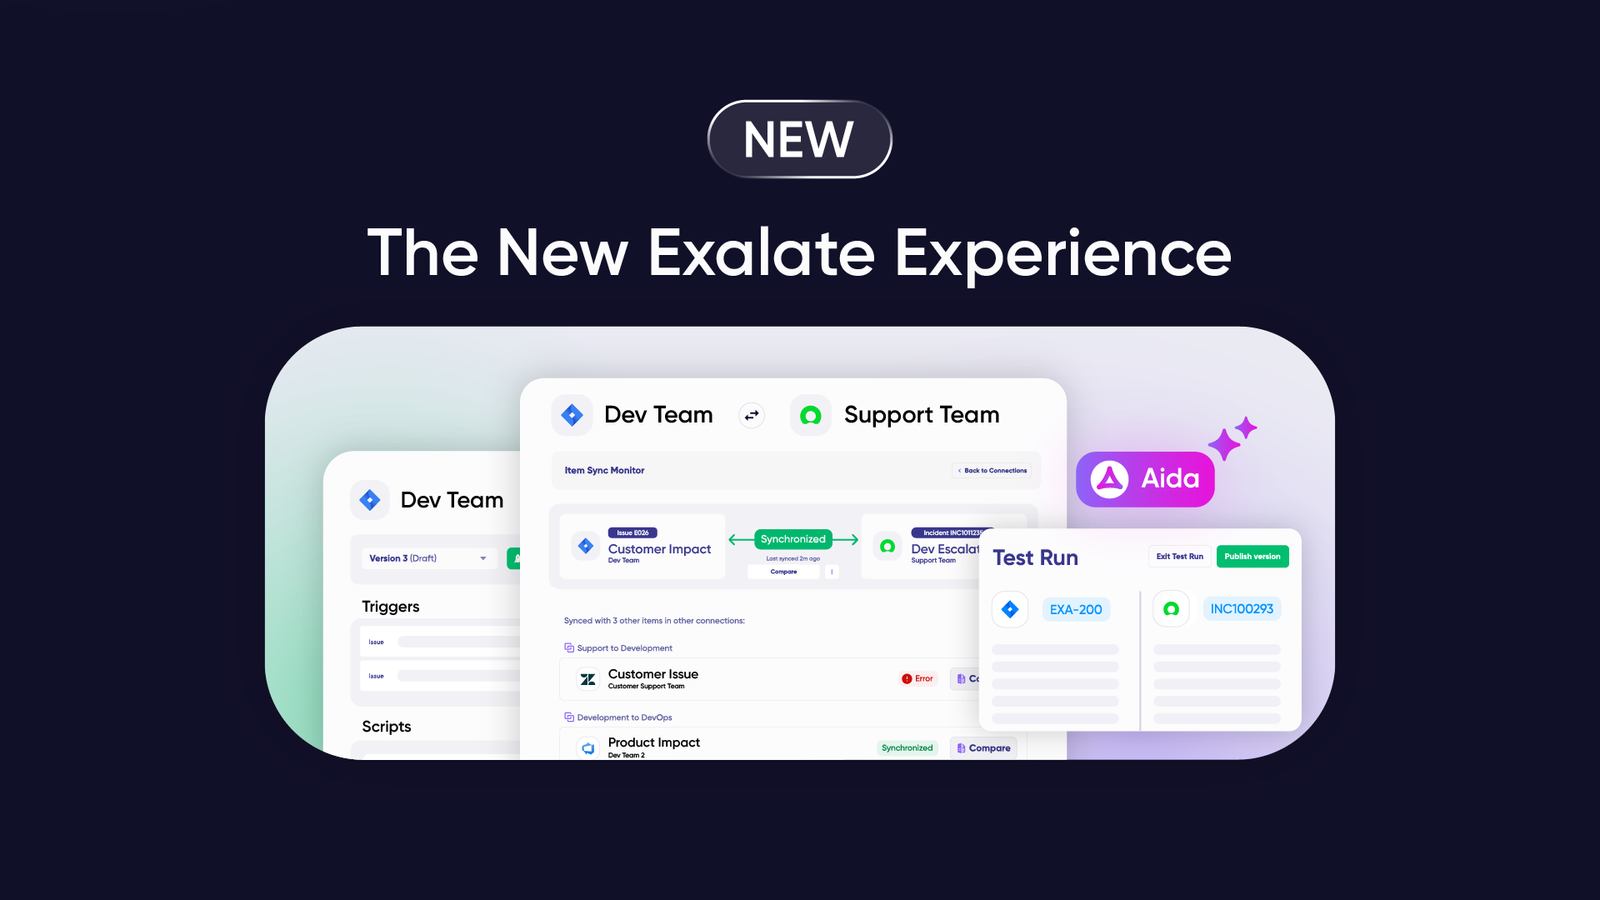
Exalate is a bi-directional synchronization solution that integrates different platforms like Jira, Salesforce, Azure DevOps, ServiceNow, Zendesk, GitHub, and more. The above use case can be implemented using the Exalate API. With a built-in Groovy-based scripting engine, you have the necessary capabilities to implement almost any use case.
As an Exalate administrator, you can configure both the incoming and outgoing processors on each side independently. These processors on both Jira and Salesforce filter what information must be sent and received.
Implementation with Exalate
Before starting the implementation we need to install Exalate on both Jira and Salesforce. For Jira Cloud, you can do so from the Atlassian Marketplace. For Salesforce head over to AppExchange.
Note: You can also watch the Exalate installation videos of Jira and Salesforce if you prefer so.
Search for the Exalate app on both marketplaces and start following the installation wizard, which is pretty straightforward.
Note: To know about how it can be done on Jira on-premise, have a look at this doc.
Then a connection must be established between them. There are 2 types of connections that are supported: Basic mode and Script mode.
The Basic mode is for syncing basic entities like summary, description, comments, attachments, and issue types in Jira and Cases in Salesforce. As you can’t configure it, it is suitable for simple integration cases, but you can use it for free.
The Script mode connection provides independent control on each side. It consists of Groovy scripts that help configure the incoming and outgoing information. It can be done by editing the Sync rules.
Keeping in mind the advanced configuration of this use case, it is recommended we use the Script mode connection.
Configuring the Connection
Once the connection has been set up, we start configuring it. Both the incoming and outgoing scripts need to be configured at either end. ‘Outgoing sync’ at the Jira end decides what information goes out from Jira to Salesforce and ‘Incoming sync’ at Jira keeps track of how to receive information coming from Salesforce. These syncs are present at the Salesforce end too.
As seen in the script below, all the information (sent or received) is through something called ‘replica’. This ‘replica’ acts like a payload or message being sent as a part of a sync transaction. It can contain issues, Cases, or any other information that needs to be passed between the two platforms.
Let us have a look at the ‘Incoming’ and ‘Outgoing’ syncs that need to be configured at Jira and Salesforce by following the steps of this use case along the way.
Outgoing Sync: Jira
Since there is no additional information apart from the defaults that need to be sent from Jira to Salesforce, we keep it as it is.
Step 1: Outgoing Sync, Salesforce
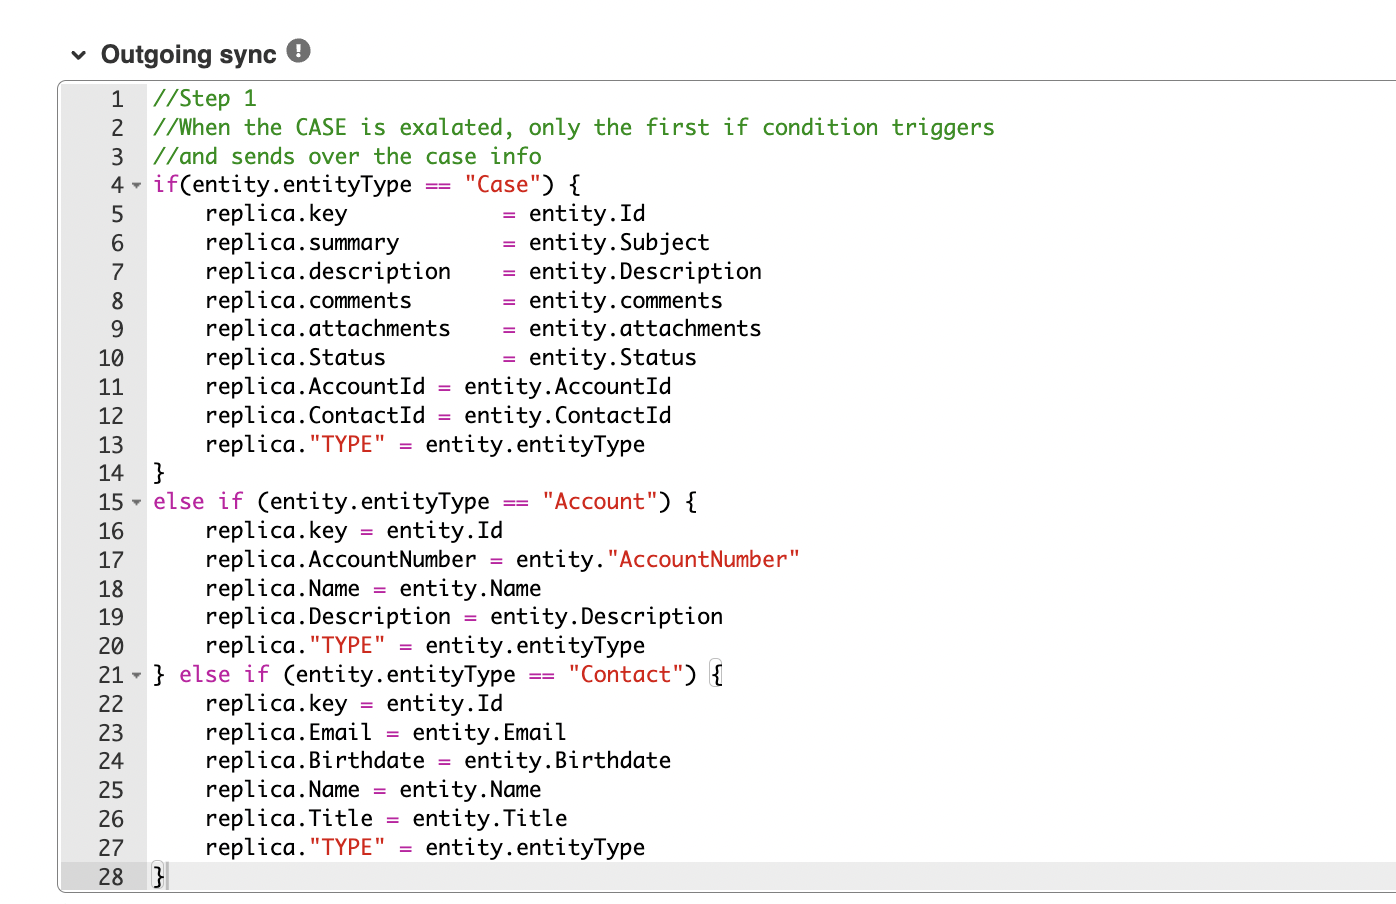
- Line 4: Here, the first ‘If’ condition checks whether the entityType is ‘Case’.
- If yes, then Subject, Description etc for the Case is copied into a replica to be sent over to Jira.
- Line 13: replica.“Type” carries the type of the Salesforce record, for instance, Case, Account or Contact. This is used at the Jira end to recognize what type of entity is coming over.
- Line 15 and Line 21: The next 2 if conditions are to send specific Account and Contact related information.
You can find the entire snippet here.
Step 2: Incoming Sync, Jira
Here, you will check if the entity from the replica is ‘Case’, if it is and it’s the first sync, then you create a ‘Task’ in Jira.
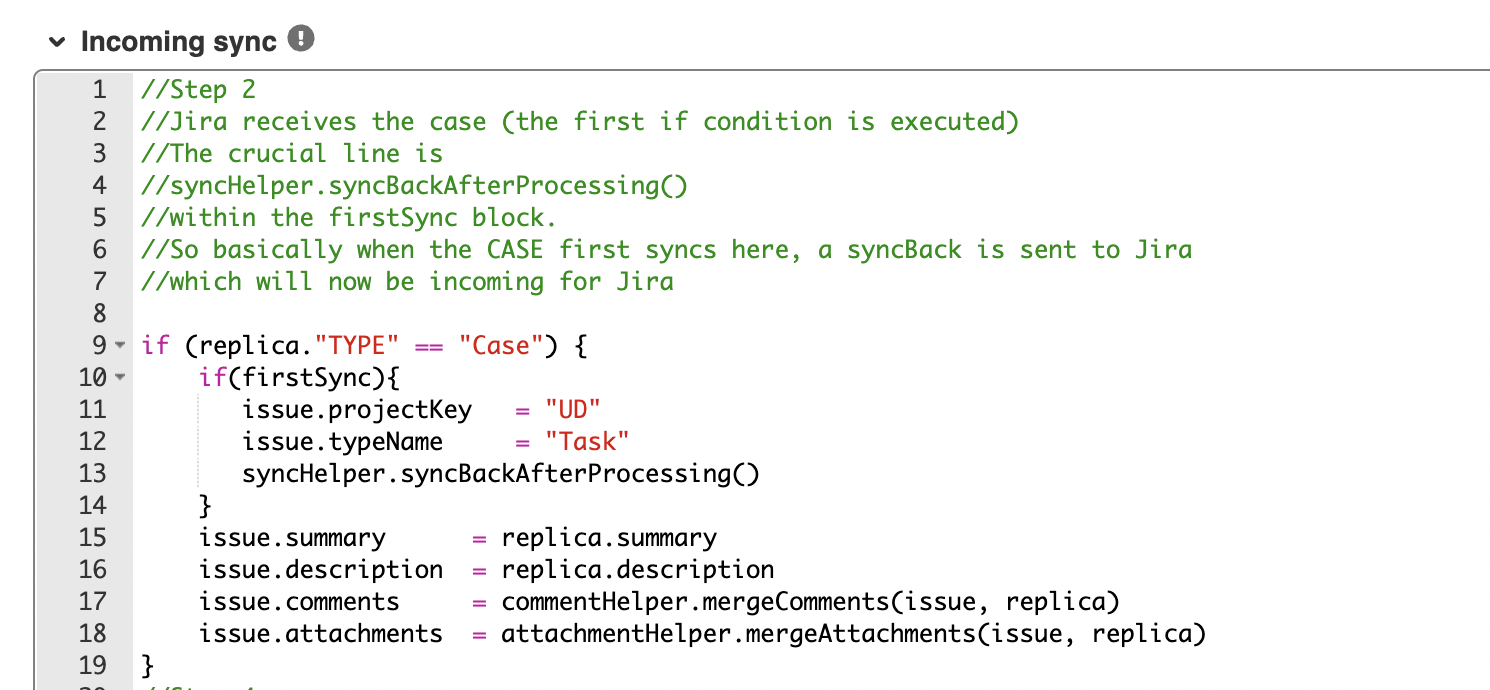
And then we call: syncHelper.syncBackAfterProcessing().
This is a helper method the Exalate API provides. When it’s the first sync, this method syncs back to Jira, so there is an incoming sync for Jira to fetch the Contact and Account information from Salesforce.
Note: You can also have a look at the other helper methods provided by the Exalate API.
Right now let’s go to the other end (Salesforce incoming) to be in line with the steps of our use case. We will have a look at the remaining code in the ‘Incoming sync’ of Jira in step 4 again.
Step 3: Incoming Sync, Salesforce
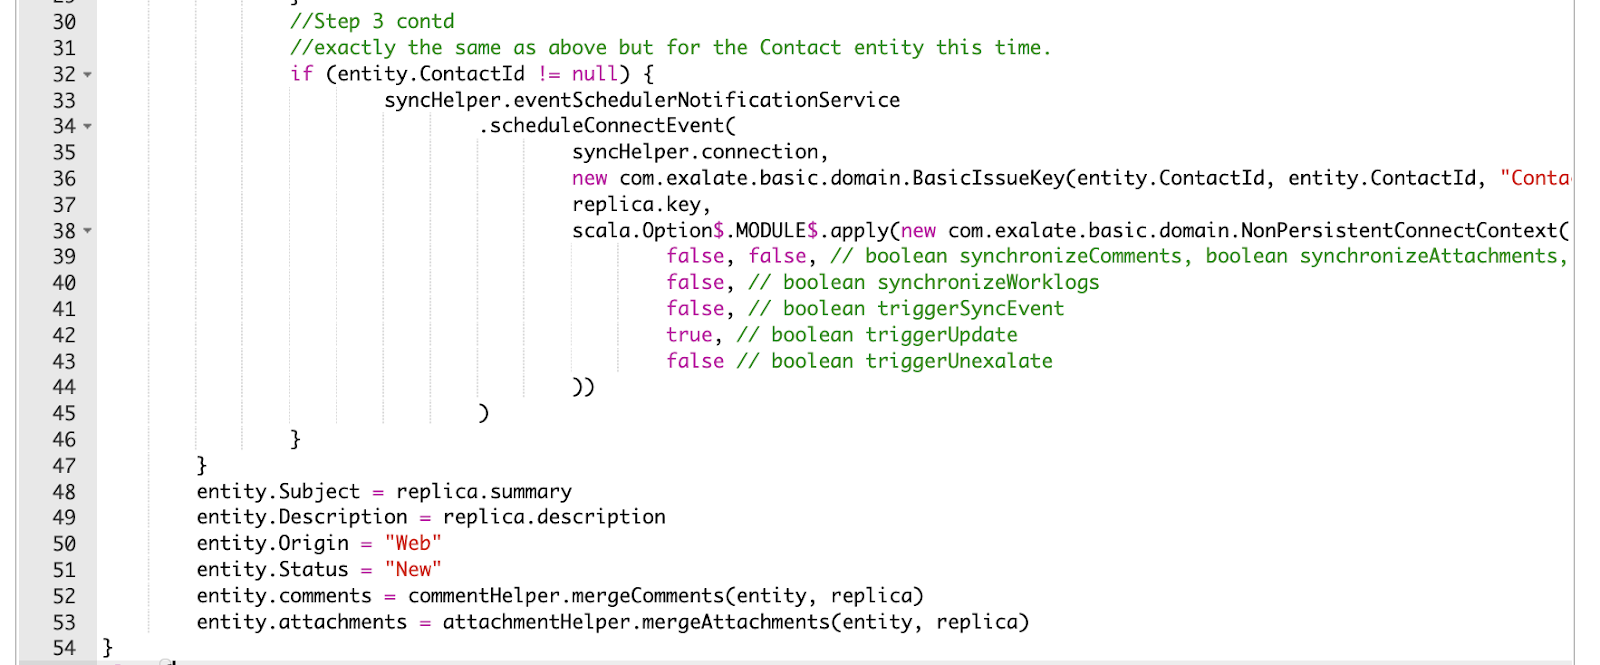
In Salesforce, if it is the first sync then a Case is created. Do remember that this is completely customizable, you can create any other entity if you want.

- Line 6: If the entity type is Case, then proceed with fetching the Account and Contact information
- Line 10: The value of the syncRequest.remoteSyncEventNumber is checked to see if it’s equal to 1. If it is, then it ensures that the code that goes next is executed only once and not on every subsequent sync.
- Line 12: Checks if there is some Account information to be fetched (i.e it’s not null).
- Line 16: Executes the scheduleConnectEvent method which connects the linked Account from Salesforce with the Jira issue already synced with the Case, and doesn’t create a new one. It uses the replica.key from the Jira side to form this link. This key is already received in the syncBack transaction.
The same set of code applies to fetching the Contact details as well.
Step 4: Incoming Sync, Jira
Now coming back to the incoming sync on Jira, it’s time we display the fetched Account and Contact details.
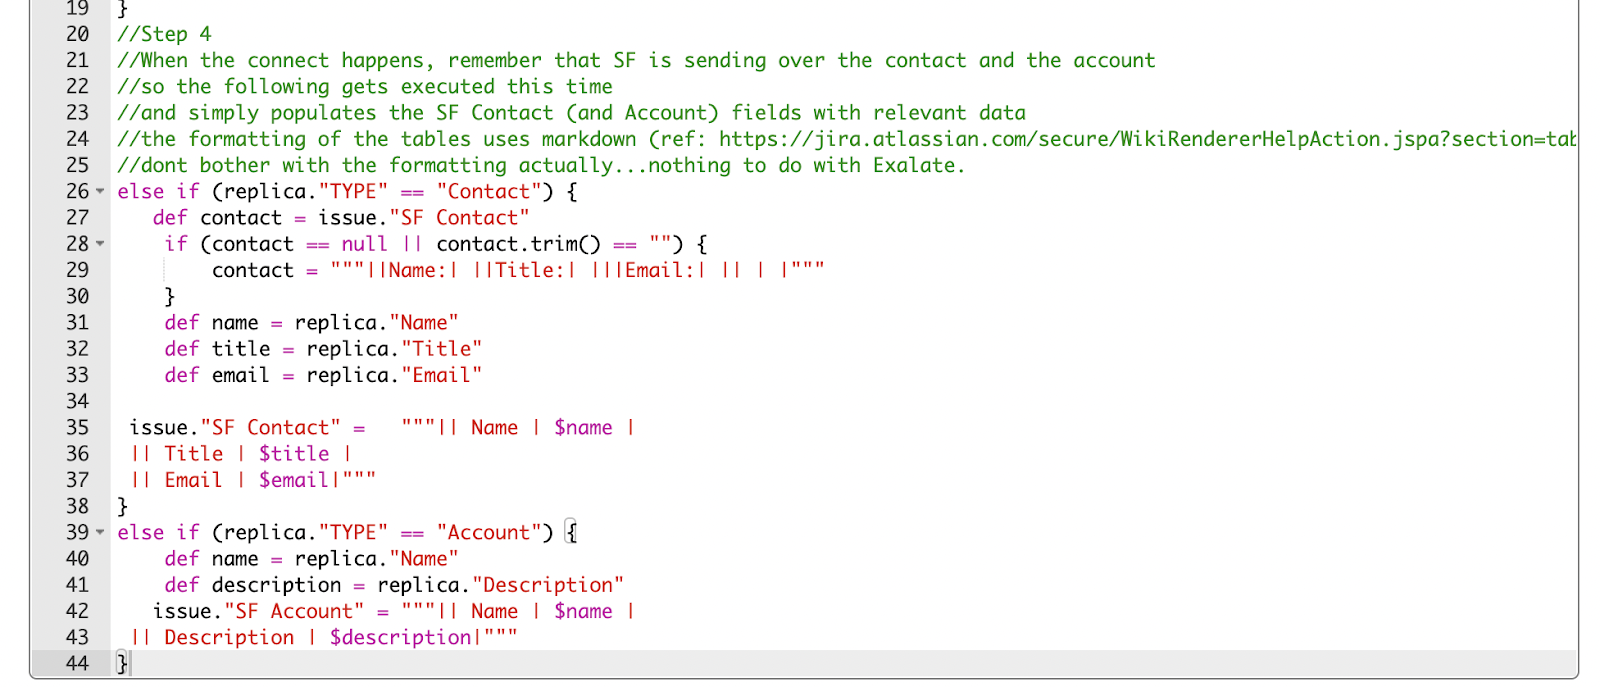
As seen, the details are displayed in custom fields called ‘SF Contact’ and ‘SF Account’.
Line 26, 39: Check if the type of entity received from Salesforce is Account or Contact, and depending on it, the details are displayed further.
Line 36, 37: Name, Title, and Email of the Contact are displayed.
Line 42,43: Name and Description of the Account are displayed.
Additional fields from both these Salesforce records or some other Salesforce record in itself can also be displayed this way.
Note the ‘|’ and ‘||’ used here are just to display the data in the form of tables. It has nothing to do with Exalate.
Output
Let’s quickly see how all this looks in action.
We start by creating a Case in Salesforce and assign a Contact and Account to it.
Then sync it over to Jira (either manually or through triggers).
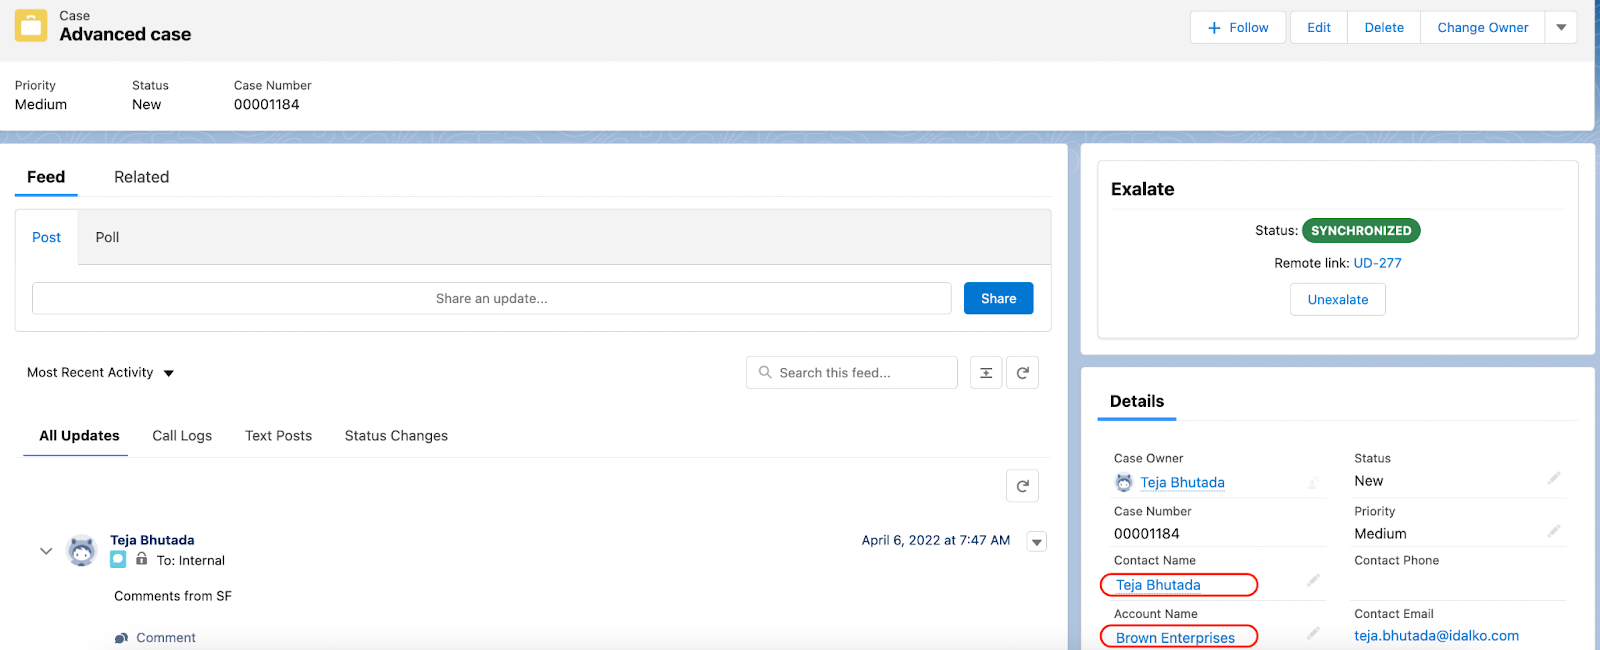
In a short while, under the issue created in Jira, you can see the Account and Contact related information being displayed under the 2 custom fields in Jira in the form of a table.
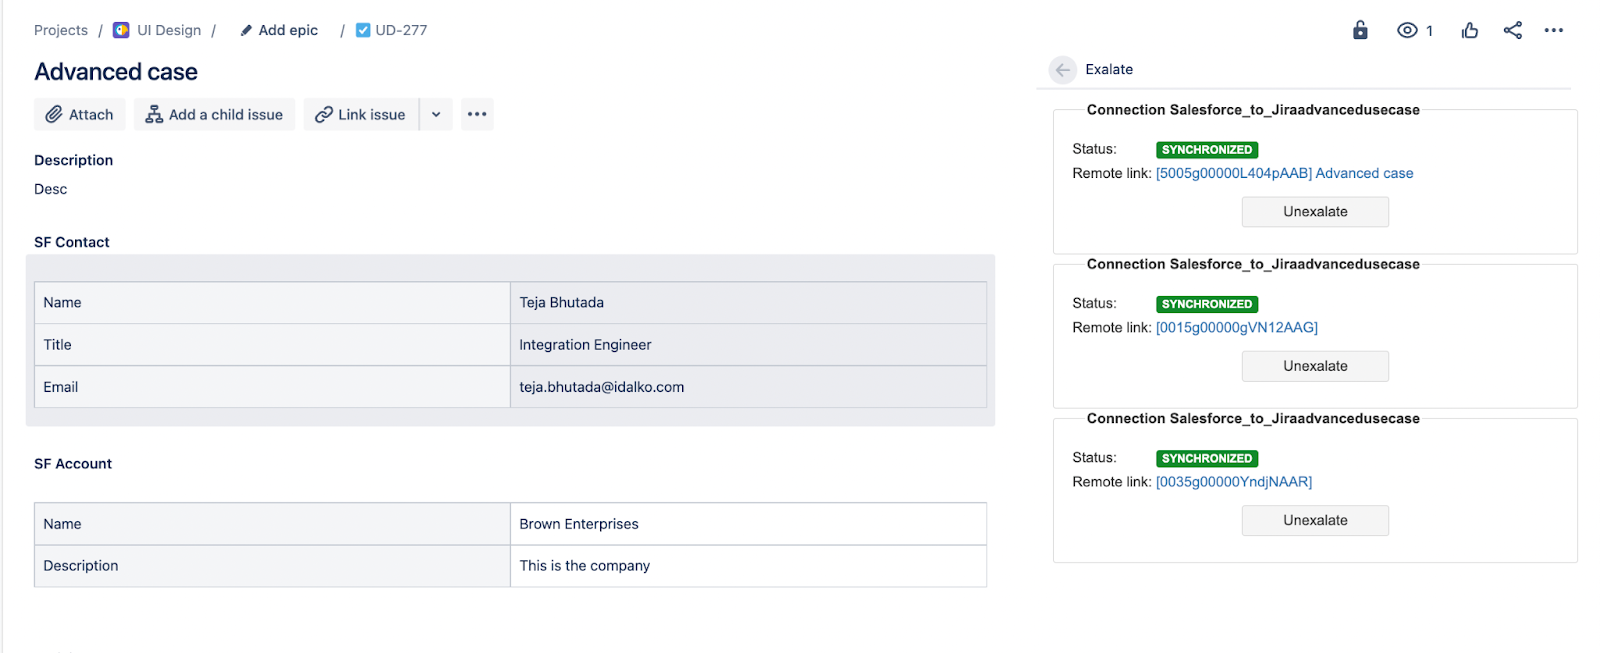
Open the Exalate panel on the issue view and you can see the Account, Case, and Contact sync status and also their respective remote links.
You can try making some changes to either the Account or the Contact in Salesforce and see those being reflected in Jira.
Wrap it up
We saw how multiple-related objects within Salesforce can be synced over to Jira or even some other platforms like Azure DevOps, ServiceNow, GitHub, or Zendesk. This was possible using an integration solution called Exalate which uses Groovy-based scripts to implement even the most advanced or complex use cases.
If you want to learn more about it or want to see how Exalate can be tailored to your specific use case, then book a demo with us. Or get in touch with our partners if you already use it and want to sync with an advanced use case like this.
Recommended Reading: