If different teams (working in ServiceNow) have their own instances, they can easily manage that data independently while making it available to the other teams through a ServiceNow to ServiceNow integration.
Such integration can automatically exchange data between ServiceNow instances. Both sides can control what they send and set the conditions for data transfer.
This opens up all kinds of possibilities for teams wanting to help each other work more effectively. It can also make existing data transfer tasks faster, cheaper, and more reliable.
Setting up a two-way ServiceNow to ServiceNow integration can improve productivity, but it also comes with several challenges. Let’s discuss them in more detail.
Key Takeaways
- ServiceNow to ServiceNow integration connects multiple instances to enable automatic, bidirectional data exchange between teams and organizations.
- Integration methods range from native solutions like Integration Hub and eBonding to third-party tools and custom API development.
- AI-assisted configuration through tools like Aida simplifies script generation and reduces setup complexity.
- By connecting your teams, you can make sure everyone in your organization benefits from sharing knowledge.
- With Exalate, you sync systems in minutes and have complete control over what you share and when you share it. It’s fast, efficient, and reliable.

What Is ServiceNow to ServiceNow Integration?
ServiceNow to ServiceNow integration connects two or more ServiceNow instances to automatically exchange data between them. Both sides control what they send and receive, setting conditions for when data transfers happen.
If different teams manage their own instances, they can work independently while making relevant data available to other teams. This opens up collaboration possibilities while making data transfer faster, more reliable, and less error-prone than manual methods.
For example, IT teams in one organization can connect their ServiceNow instance with a customer support team in another company to improve service quality.
This type of integration also establishes collaborative environments between service providers, clients, vendors, and suppliers.
Why Organizations Need ServiceNow to ServiceNow Integration
Organizations sync multiple ServiceNow instances for several strategic reasons:
- Unified data visibility: Consolidate data from different instances into a single source of truth for better decision-making across departments and business units.
- Cross-organization collaboration: Service providers, partners, and clients can share critical information without granting full system access, maintaining security while enabling transparency.
- Merger and acquisition support: When companies merge, integrating their existing ServiceNow instances preserves workflows while creating new collaboration channels between previously separate teams.
- Multi-tenant management: Managed service providers (MSPs) can connect their instance with client instances, managing multiple customers efficiently while keeping their data separate.
- Departmental coordination: Large enterprises with separate instances for IT, HR, facilities, and other departments can sync relevant data automatically instead of relying on manual updates.
- Regulatory compliance: Some industries require data to be synchronized between systems for audit trails, reporting, and compliance verification.
Key Features to Consider When Choosing an Integration Solution
When evaluating ServiceNow integration options, consider these essential capabilities:
- Bidirectional sync: True two-way synchronization ensures changes in either instance update the other automatically, maintaining data consistency without manual intervention.
- Field-level control: Choose exactly which fields sync between instances. Different teams often need different subsets of data, and granular control prevents information overload.
- Data transformation: Convert and map data between instances that use different field structures, picklist values, or data formats.
- Security and compliance: Look for ISO certification, role-based access control (RBAC), as well as data encryption in transit (TLS/SSL) and at rest. Visit the Exalate Trust Center for detailed security documentation.
- AI-assisted configuration: Tools with built-in AI assistants like Aida accelerate setup by generating sync scripts from natural language descriptions, reducing technical barriers.
- Trigger conditions: Automated triggers let you set up rules like sync all incidents where “priority = 1” or sync change requests for specific assignment groups.
- Real-time synchronization: Event-based integration triggers data exchange immediately when changes occur, rather than waiting for scheduled batch processes.
- Scalability: The solution should handle growing data volumes and additional connections without performance degradation.
- Testing capabilities: Dry-run functionality lets you validate sync behavior before deploying to production, reducing the risk of data issues.
What Are The ServiceNow to ServiceNow Integration Methods?
Integration Hub
Integration Hub is ServiceNow’s native solution for connecting instances. It uses “spokes” (event-driven configurations) to call APIs and interact with other systems.
Available features include:
- Pre-built connectors for common ServiceNow-to-ServiceNow workflows
- Low-code environment for building integrations
- Flow Designer for visual workflow creation
- Spoke Generator for custom spoke development
Integration Hub works well for straightforward synchronization needs but has limitations. The scripting capabilities have a limited scope for customization. Organizations needing complex, bidirectional synchronization often find it restrictive. Licensing costs can also add up for multiple integrations.
eBonding
ServiceNow eBonding spoke enables instance-to-instance data exchange for simple requirements. It handles basic ticket creation and updates between instances using predefined field mappings.
eBonding works for scenarios like:
- Incident ticket synchronization
- Change request coordination
- Basic status updates
However, eBonding lacks flexibility for complex transformations and advanced synchronization logic.
Third-Party Integration Tools
Third-party tools offer more flexibility and customization than native options. They typically support bidirectional sync, custom field mapping, and advanced transformation logic.
Exalate provides AI-assisted integration between ServiceNow instances with these capabilities:
- Bidirectional synchronization: Real-time, two-way data exchange between instances
- Aida AI-assisted configuration: Generate sync scripts using natural language prompts instead of writing code from scratch
- Groovy-based scripting: Full control over data transformation and mapping logic
- Entity-level sync: Sync incidents, problems, change requests, catalog tasks, and any entity available via REST APIs
- Trigger-based automation: Set conditions to control when data syncs between instances
Exalate supports connections with ServiceNow and other platforms, including Jira, Azure DevOps, Salesforce, Zendesk, GitHub, Freshservice, Freshdesk, and Asana through custom connectors.
A Step-by-Step Setup Guide For ServiceNow to ServiceNow Integration With Exalate
Head to the Exalate integrations page to begin. Set up a new account by entering your email and verifying it, or use Google sign-in.
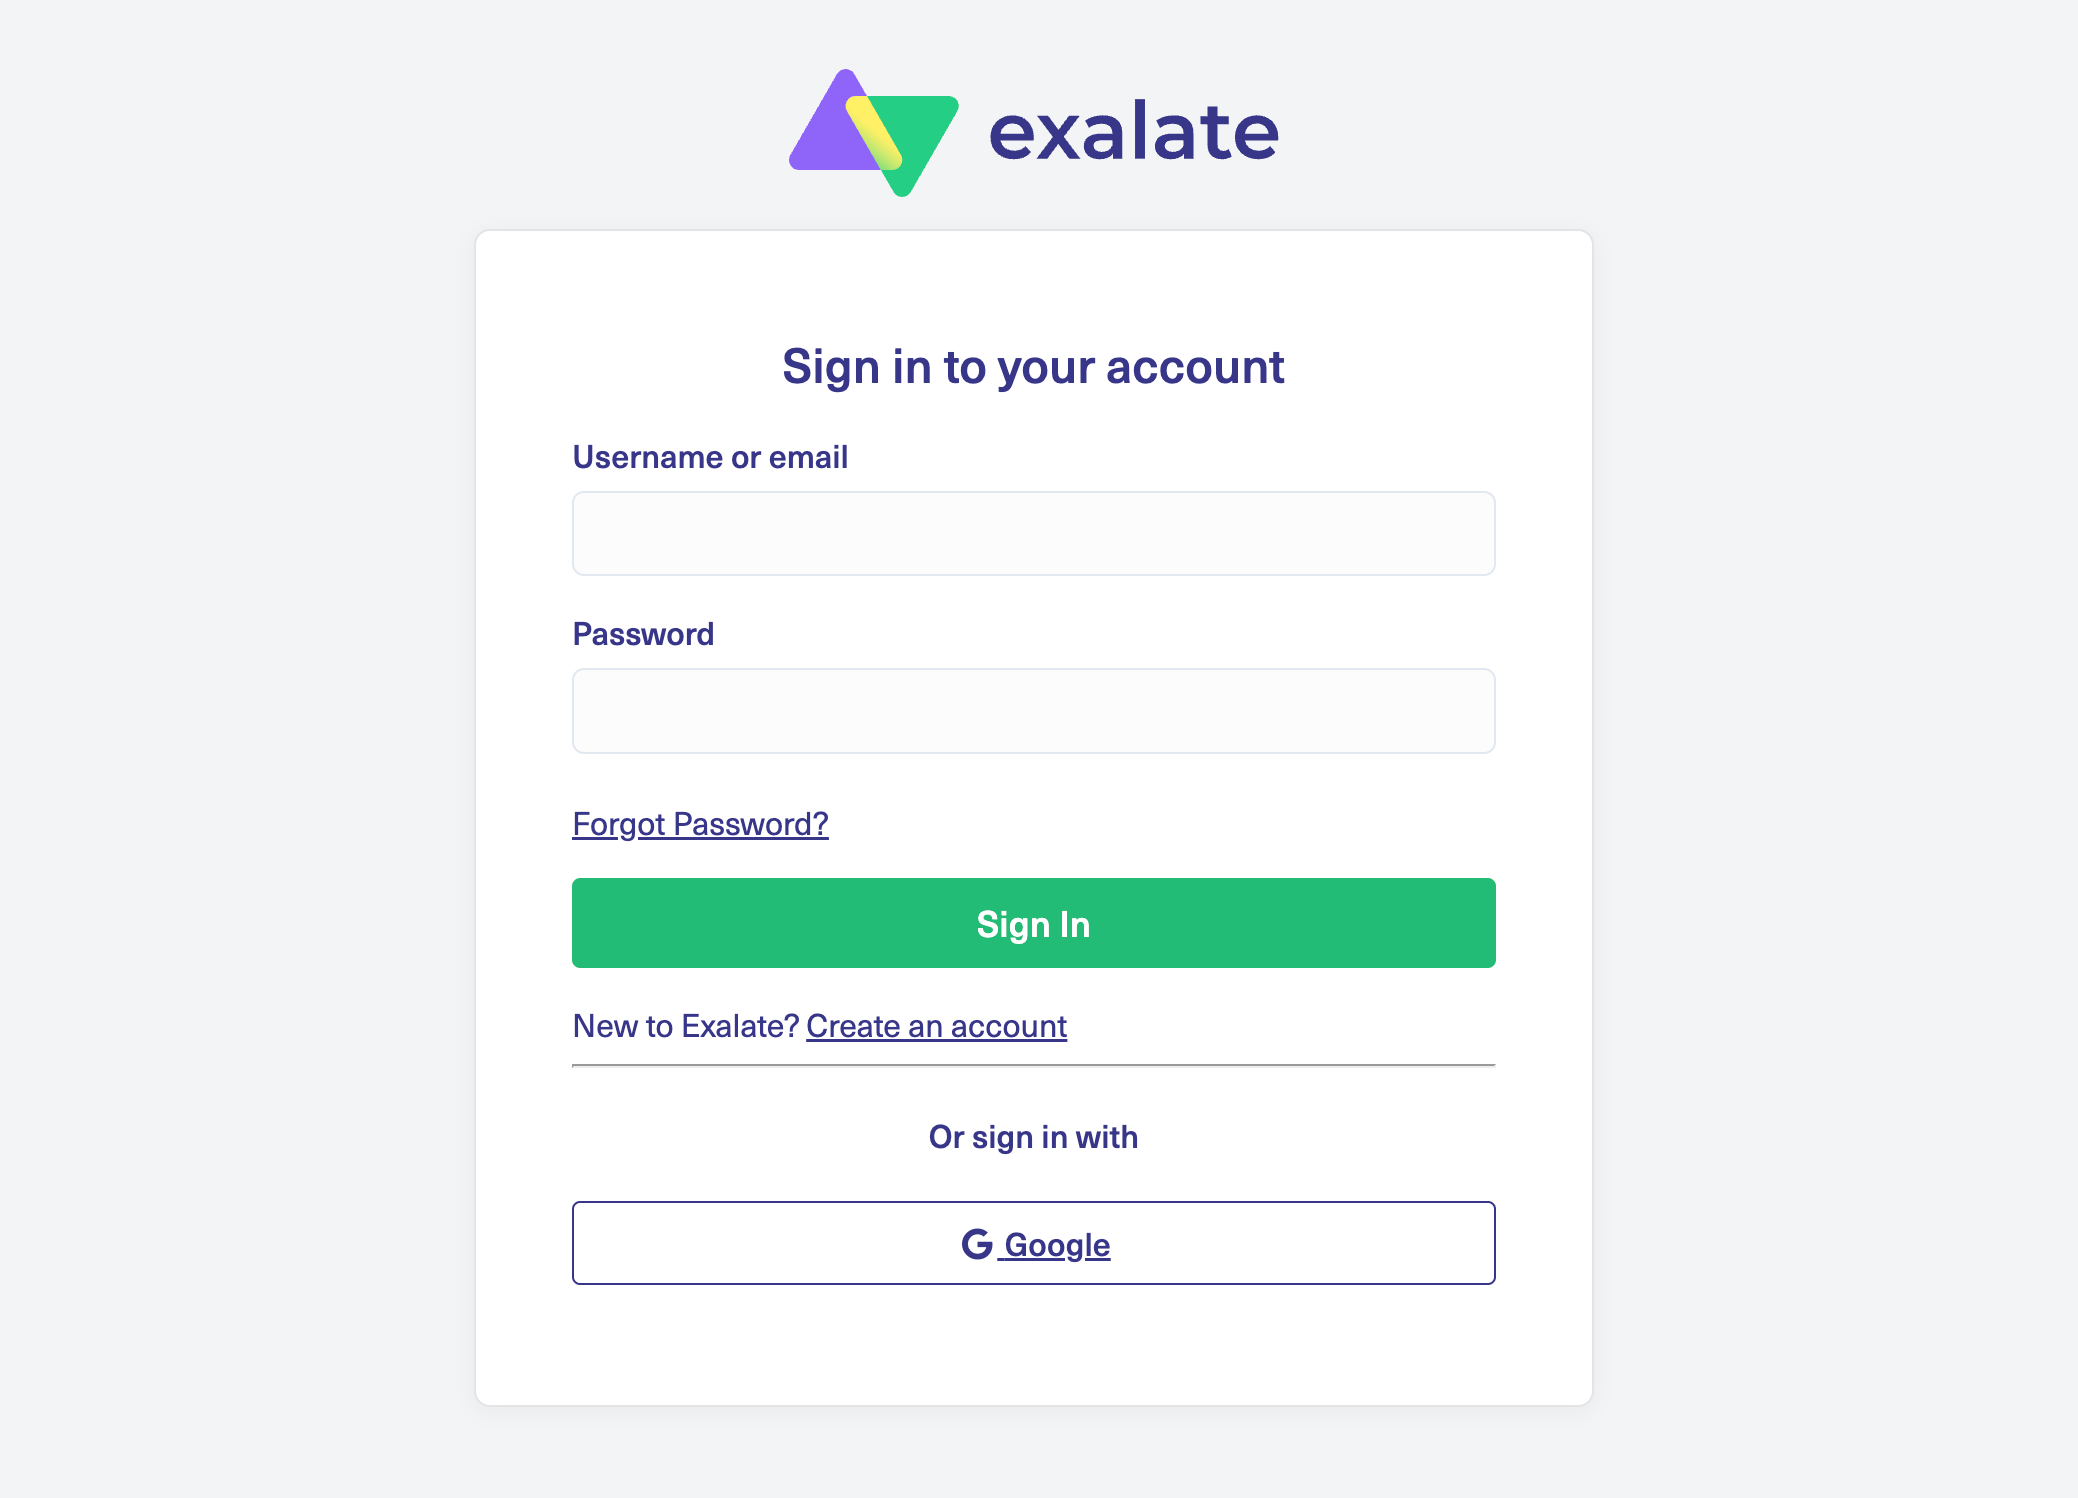
Already have an account? Just log in to reach the dashboard.
Set up a workspace to handle your integrations and connections. You can find all your workspaces under the “Workspaces” tab.
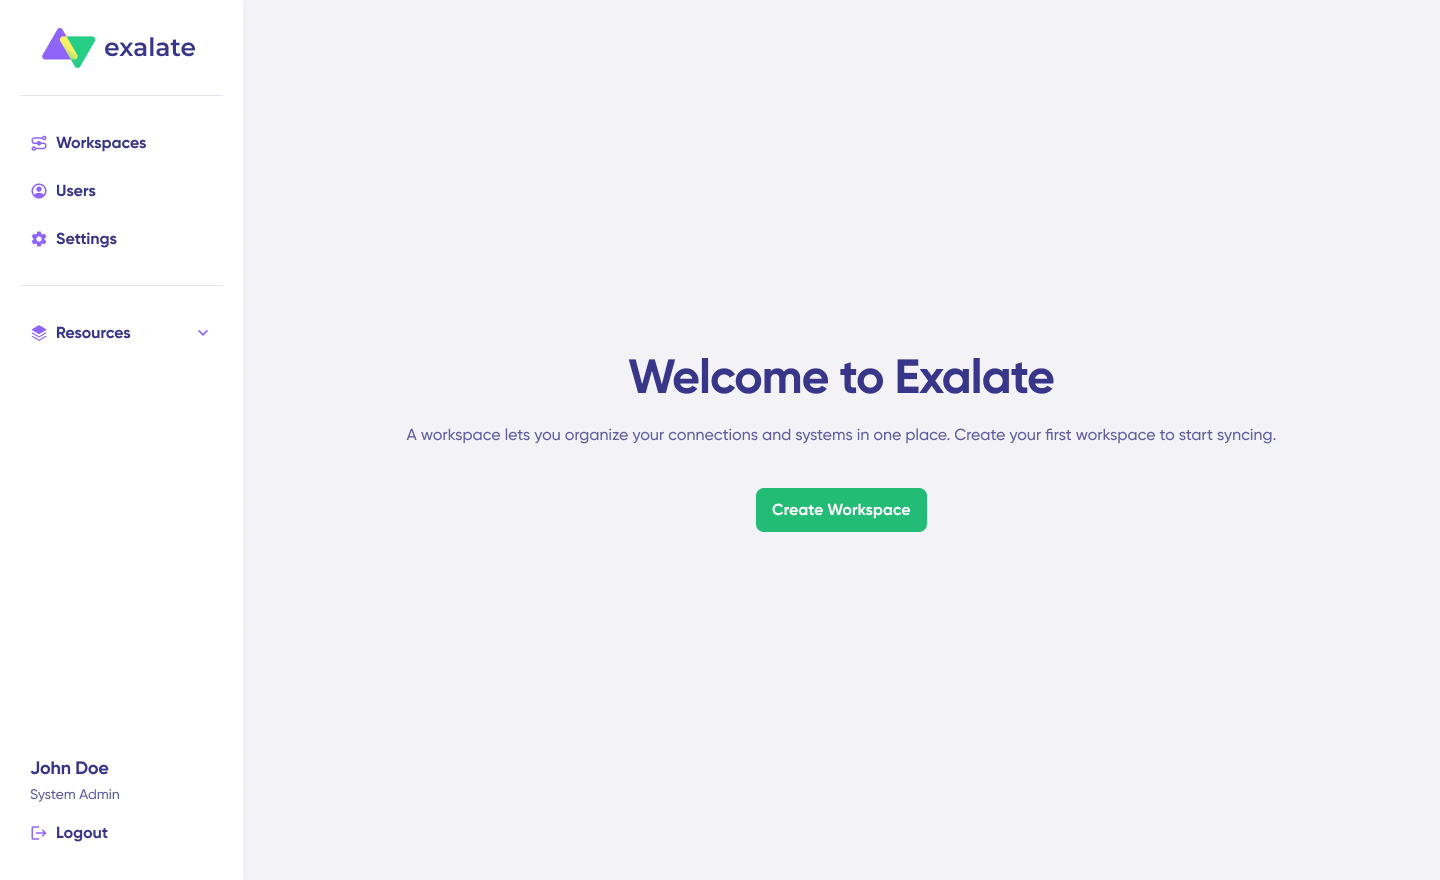
To build your own workspace, hit the “+ Create Workspace” button. Give it a name and description, then click “Create workspace.“
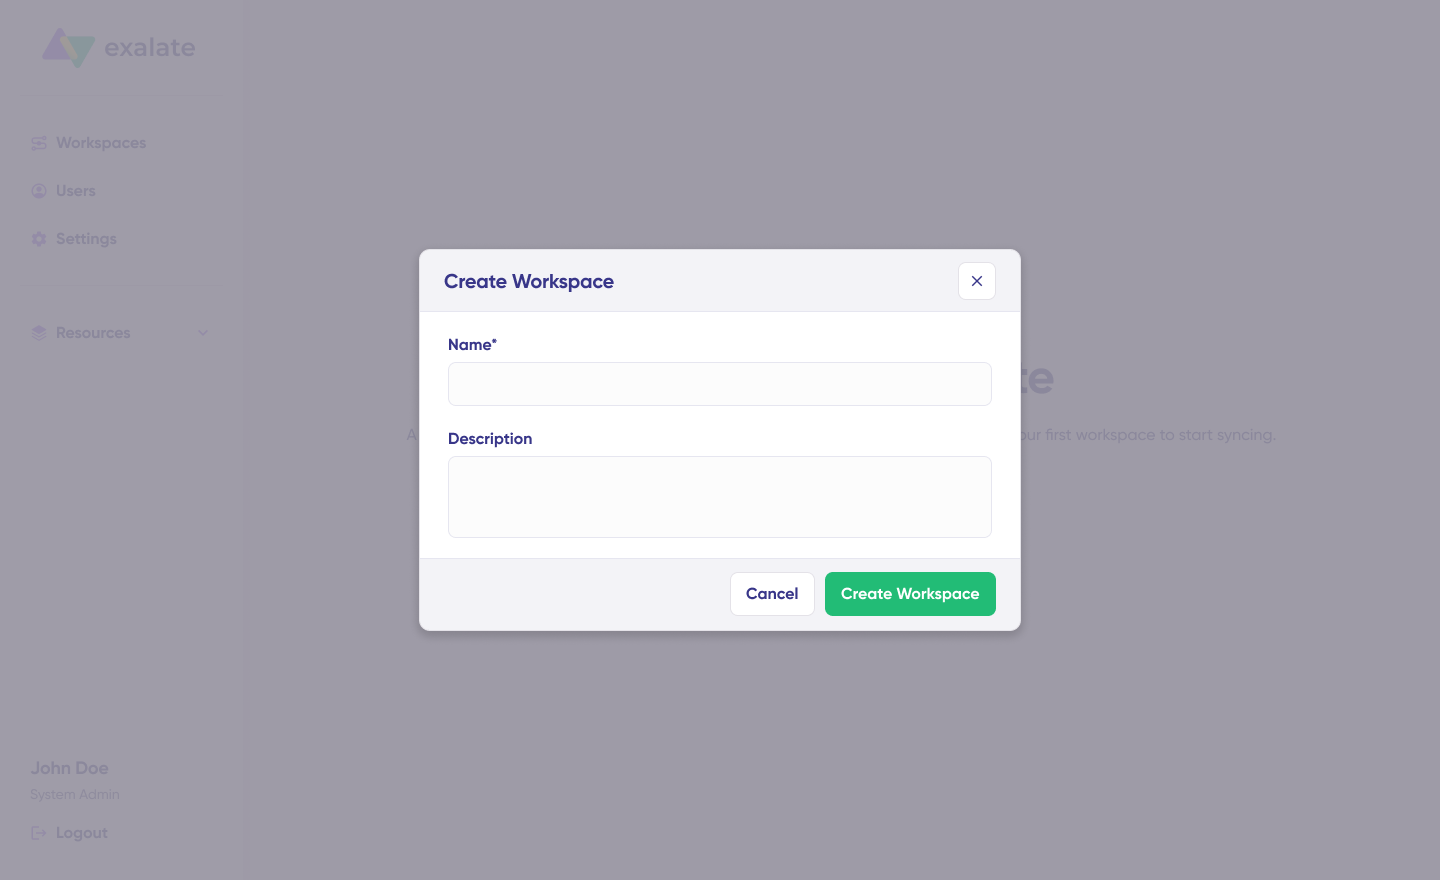
To set up a connection, you’ll need an active Exalate account with at least one Workspace and login credentials for both systems you’re connecting (System A and System B).
Click “+ Add connections” > “Create new connection“. Name your first system and enter the URL of your ServiceNow instance.
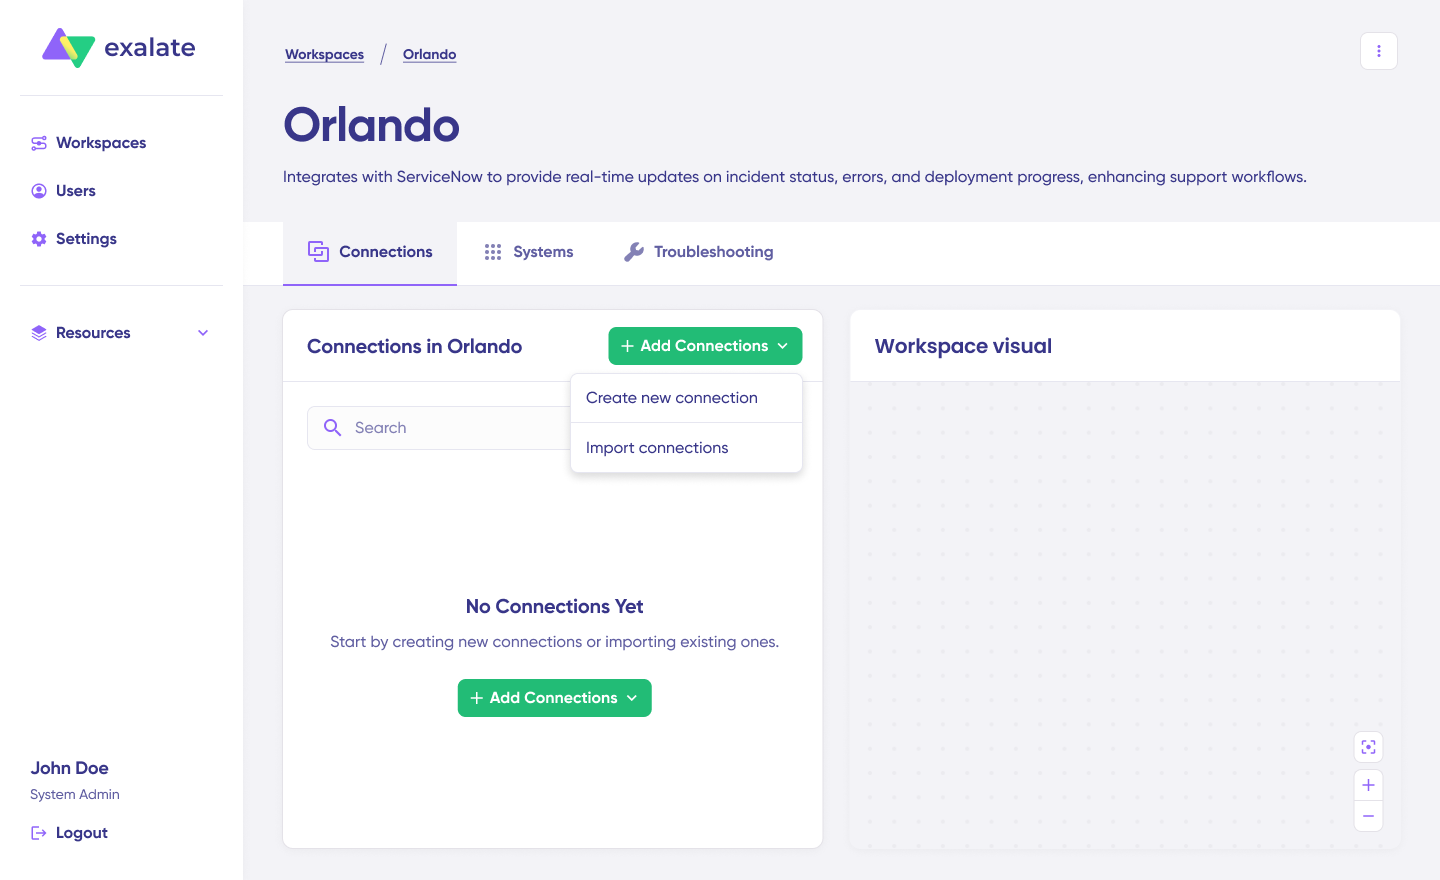
The system will automatically run checks and handle authentication. Systems from other workspaces will be registered for your current workspace.
Provide your authentication details. For ServiceNow to ServiceNow connections, enter a Username and Password for your ServiceNow instance. Click “Check Authentication“. When everything’s good, you’ll see “Successfully Authenticated“.
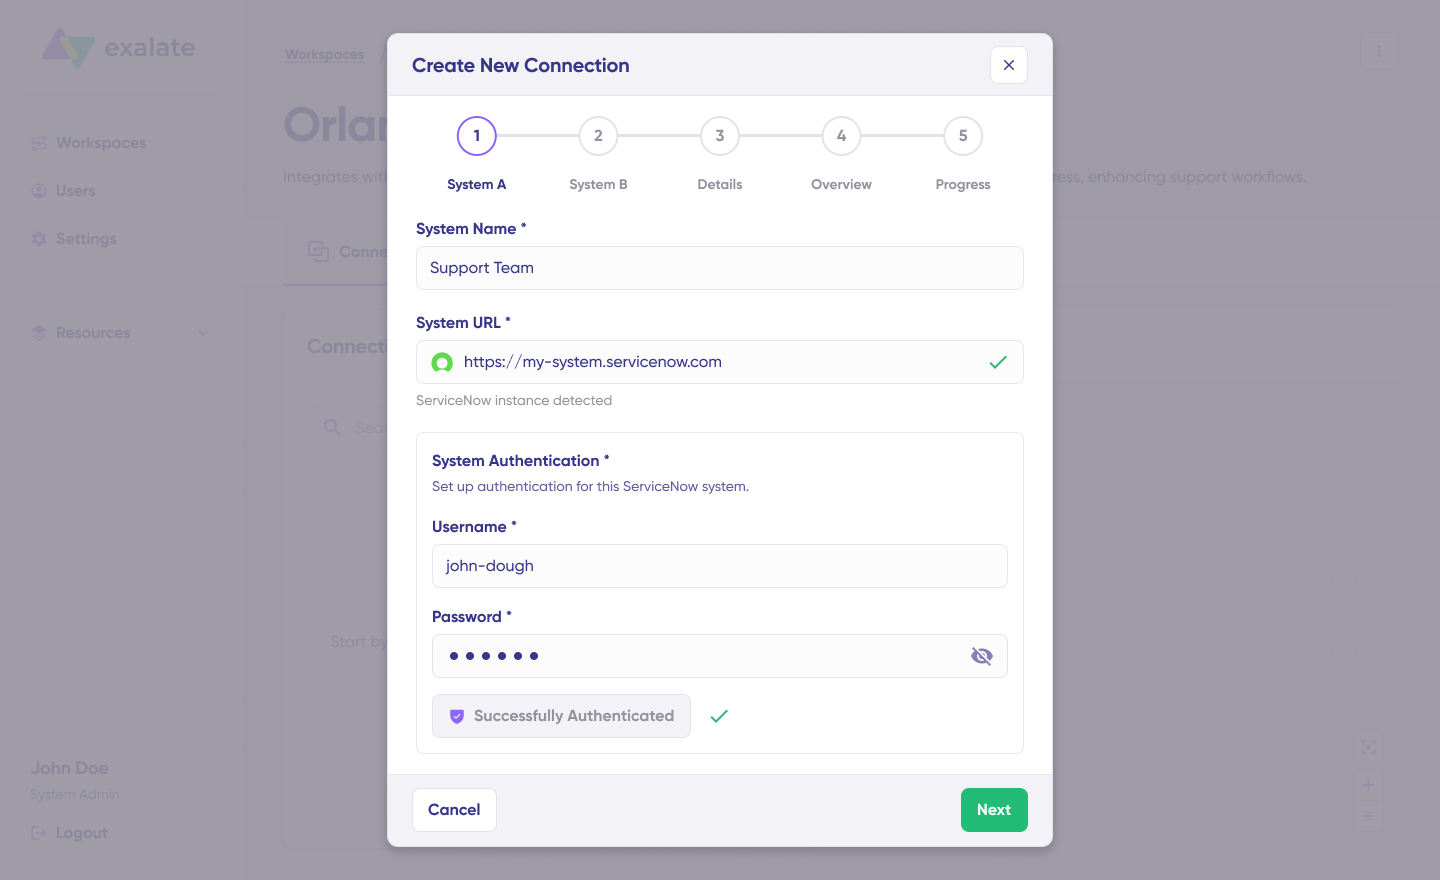
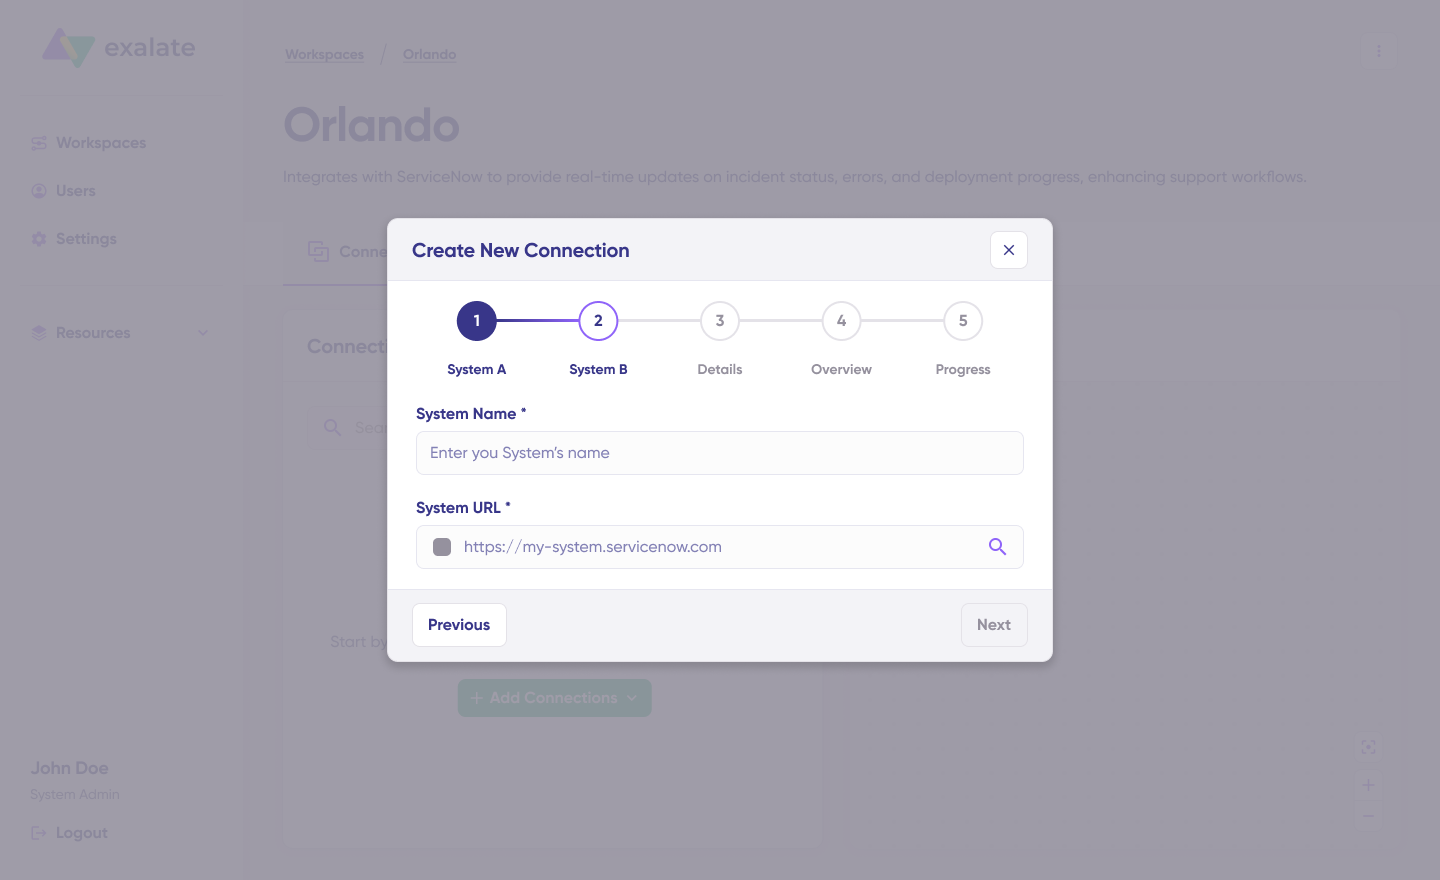
Hit Next to set up System B (ServiceNow). Repeat the same steps as you did for your first ServiceNow instance.
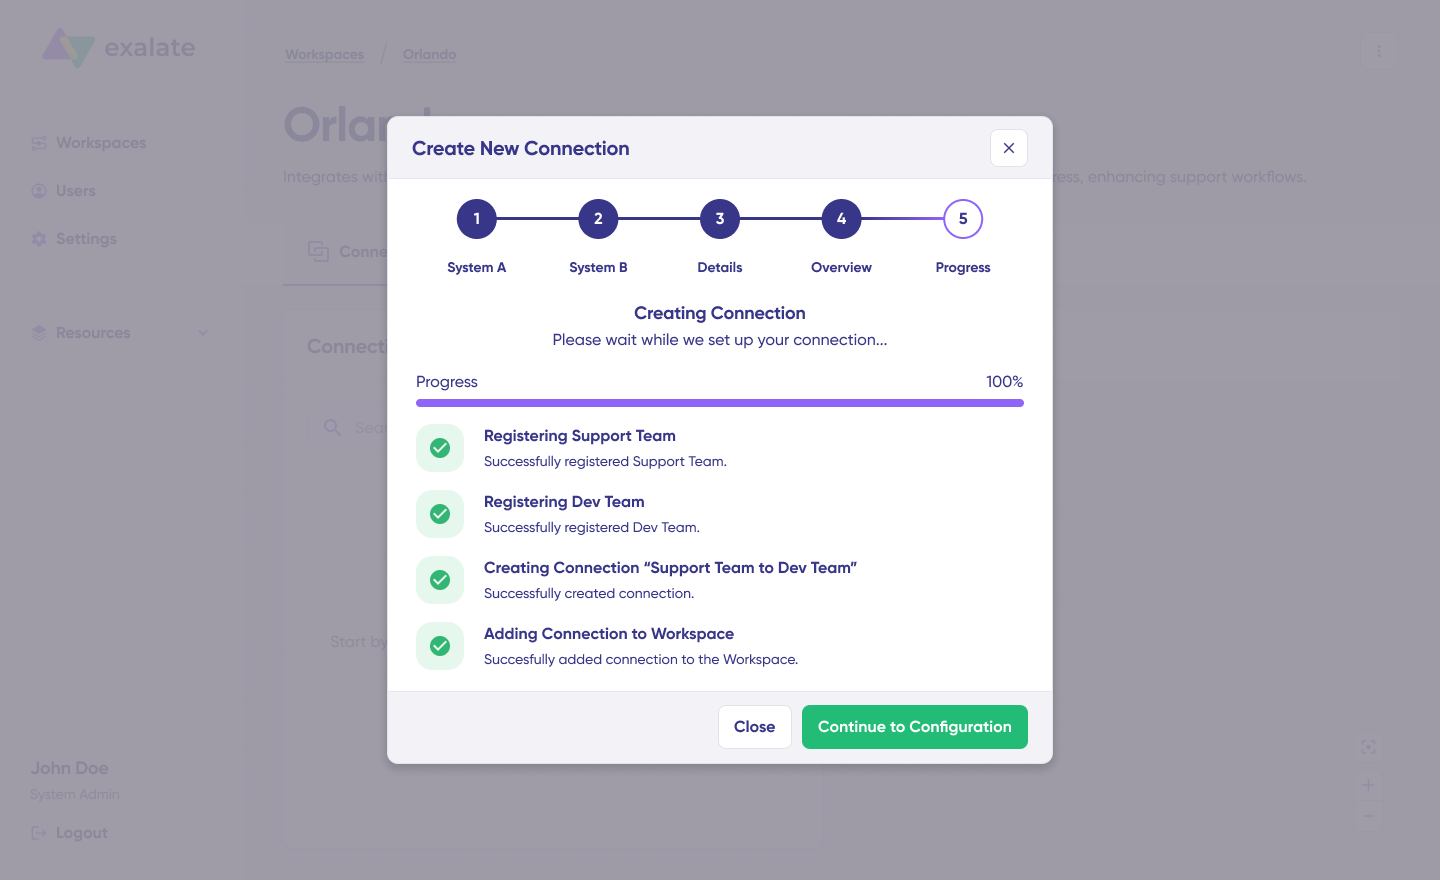
Confirm the Connection Name and add a description if you want. Double-check the connection setup and click “Create Connection“. Give it a few minutes while everything gets configured behind the scenes.
When it’s ready, click “Continue to Configuration“. Done! Your first connection is live in your workspace.
Pick a table you want to sync on both sides from the dropdown menu. Click “Build and Continue“.
You’ve got 2 options here: “Quick sync” and “Edit & Test“. Let’s walk through both.
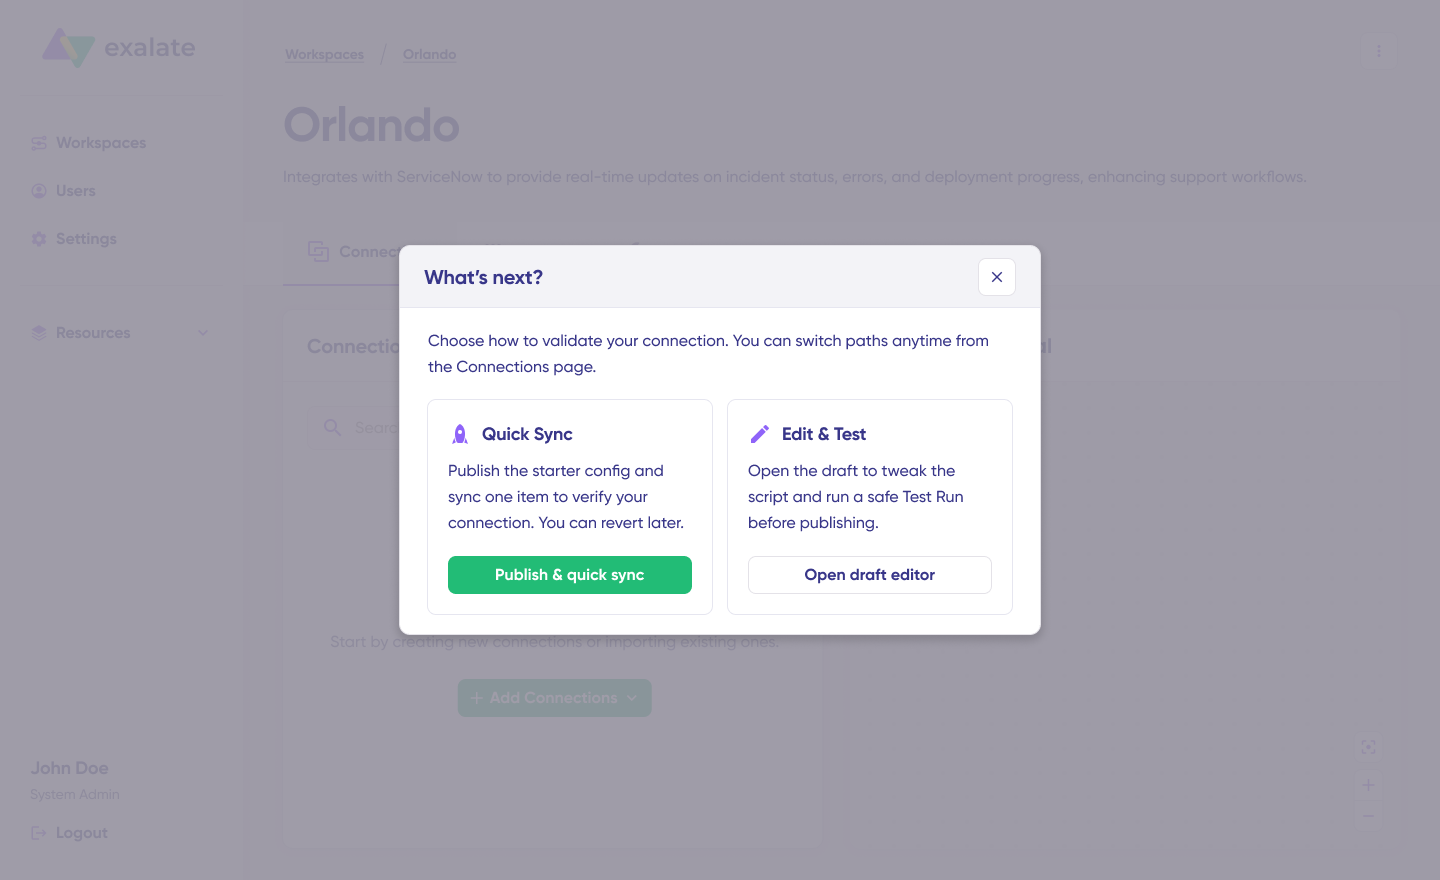
Quick Sync: This lets you sync a single item between ServiceNow instances. In the “Item sync monitor,” type in the work item number and click “Sync Now“.
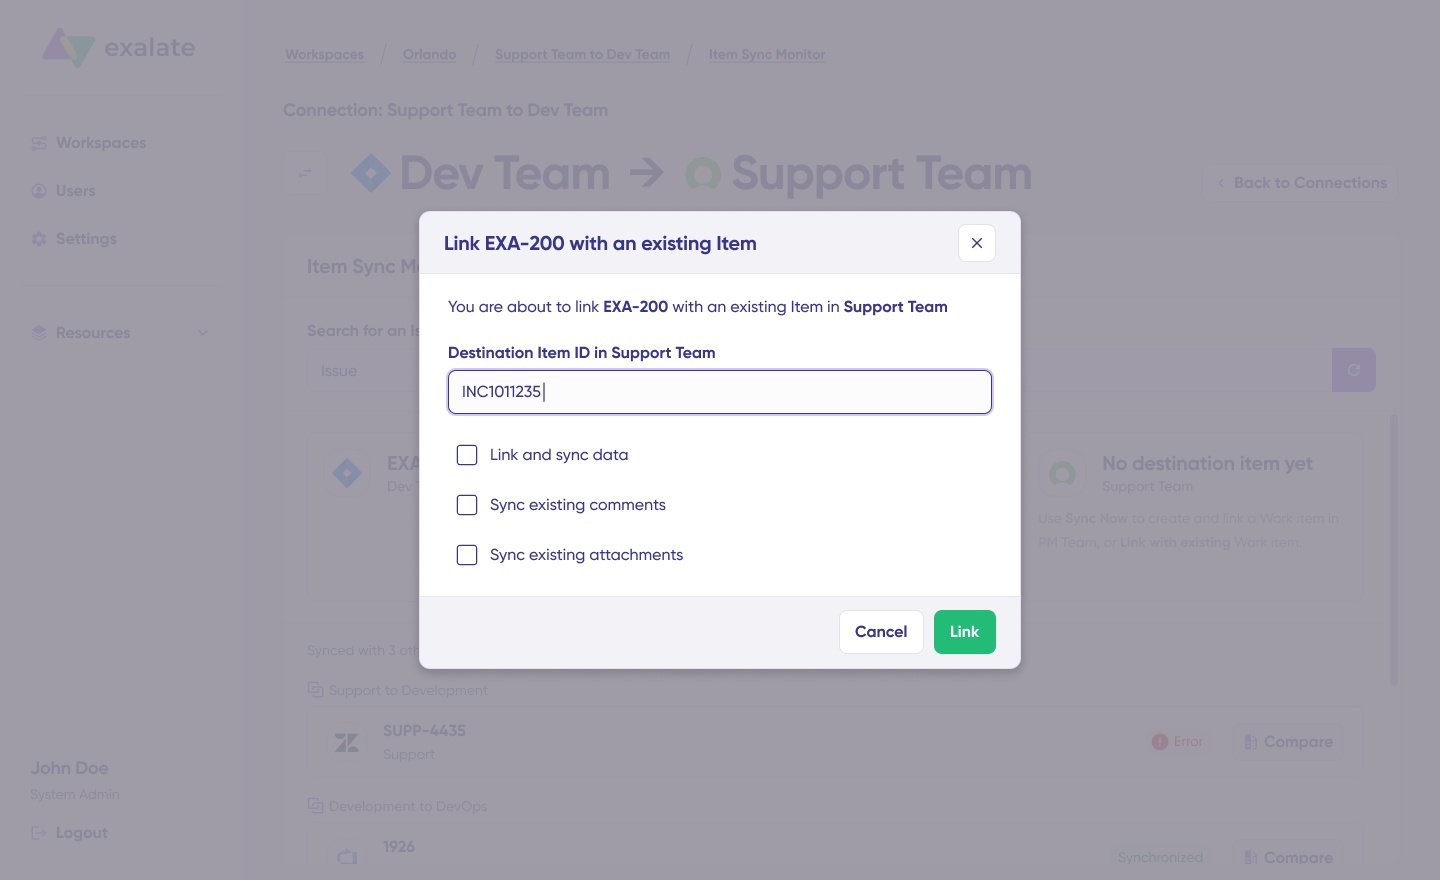
To connect 2 existing items, click “Link with existing“. After the sync finishes, you can check out both synced items in a new window. You can also compare the changes if needed.
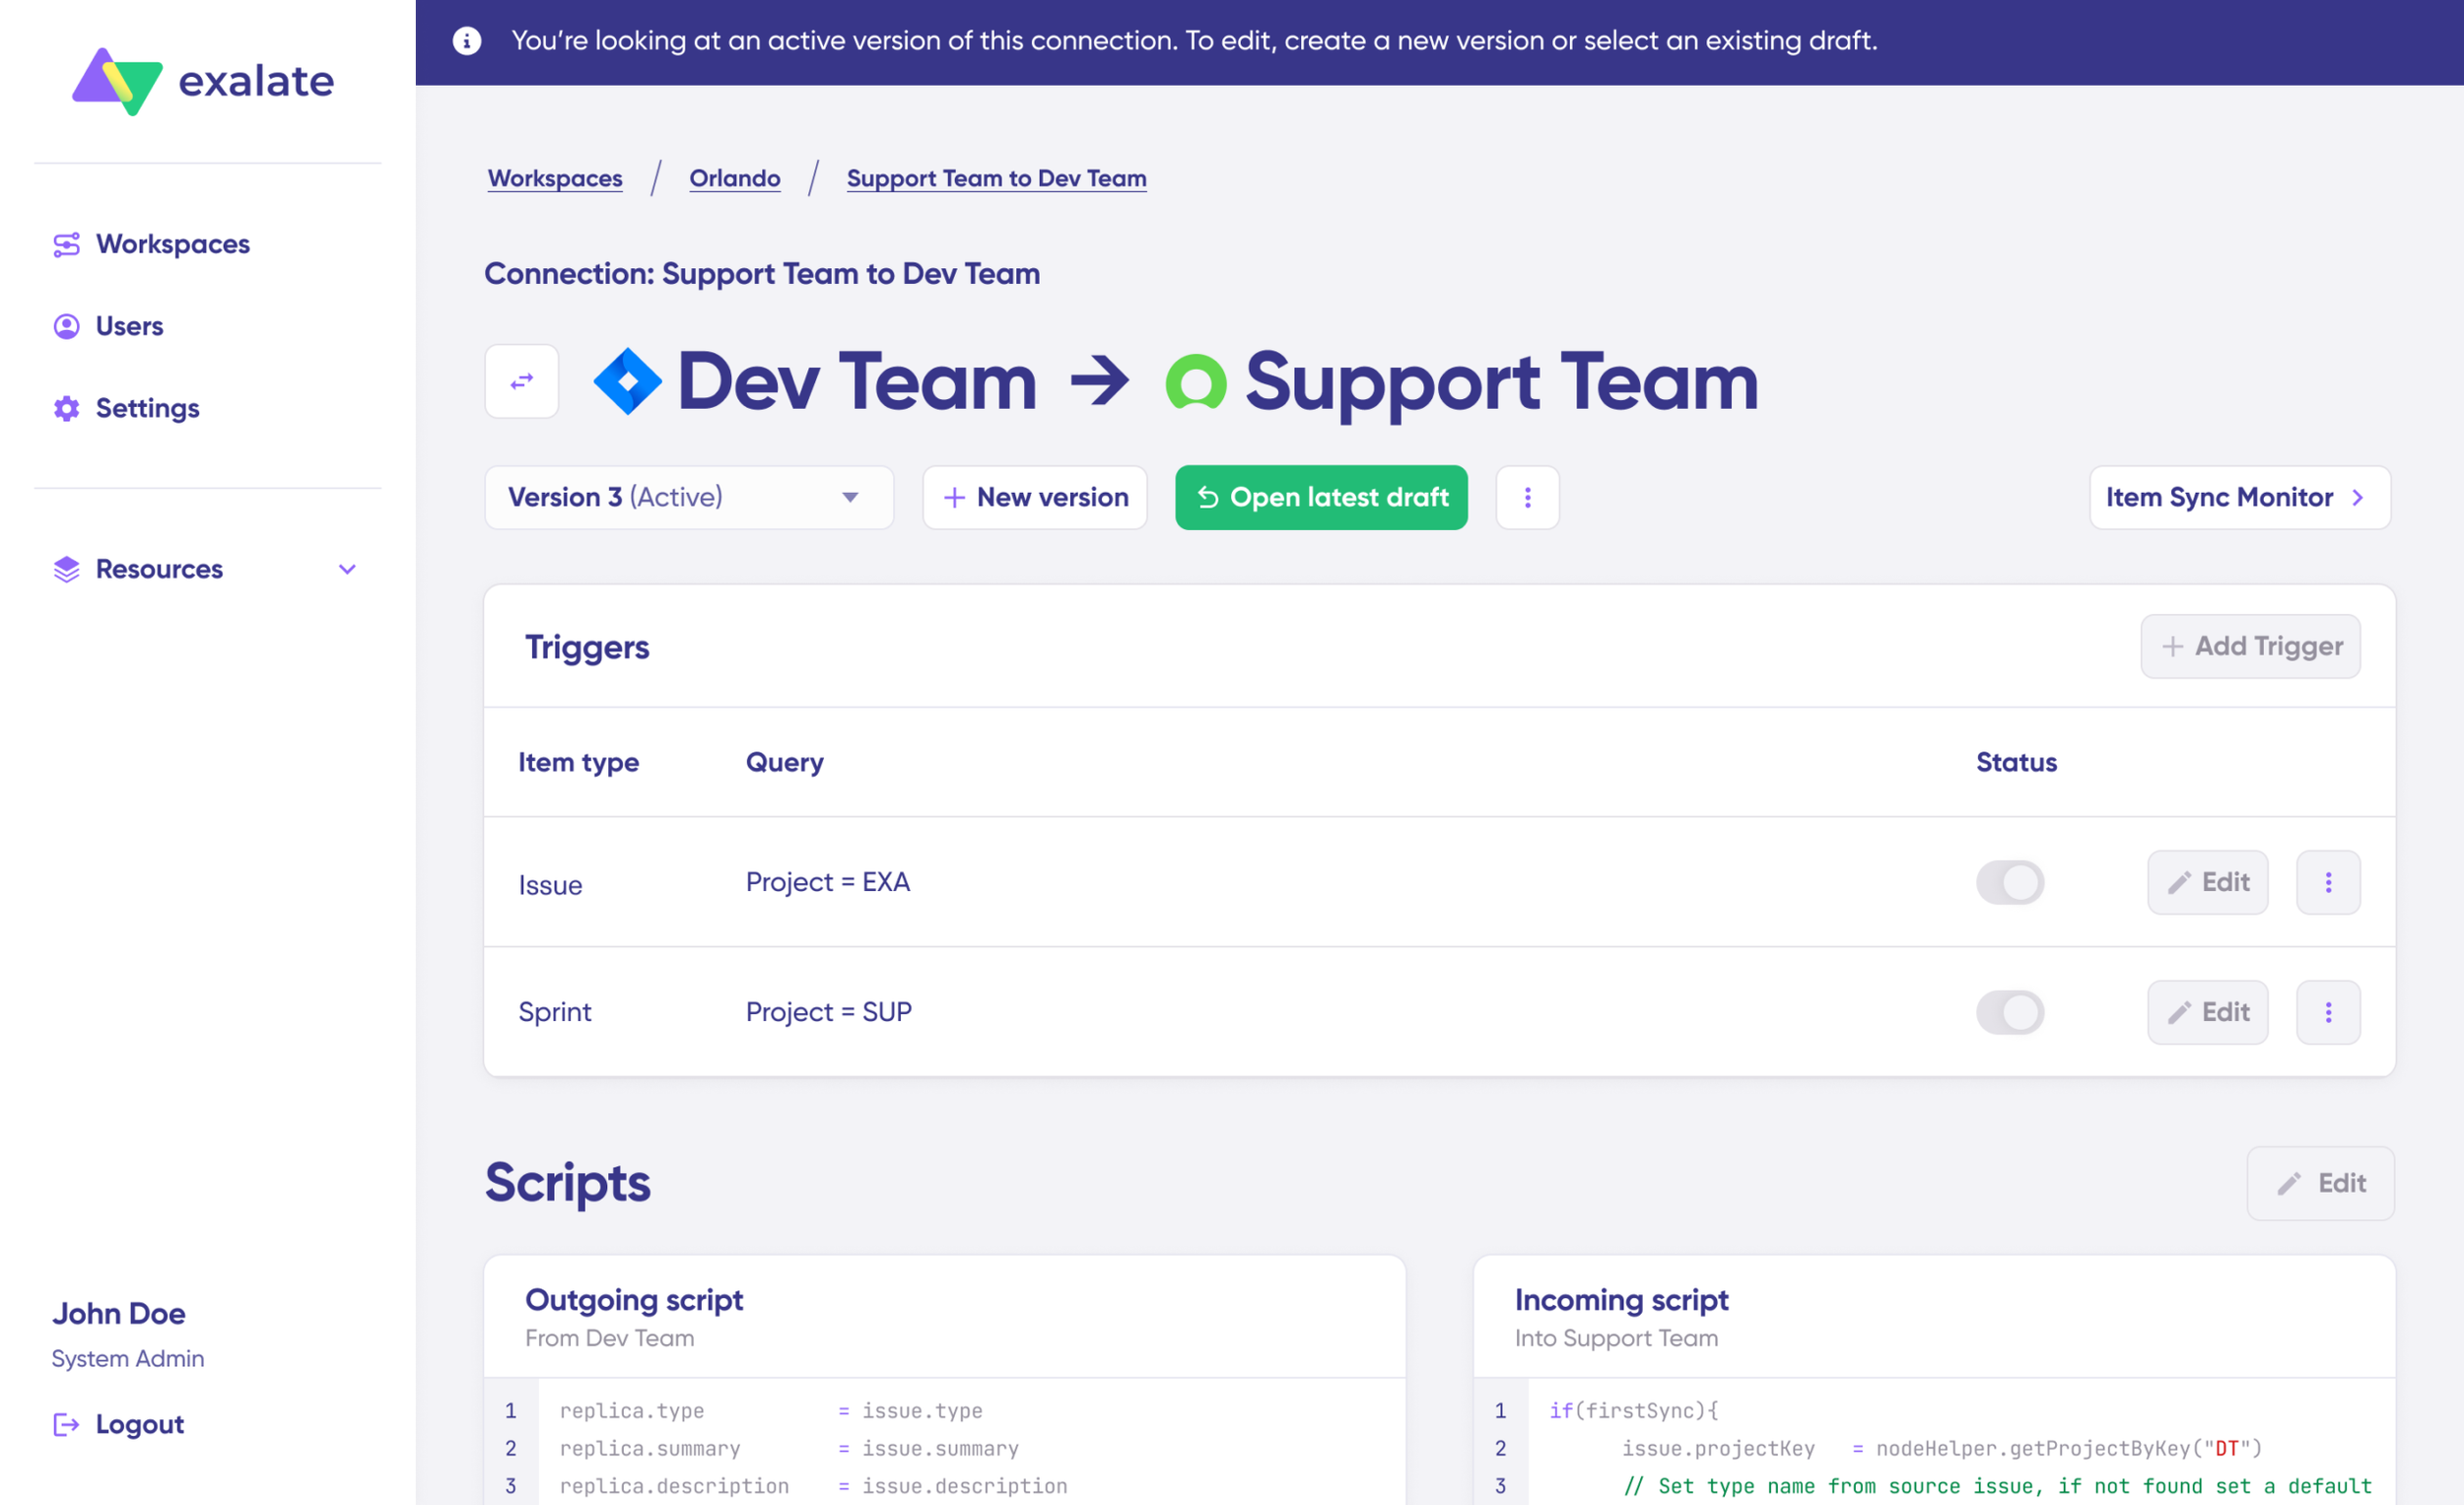
Open draft editor: This lets you make changes when you click “Create a new version” or pick “Open latest draft“. It prevents you from accidentally messing with the live configuration.
Once it’s active, hit the “Edit” button to open the editor and tweak the sync rules (Groovy-based scripts). These scripts let you add custom data logic and mapping for more complex workflows.
Switch the sync direction by clicking the two arrows beside the connection name.
The outgoing script handles values moving from ServiceNow A to ServiceNow B, and the incoming sync defines how values from ServiceNow B get mapped in ServiceNow A.
The Replica is a JSON file that holds the payload with data being shared across both ServiceNow instances. You can modify the sync scripts if you’re comfortable with Groovy. If not, use Aida, our built-in AI assistant.
Use Aida to build sync scripts. Aida appears in both incoming and outgoing script sections, so pick the right side.
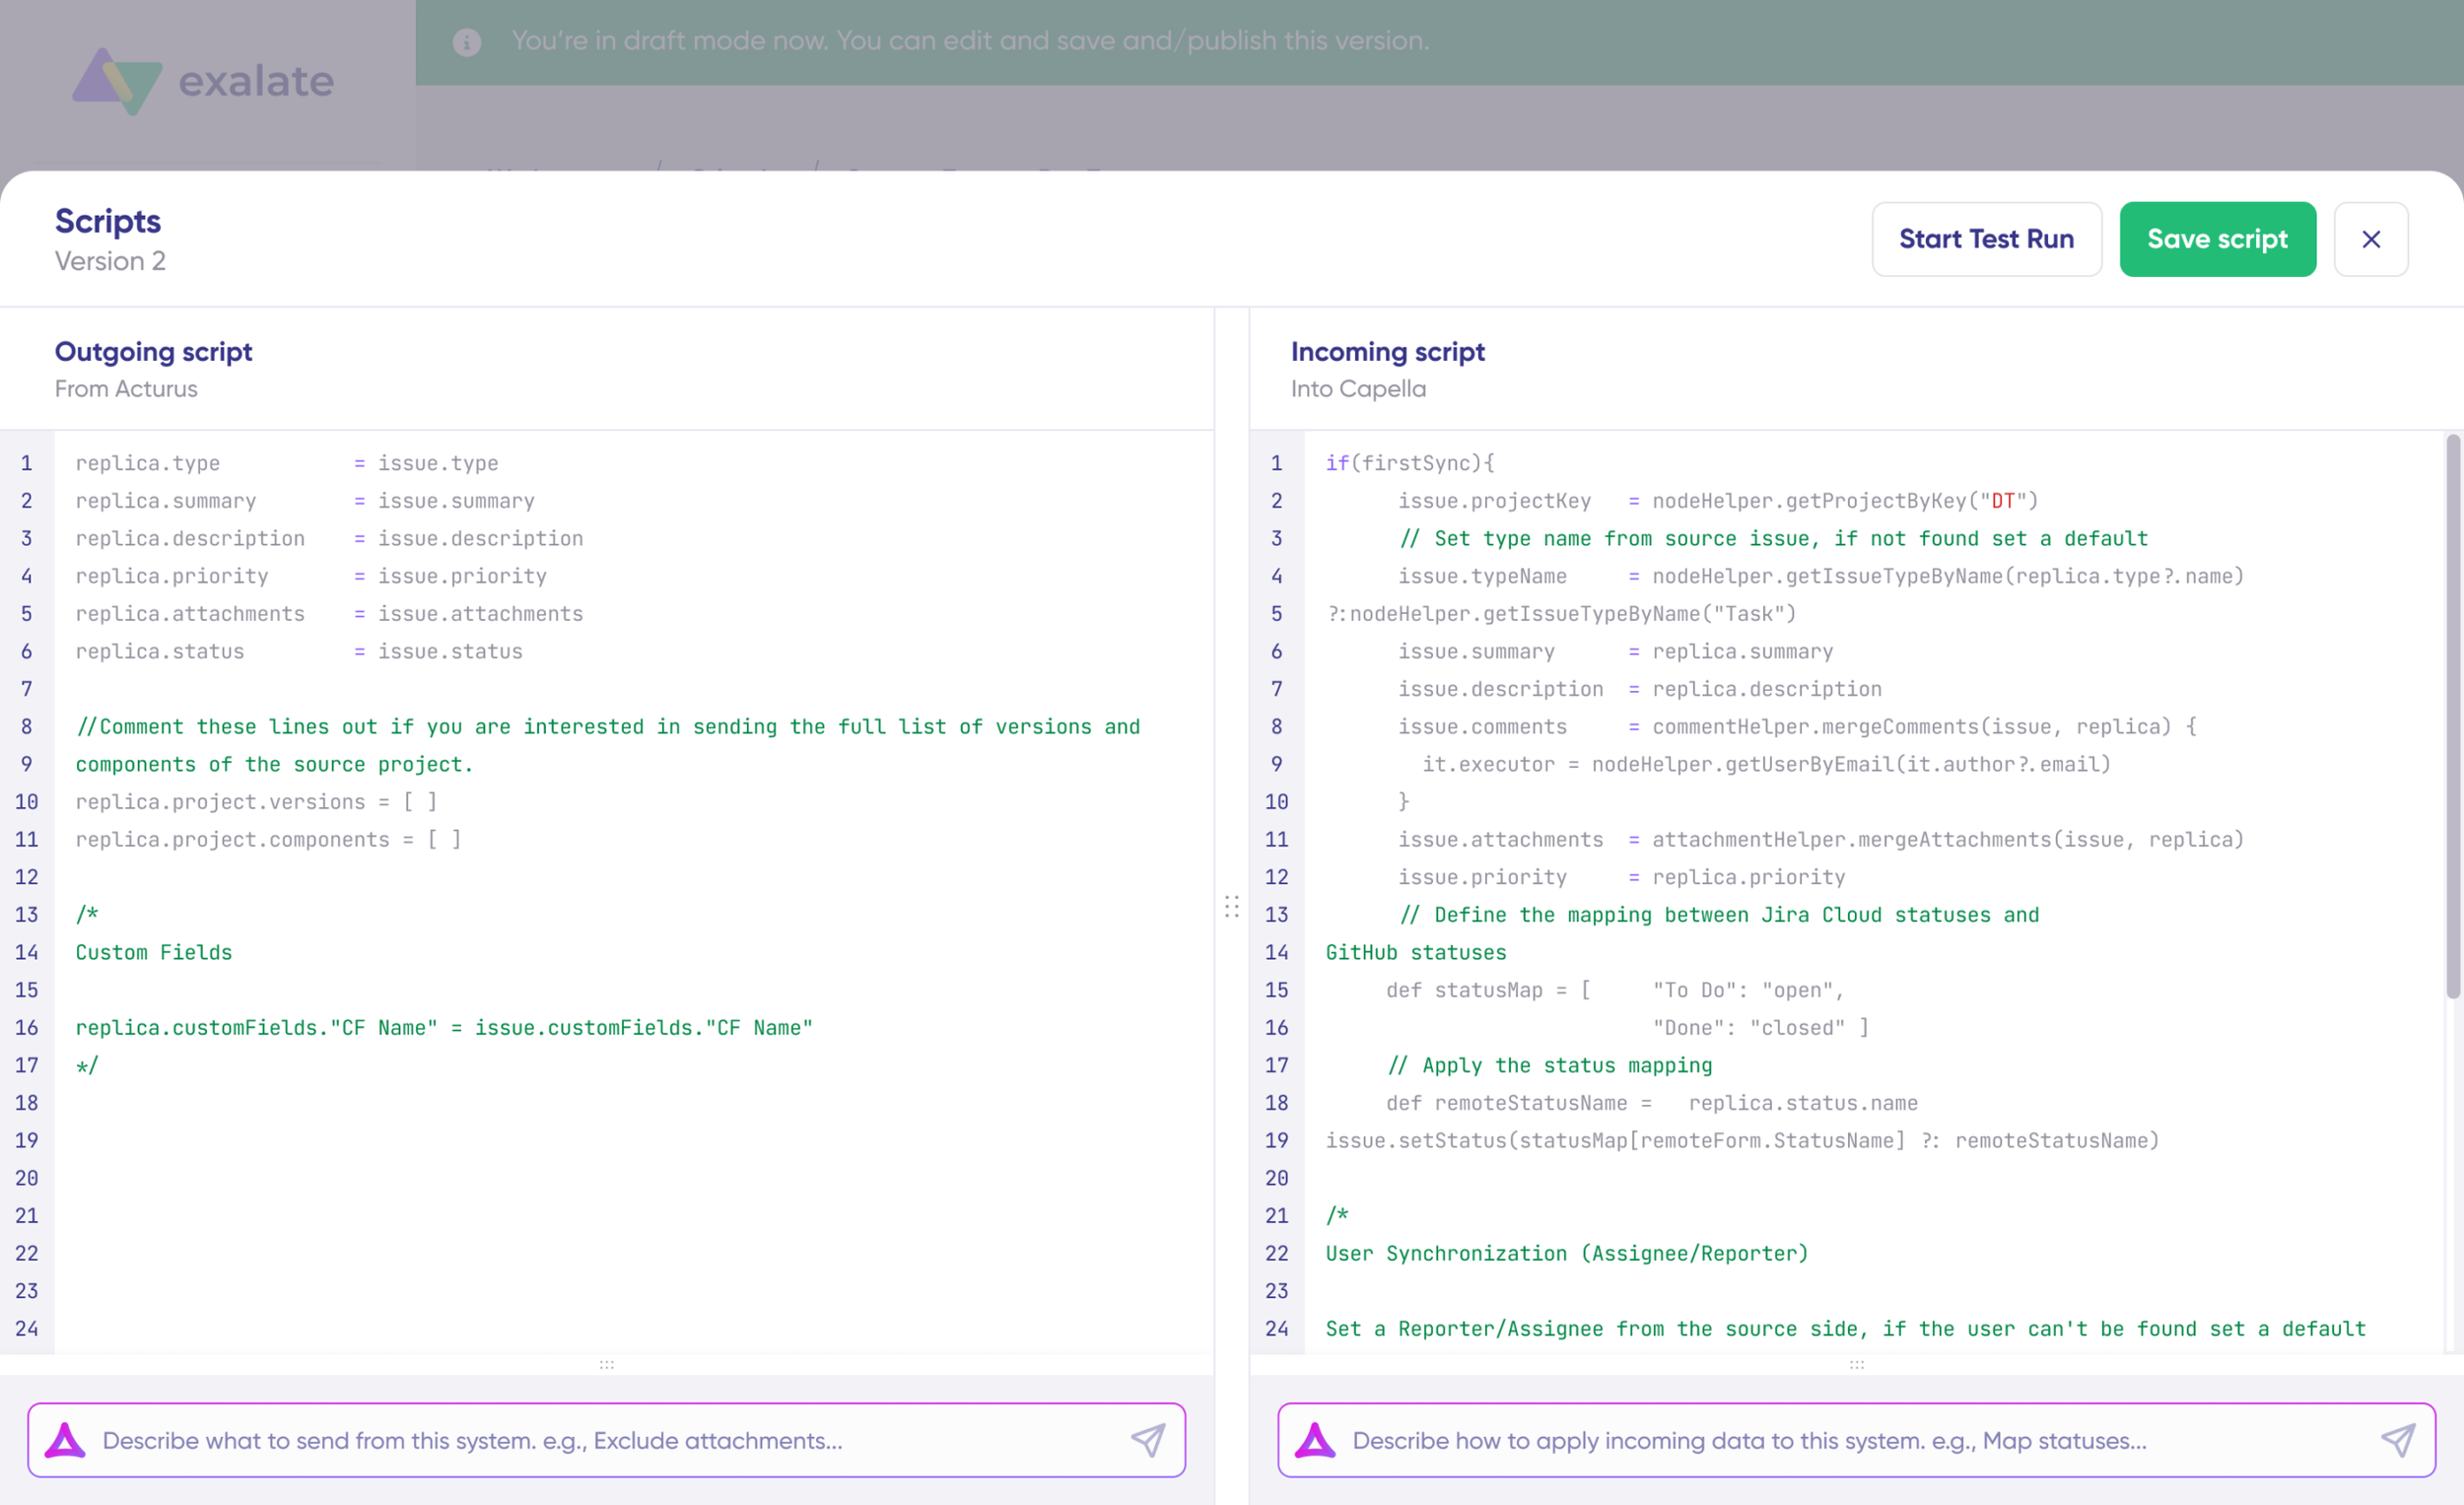
For Outgoing scripts: Explain what data should exit your system. For example, “Only sync priority 1 incidents.“
For Incoming scripts: Explain how incoming data should be handled in your system. For example, “Match state values between instances“.
The scripts are created using Exalate’s scripting API and your current scripts.
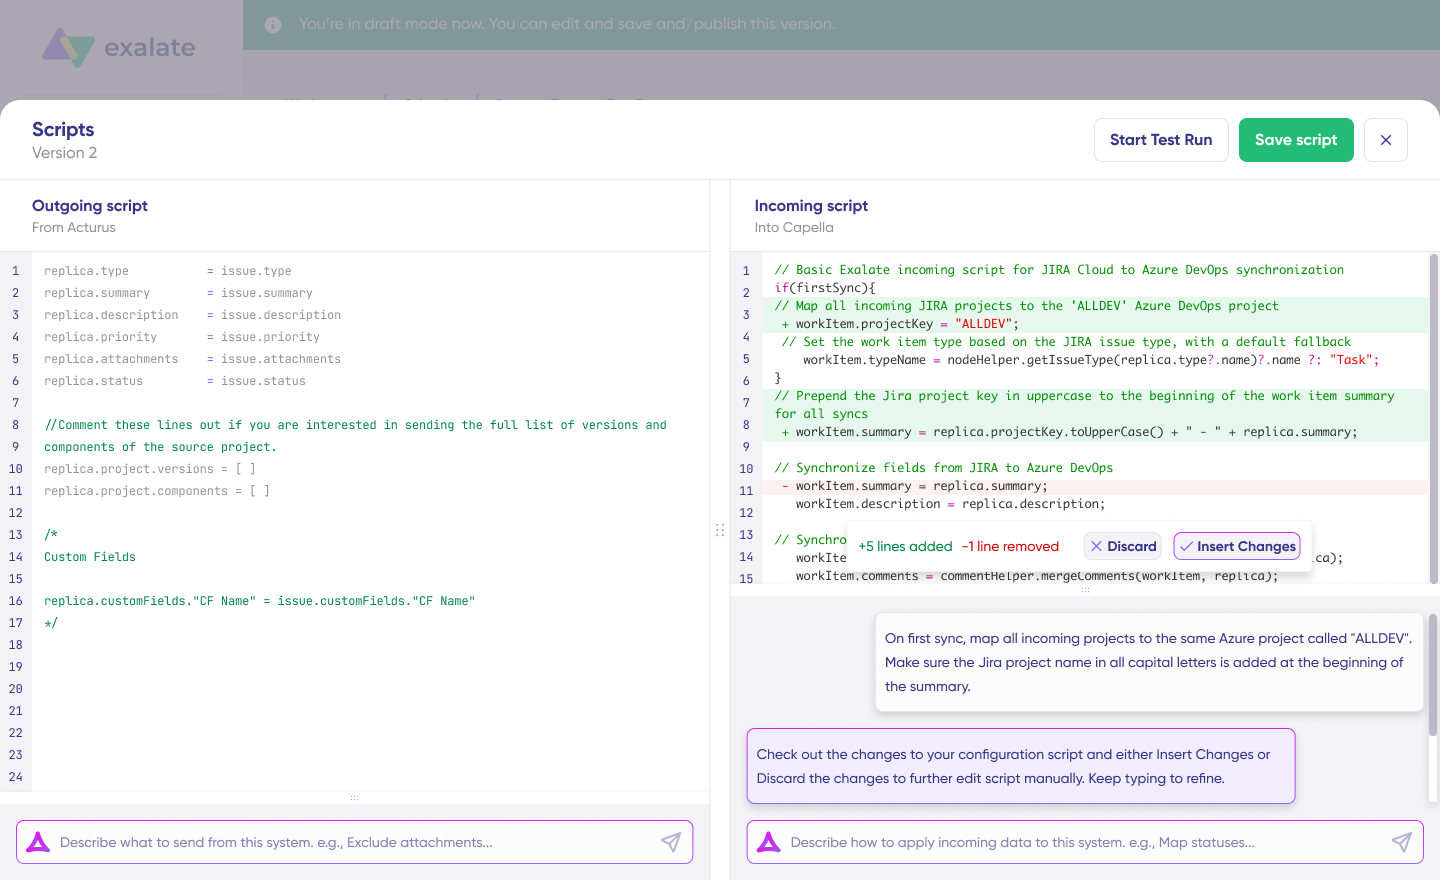
Check the output to confirm the suggested changes. New lines show up in green, while removals appear in red. You can “Insert” or “Discard” the suggestions.
Note: Like any AI tool, make sure to review the generated code before using it.
Once your sync scripts are ready, you can “Save script” or test them with a dry-run before publishing.
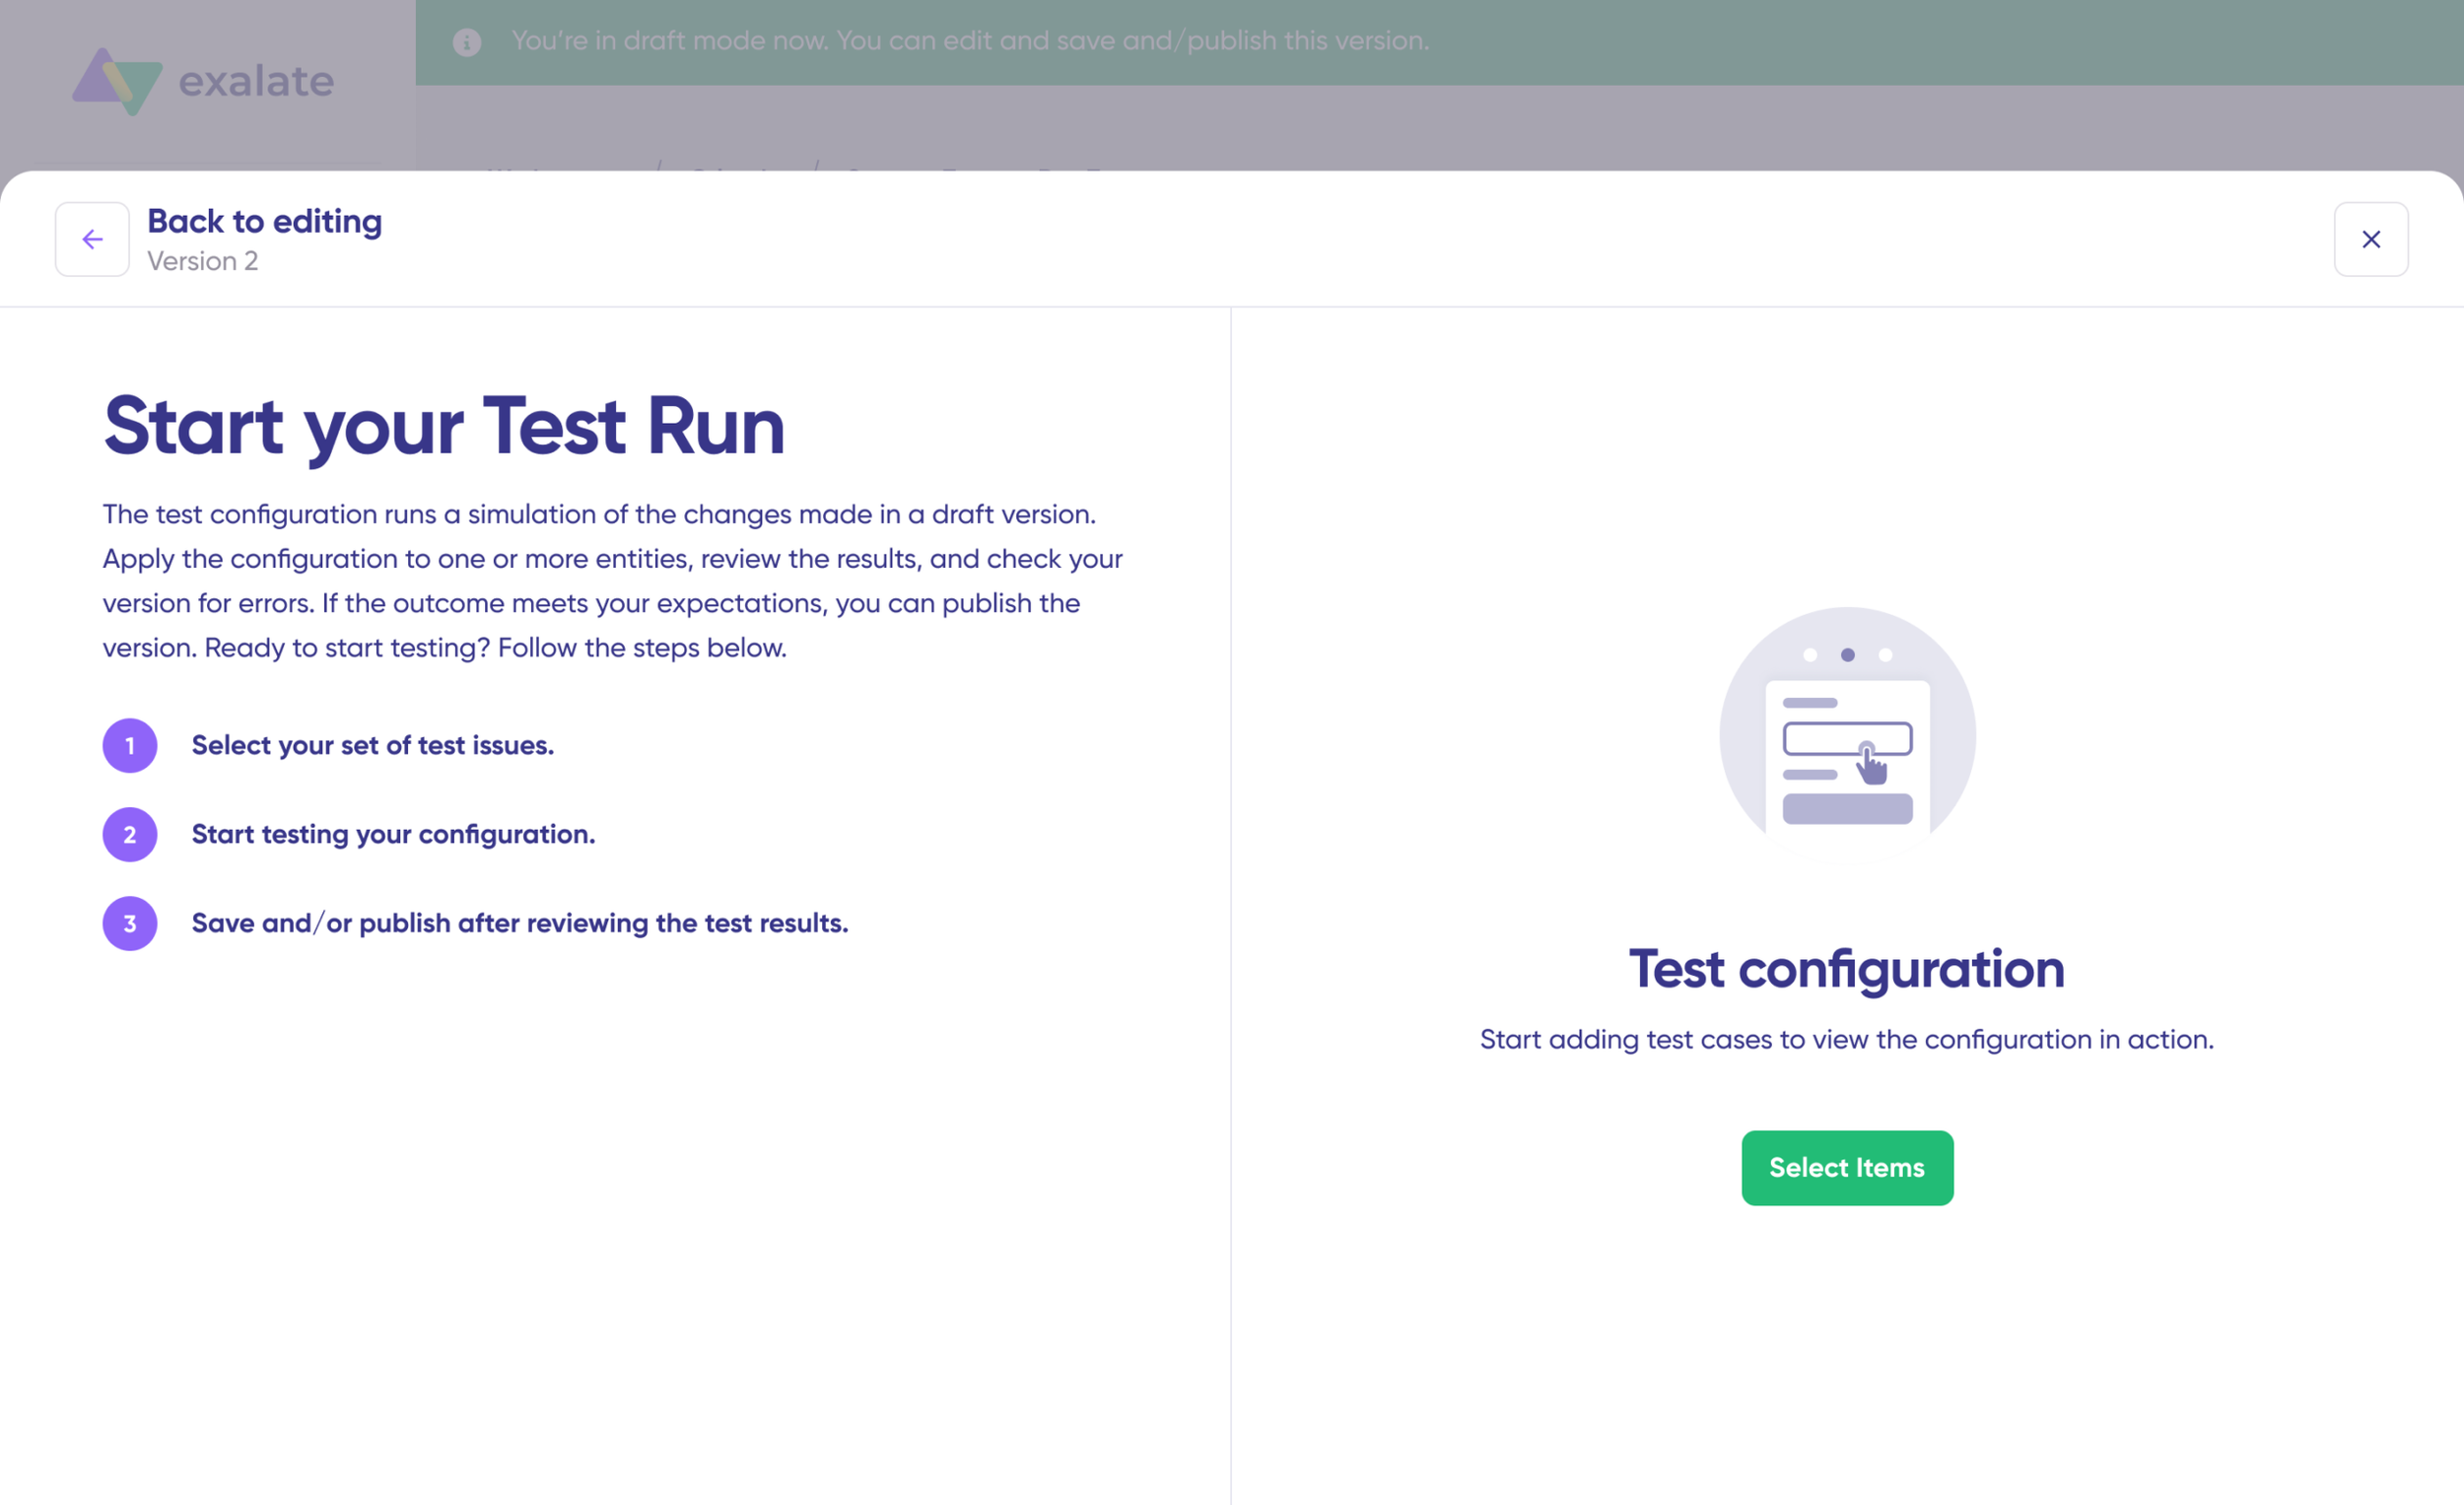
Click “Start Test Run” and “Select items” to sync. You can pick multiple work items. Wait a moment, and you’ll see detailed results of the synced fields and the payload exchanged between both instances. If everything looks right, click “Publish Version“.
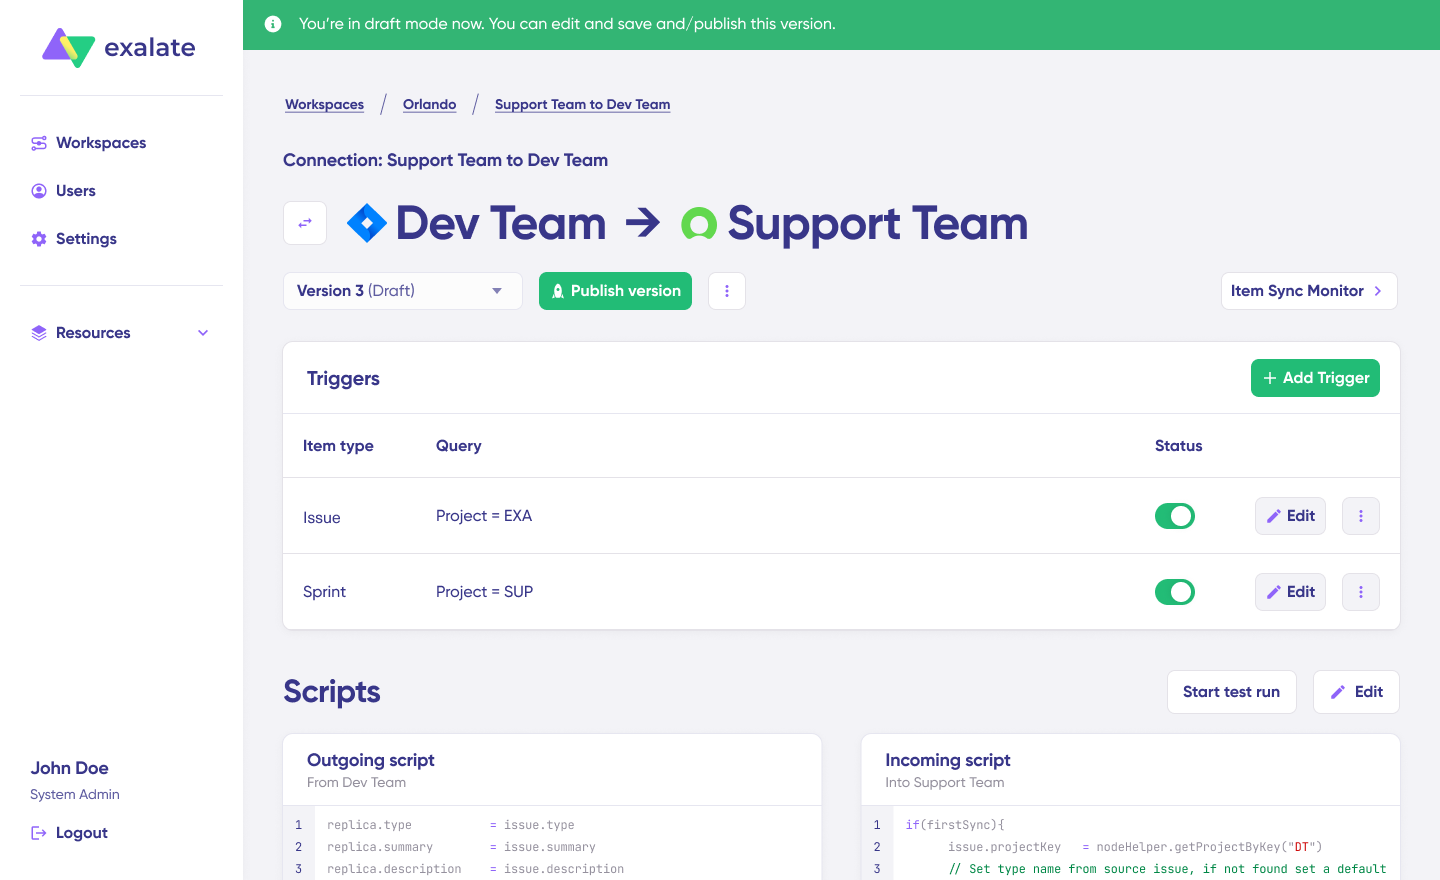
Check all versions from the “Version” dropdown. Versions can be “Active“, in “Draft” (editable), or “Archived“.
Configure triggers to automate your sync. These are conditions or filters applied to specific items. For example, sync all ServiceNow incidents where "priority = 1".
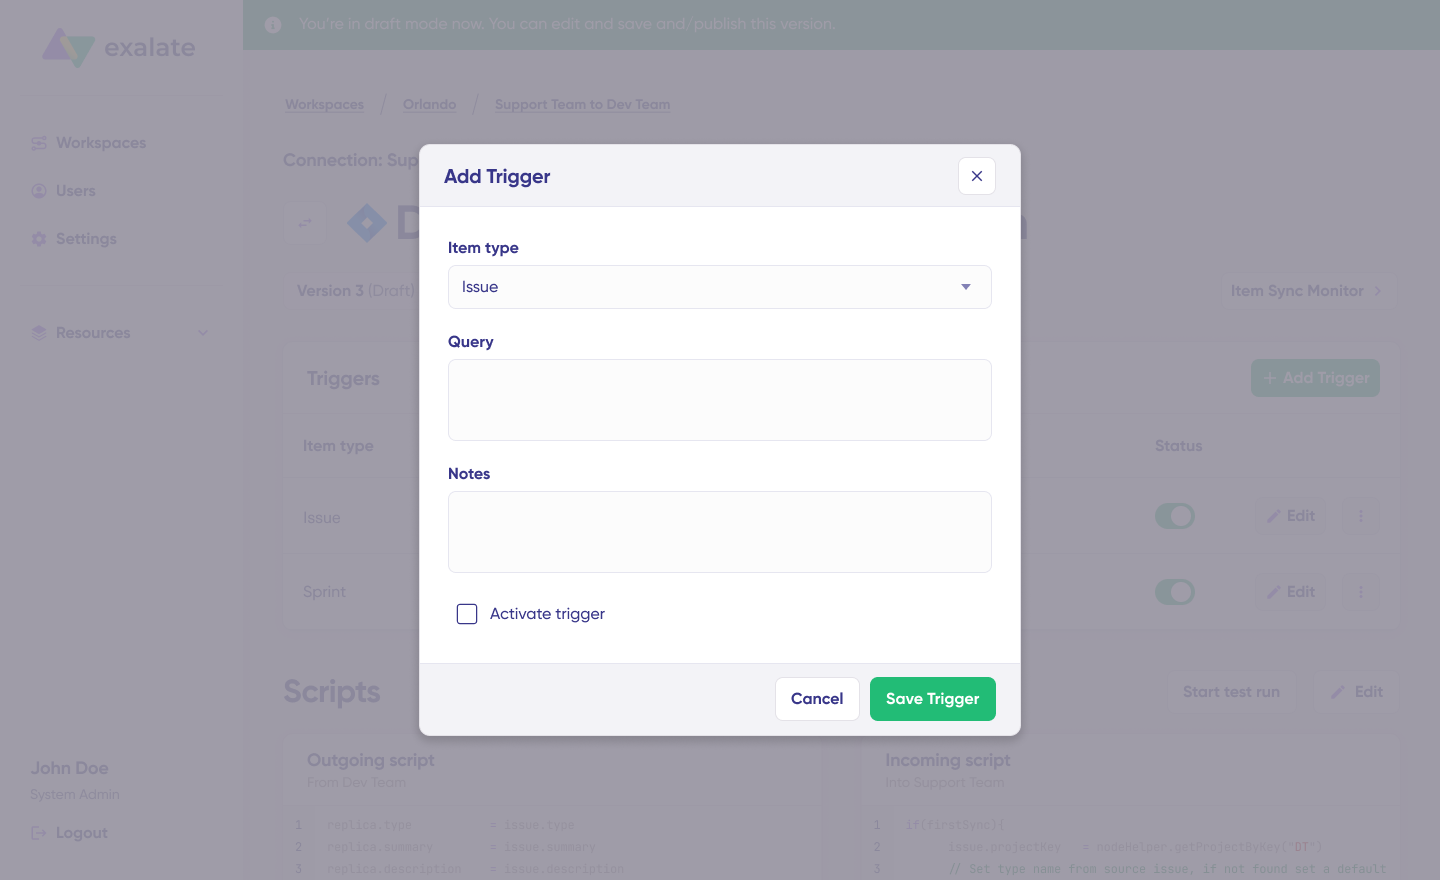
Click the “+ Add trigger” button to create platform-specific triggers.
Pick the entity type (incident, change request, etc.). For ServiceNow, you can use encoded queries to define conditions: “urgency=1” will only sync active incidents with the highest urgency level. Then save the trigger.
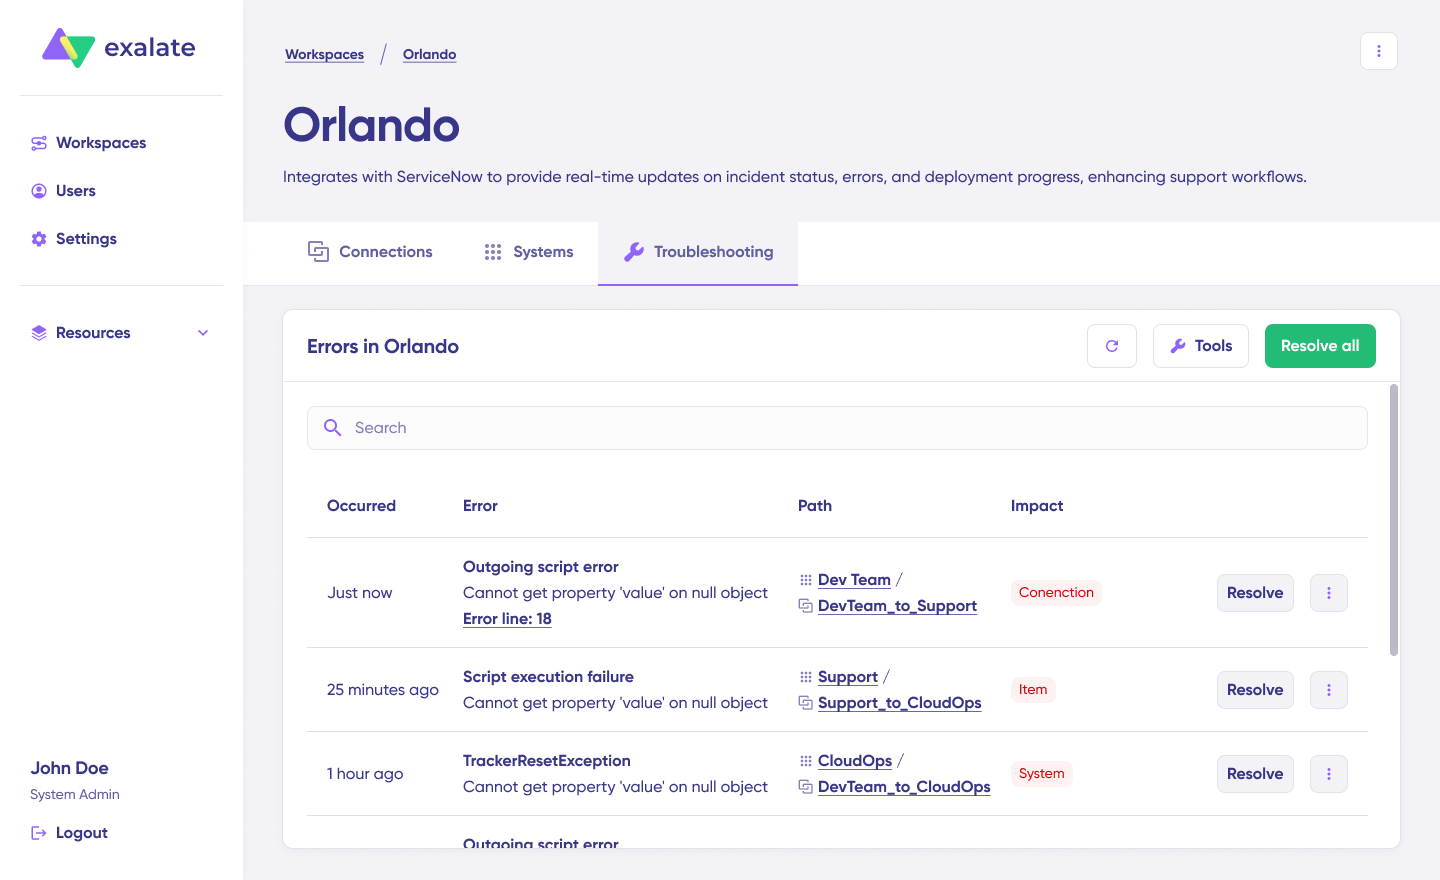
Debug your connection with Aida. If something goes wrong, navigate to the “Troubleshooting” tab in your workspace. Hover over the error you need to fix and click the Aida icon that shows up.
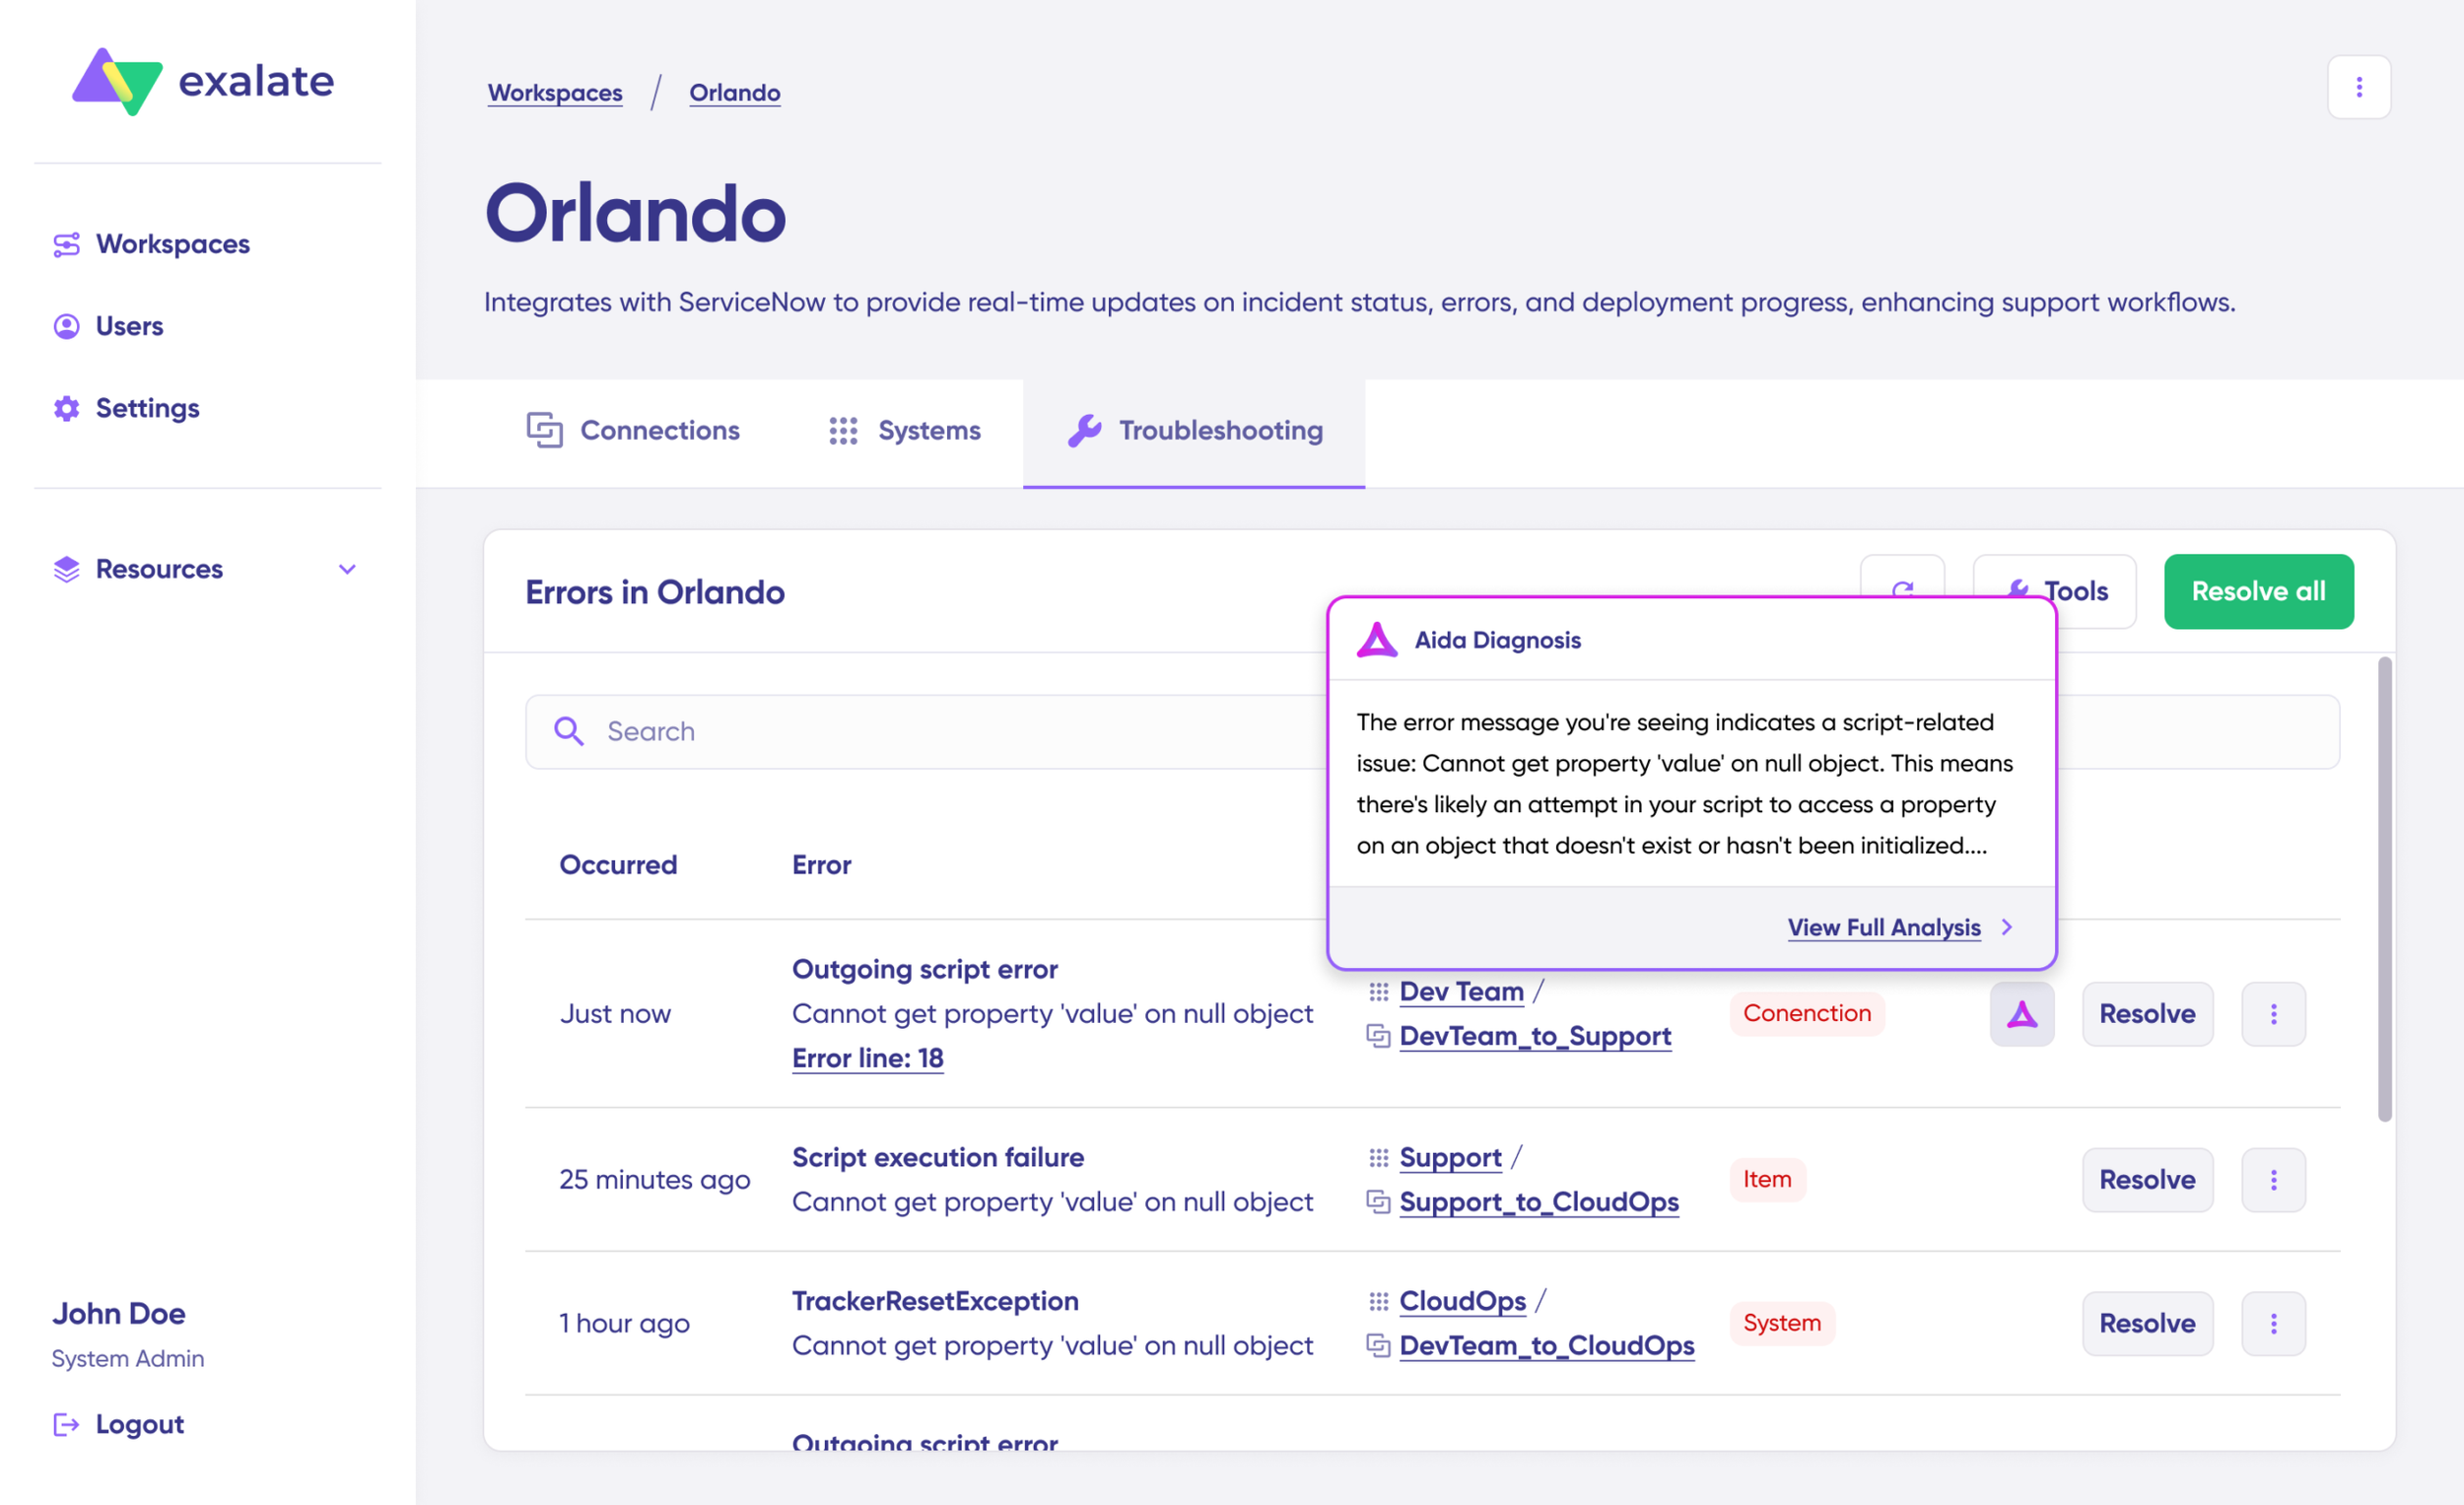
You’ll see all affected systems, connections, and items. Aida will give you a quick breakdown of the error message.
For more details, click Error Details. You’ll see the impact level, stack trace, error type, and when it happened. You can also “View Full Analysis” for additional context.
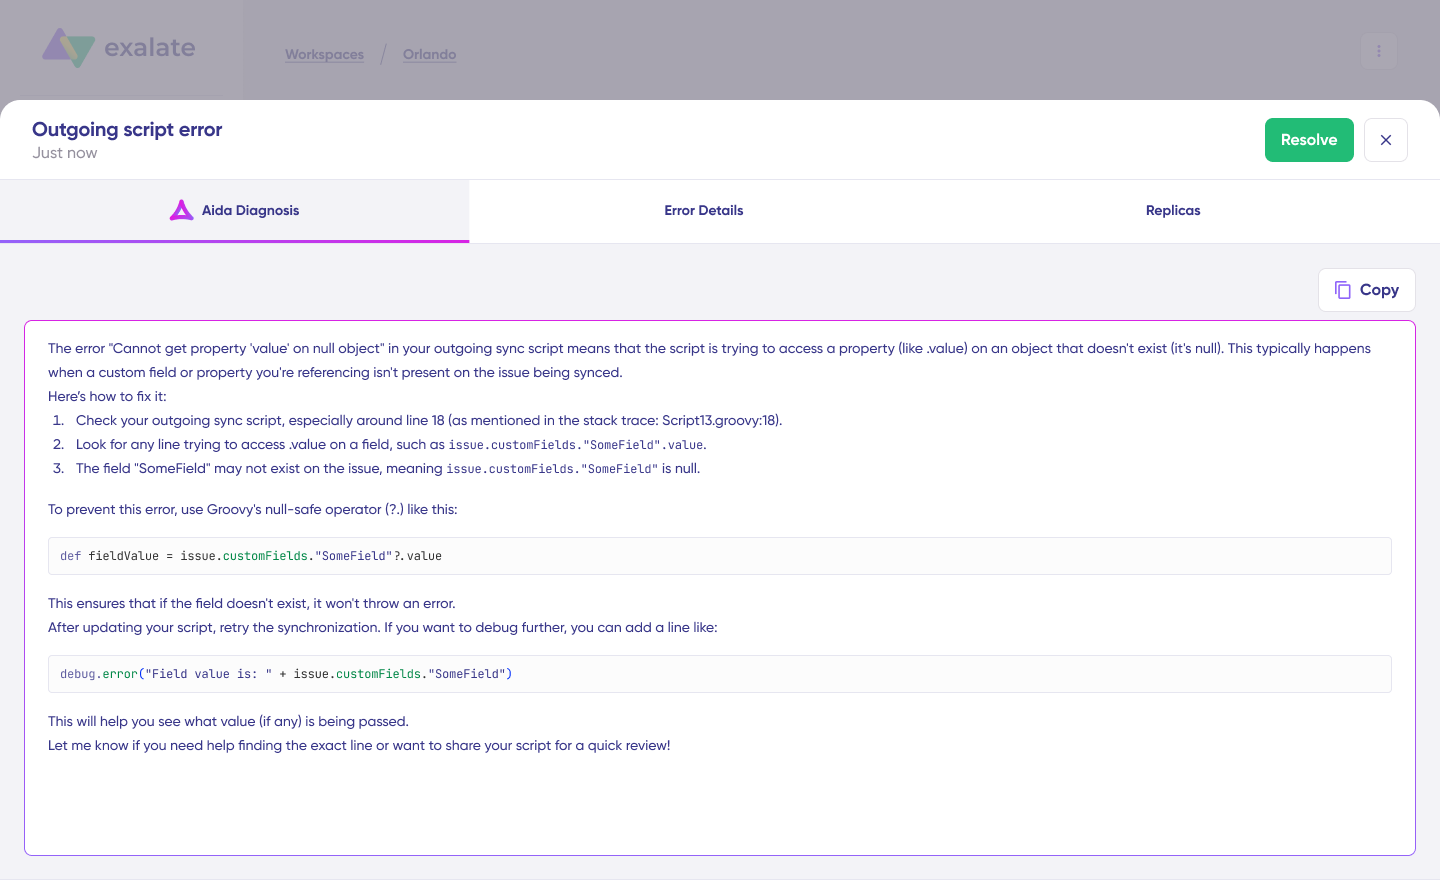
Fix the issue and click “Resolve“.
That’s all there is to it. Your first sync will kick off automatically based on the sync rules and triggers you’ve configured. Happy syncing.
REST and SOAP APIs
Organizations can build custom integrations using ServiceNow’s REST and SOAP APIs. This approach requires development resources but offers complete control over integration logic.
REST API integration involves:
- Creating outbound REST messages in the source instance
- Setting up authentication (Basic Auth, OAuth, API tokens)
- Configuring HTTP methods (POST for creation, PUT for updates)
- Writing business rules to trigger API calls
- Handling response data and error conditions
SOAP APIs provide similar functionality with XML-based message structures. While more complex, SOAP offers built-in error handling and transaction management.
Custom API integration requires ongoing maintenance and technical expertise, but it works well for unique use cases that standard tools can’t address.

Calculate time and money savings from automated bidirectional sync.
What Are Some ServiceNow to ServiceNow Integration Use Cases?
Case 1: Managed Service Provider Operations
Scenario: An MSP manages IT services for 20+ clients, each with their own ServiceNow instance. The MSP needs visibility into client tickets without accessing their systems directly.
Solution: Connect the MSP’s central instance to each client instance with bidirectional sync. The MSP receives incident notifications in its system when clients create high-priority tickets.
Real-world application: Cybersecurity firms use this approach to monitor security incidents across client environments. When a client’s ServiceNow detects a security event, it automatically creates a corresponding ticket in the provider’s instance with all relevant details, enabling immediate response.
Case 2: Post-Merger Integration
Scenario: Two companies merge, each with established ServiceNow implementations and years of historical data. They need to coordinate operations while maintaining separate instances during transition.
Solution: Set up selective synchronization between instances based on project, department, or customer. Critical incidents, change requests, and asset information sync automatically while each organization preserves its existing workflows.
Real-world application: After acquisition, organizations gradually consolidate operations by syncing specific service catalogs, knowledge bases, and incident categories. Teams continue working in familiar systems while leadership gains unified reporting across both instances.
Case 3: Multi-Department Coordination
Scenario: A large enterprise runs separate ServiceNow instances for IT, HR, Facilities, and Finance departments. When an employee leaves, multiple teams need notification to revoke access, process the final paycheck, and reclaim equipment.
Solution: HR’s instance triggers updates to IT and Facilities instances when employment status changes. IT automatically creates tasks to disable accounts, while Facilities schedules equipment collection.
Real-world application: Fortune 500 companies use cross-instance workflows to orchestrate complex processes like new employee onboarding, involving IT setup, facilities access, equipment provisioning, and HR paperwork—all coordinated through automated sync between departmental instances.
Case 4: Partner and Vendor Collaboration
Scenario: A manufacturing company works with external suppliers who use ServiceNow. When the manufacturer identifies a quality issue, they need to create a ticket in the supplier’s system without giving suppliers full access to internal data.
Solution: Bidirectional sync shares specific incident types, change requests, and problem tickets between organizations based on vendor relationships and product categories. Both sides work in their own systems while maintaining shared visibility.
Real-world application: Shipping and logistics companies integrate with port authorities, customs agencies, and freight partners. When shipment delays occur, incidents automatically propagate to relevant partner systems, enabling coordinated response across organizational boundaries.
Case 5: Development and Operations Synchronization
Scenario: Development teams use ServiceNow for project tracking while operations teams manage production incidents in a separate instance. When production issues require code changes, manual ticket duplication creates delays.
Solution: Automatically create development work items when operations teams identify bugs or feature requests. Status updates flow both directions—operations sees development progress, and developers receive production feedback.
Real-world application: SaaS companies synchronize production incident reports from their operations instance to their development instance. When critical bugs are identified, development tickets auto-generate with complete context, priority levels, and customer impact data, accelerating resolution.
Case 6: Geographic Distribution
Scenario: A multinational corporation maintains ServiceNow instances in different regions (NA, EMEA, APAC) for data sovereignty and performance. Regional teams need visibility into global initiatives while keeping local data separate.
Solution: Sync specific projects, major incidents, and change requests across regional instances while keeping routine tickets local. Global program management offices gain visibility without data governance concerns.
Real-world application: Global banks maintain separate instances per regulatory jurisdiction while coordinating security incidents, compliance changes, and technology rollouts through selective synchronization.

Common ServiceNow to ServiceNow Integration Challenges
Data Synchronization Conflicts
When both instances modify the same record simultaneously, conflicts can occur. Implement last-write-wins logic or create conflict resolution rules based on priority, source system, or data type. Use correlation IDs to track which records correspond across instances.
Performance Impact
High-volume synchronization can strain system resources. Use asynchronous processing, implement rate limiting, and schedule bulk operations during off-peak hours. Monitor API call quotas and implement caching where appropriate.
Field Mapping Complexity
Different instances often use custom fields, different picklist values, or varying data structures. Document all field mappings carefully. Create transformation rules for enum values and establish default values for missing fields.
Security and Access Control
Determine what data each side should access. Implement role-based access control for integration configuration. Use dedicated service accounts with minimum necessary permissions. Regularly audit sync activity and maintain encrypted connections.
Maintenance Overhead
Custom integrations require ongoing updates when ServiceNow releases new versions. Choose solutions with automatic version compatibility or plan for regular maintenance windows. Document integration logic thoroughly to simplify troubleshooting.
Network Reliability
Temporary network issues can interrupt sync operations. Implement retry logic with exponential backoff. Use transactional queues to ensure data consistency. Monitor integration health with alerts for prolonged failures.
What Are the Best Practices for ServiceNow to ServiceNow Integration?
- Define clear objectives: Identify exactly what data needs synchronization and why. Document which teams need access to what information. Establish success metrics before implementation.
- Start with a pilot: Test integration with a single table or small dataset before full rollout. Validate data quality, performance, and user experience. Gather feedback from actual users.
- Map your data: Create detailed field mappings showing how data transforms between instances. Document picklist value conversions. Identify required versus optional fields.
- Establish governance: Designate owners for integration configuration and maintenance. Define approval processes for changes. Create runbooks for common troubleshooting scenarios.
- Plan for exceptions: Not all data should sync automatically. Establish filters and triggers to control what transfers. Build error handling for records that don’t meet sync criteria.
- Monitor and optimize: Track sync performance, error rates, and API consumption. Set up alerts for failures. Review logs regularly to identify optimization opportunities.
- Secure your integration: Follow security best practices, including encryption, authentication, and authorization. Regularly review access permissions. Conduct security audits. Reference the Exalate Trust Center for comprehensive security guidance.
- Document everything: Maintain current documentation of integration architecture, field mappings, trigger conditions, and troubleshooting steps. Update documentation when making changes.

FAQ
What’s the difference between Integration Hub and third-party tools?
Integration Hub is ServiceNow’s native solution with pre-built connectors and a low-code setup. Exalate offers more flexibility, advanced scripting capabilities, and AI-assisted configuration for complex requirements.
Can I sync custom fields between ServiceNow instances?
Yes, Exalate supports custom field synchronization. You’ll need to map custom fields from one instance to corresponding fields in the other, which may require data transformation.
How do I handle different workflows between instances?
Use conditional logic in your sync scripts to transform data based on the target instance’s workflow. For example, map status values differently or trigger different automation rules based on which instance receives the data.
Can I sync attachments between instances?
Yes, Exalate supports attachment synchronization, though this increases data volume and may impact performance. Configure attachment sync selectively for necessary use cases only.
How do I maintain data security during integration?
Use encrypted connections (HTTPS/TLS), implement role-based access control, authenticate with OAuth or API tokens, and regularly audit sync activity. Choose solutions with ISO 27001 certification and comprehensive security features.
What ServiceNow entities can I synchronize?
You can sync any entity available via ServiceNow’s REST API, including incidents, problems, change requests, catalog tasks, configuration items, and custom tables. The specific entities depend on your integration tool’s capabilities.
What is a ServiceNow integration?
ServiceNow integration is the process of connecting a ServiceNow instance with another application so that both systems can share data. This involves getting the APIs of both platforms to interact via a third-party application.
How can I integrate two ServiceNow instances?
You can integrate two ServiceNow instances using a connector. This connector could be a native app from the Atlassian marketplace or a standalone third-party solution such as Exalate. The most important thing is that both Exalate instances will maintain autonomy within the ecosystem.
Recommended Reading:
- ServiceNow Integrations: Integrate ServiceNow and Other Systems Bidirectionally
- How to Set Up a Salesforce ServiceNow Integration
- Jira ServiceNow Integration: How to Set up an Integration in 6 Steps
- Zendesk ServiceNow Integration
- How to Set up a ServiceNow GitHub Integration
- How to Set Up an Azure DevOps ServiceNow Integration

